


Operation
Roadster & Mirage S+/HD User Manual
3-65
020-100002-04 Rev. 1 (12-2008)
SET LAMP POWER—
Ensure each “Lamp Power” setting is as high as possible for
your application while still maintaining a good overall match of light output from
screen-to-screen. By nature, achieving a
uniform
brightness will require a slightly
reduced
overall
brightness—this reduction will help ensure that you have enough
range of adjustment when examining brightness variables more closely from
screen-to-screen, and will help prevent premature “maxing out” when trying to
match to a certain color, zone or projector.
USE A “USER” COLOR TEMPERATURE—
Always adjust Brightness Uniformity for
a
User
color temperature defined when you matched primary colors, and
continue to use it for all sources displayed on the wall. Your other color
temperatures will not necessarily be matched from screen-to-screen.
WHITE UNIFORMITY SLIDEBARS—
White Uniformity slidebar values may not
reduce to “0”. Each slidebar adjusts overall light output in a specific screen zone,
but the value shown represents the current setting for
green
in this zone. When
other “hidden” values (red or blue) are lower than green, during adjustment in the
White Uniformity menu their values will reach “0” first, causing the slidebar to
stop earlier than expected.
JUDGE BY EYE OR USE A METER—
Good brightness uniformity can be achieved
with either.
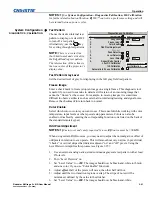
Step 1: General Setup
1a)
Adjust primary colors (see
Matching Colors in Multiple Screens)
to ensure
matched overall color temperatures and light output between screens.
IMPORTANT:
Double-check that all WHITES and LIGHT OUTPUT
are well matched.
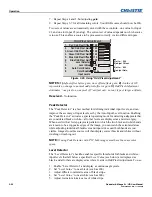
1b)
Enable the
Brightness
Uniformity
checkbox.
This will enable access
to the uniformity
controls and will apply
the settings to your
image.
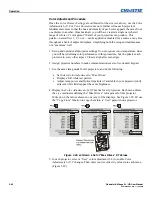
1c)
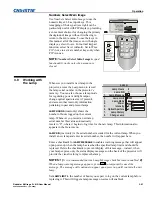
Select the 13-Point test pattern for display.
This pattern provides nine screen “zones”
with 13 targets.
FOR BEST RESULTS: Rather than
examining the CENTER of each zone when
assessing Brightness Uniformity
adjustments focus on extreme EDGES as
indicated in the illustration at right.
In either
Color Adjustments
menu, select a “User” color. Then:
•
If you have created a “User 1”
color gamut (recommended) for a well-
matched wall, continue to Step
1e
.