Installation & Setup
Roadster & Mirage S+/HD User Manual
2-17
020-100002-04 Rev. 1 (12-2008)
NOTES:
1)
If the image becomes keystoned
or exhibits uneven brightness, the projector
may simply be too high or low in relation to
the screen.
2)
Recommended offset ranges can
be exceeded, however this may affect image
quality.
3)
Simultaneous
horizontal
and
vertical
offset limits the adjustment range of
each.
4)
Offset can vary by ±7% and may be
affected by the degree of zoom currently in
use.
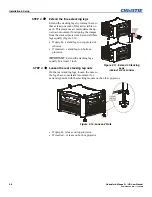
The projector can be rotated and mounted at any vertical angle—i.e., you can tilt the
face of the projector up or down as much as desired for your installation. Side-to-side
tilt, however, must not exceed 15° (Figure 2.22). Keeping the projector fairly level in
this manner ensures that the lamp axis is level, and is required for safe and reliable
lamp operation. Always vent exhaust air
away
from the lens.
Figure 2.22. Vertical and Horizontal Tilt Ranges
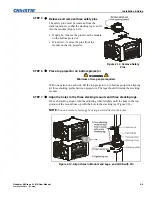
CEILING MOUNT:
Use
only
the Christie-approved ceiling mount kit designed for your
projector.
Refer to the installation instructions and safety guidelines provided in the
kit.
For more information, contact your dealer.
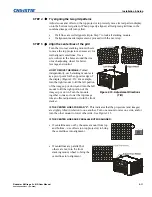
Figure 2.21. Maximum Horizontal
Offsets
Tilting the Projector


