2-58
Setting Up Your MultiPASS C50
Chapter 2
Entering Your Identification Information
The following pages show you how to enter your name or company
name, your fax number, and the date and time, and how to select the
type of telephone line connected to your MultiPASS C50.
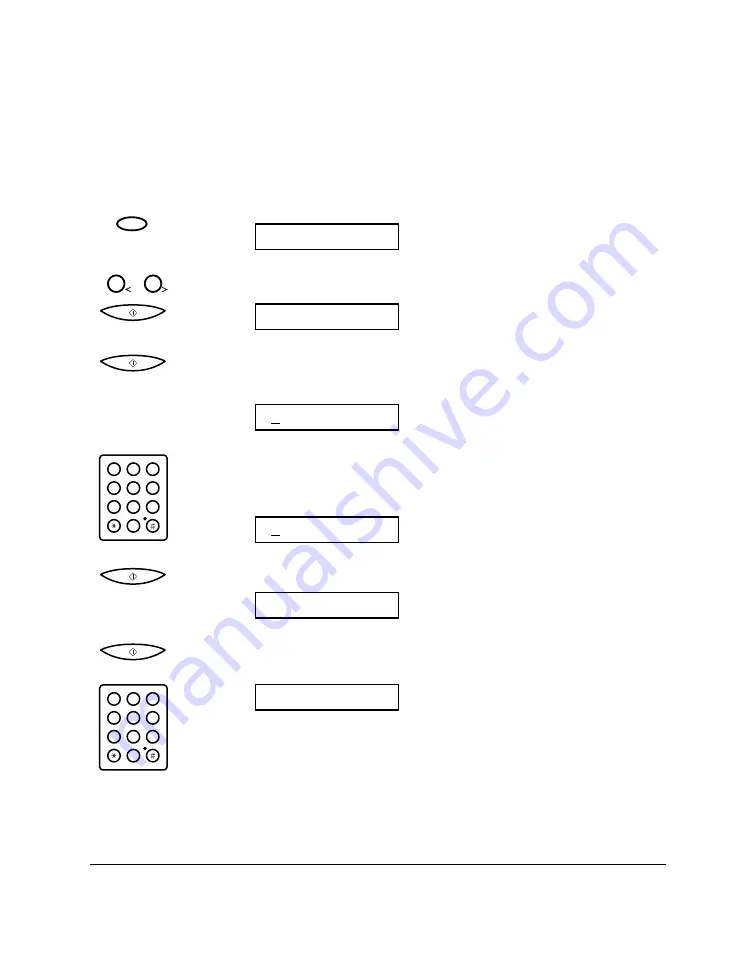
1. Press
FUNCTION
.
2. Use
<
<
or
>
>
to select USER SETTINGS, then press
START/COPY
.
3. Press
START/COPY
again.
❑
The currently set date and time appear.
4. Use the numeric buttons to type in the correct date and time.
❑
Use the DD/MM YY format for the date and use the 24-hour
clock for the time, so 2:38 p.m. would be 14:38, for example.
Ex:
5. Press
START/COPY
to save the date and time.
6. Press
START/COPY
again and enter your fax/telephone number
using the numeric buttons.
Ex:
❑
You can enter up to 20 digits for your fax/telephone number.
❑
You can enter spaces with the
>
>
button to make the number
easier to read.
TEL=541 766 3452
1
2
ABC
3
DEF
4
5
JKL
GHI
6
MNO
7
8
TUV
PQRS
9
WXYZ
0
UNIT TELEPHONE #
23/12 98 14:38
1
2
ABC
3
DEF
4
5
JKL
GHI
6
MNO
7
8
TUV
PQRS
9
WXYZ
0
22/11 98 13:30
DATE & TIME
1
2
FUNCTION
FUNCTION
Содержание MultiPASS C50
Страница 1: ......
Страница 38: ...2 10 Setting Up Your MultiPASS C50 Chapter 2 5 Peel the clear protective sheet off the LCD display ...
Страница 50: ...2 22 Setting Up Your MultiPASS C50 Chapter 2 Inside the Printer Cover PAPER THICKNESS LEVER CARTRIDGE HOLDER ...
Страница 124: ...3 22 Speed Dialling Chapter 3 ...
Страница 154: ...4 30 Sending Faxes Chapter 4 ...
Страница 186: ...6 16 Scanning Documents and Making Copies Chapter 6 ...
Страница 196: ...7 10 Printing From Your PC Chapter 7 ...
Страница 252: ...9 22 Maintaining Your MultiPASS C50 Chapter 9 ...
Страница 266: ...A 14 Specifications Appendix A ...
Страница 292: ...G 18 Glossary ...
Страница 305: ......


