background image

11

Contents

Loading Paper in the Drawers ............................................................................................................................................. 5-2

Loading Paper for the First Time .......................................................................................................................................... 5-4

Adjusting a Paper Drawer to Hold a Different Paper Size .................................................................................................... 5-6

Adding Toner ....................................................................................................... 5-8
Consumables and Options ................................................................................ 5-12

Consumables ..................................................................................................................................................................... 5-12

Options ............................................................................................................................................................................... 5-13

Chapter 6  Troubleshooting

Clearing Paper Jams ........................................................................................... 6-2

Display Indicating How to Clear the Jam ............................................................................................................................. 6-2

Paper Jam in the Main Unit .................................................................................................................................................. 6-4

Paper Jam in the Duplexing Unit ......................................................................................................................................... 6-6

Paper Jam in the Copy Tray ................................................................................................................................................ 6-7

Paper Jam in the Right cover ............................................................................................................................................... 6-9

Paper Jam in the Drawers ................................................................................................................................................. 6-10
Frequently Occurring Paper Jams ..................................................................................................................................... 6-12

Clearing a Paper Jam in the Stack Bypass ........................................................................................................................ 6-14

Routine Cleaning ............................................................................................... 6-16

Original is not Being Scanned Cleanly ............................................................................................................................... 6-16

Original Scanned Using The Feeder Becomes Dirty (FEEDER CLEANING) .................................................................... 6-17

Streaks Appear on Copy Sheet (ROLLER CLEANING) .................................................................................................... 6-18

Self-diagnostic (Error) Display .......................................................................... 6-19

Self-diagnostic (Error) Displays ......................................................................................................................................... 6-19

Service Call Message ....................................................................................... 6-21

Chapter 7  Handling Options

System Configuration .......................................................................................... 7-2
Cassette Feeding Unit-S1 ................................................................................... 7-3

Parts and Their Functions .................................................................................................................................................... 7-3

Clearing Paper Jams ........................................................................................................................................................... 7-3

Main Specifications .............................................................................................................................................................. 7-4

Cassette Feeding Unit-R1 ................................................................................... 7-5

Parts and Their Functions .................................................................................................................................................... 7-5

Clearing Paper Jams ........................................................................................................................................................... 7-5

Main Specifications .............................................................................................................................................................. 7-6

Paper Deck-B1 .................................................................................................... 7-7

Parts and Their Functions .................................................................................................................................................... 7-7

Clearing Paper Jams ........................................................................................................................................................... 7-7

Paper Jam in the Paper Deck .............................................................................................................................................. 7-8

Loading Paper in the Paper Deck ........................................................................................................................................ 7-9

Main Specifications ............................................................................................................................................................ 7-10

DADF-A1 (Feeder) ............................................................................................ 7-11

Parts and Their Functions ................................................................................................................................................... 7-11

Replacing the Stamp Cartridge (When the FAX function is installed) ................................................................................ 7-12

Clearing Paper Jams ......................................................................................................................................................... 7-13

Содержание imageRunner 330

Страница 1: ......

Страница 2: ...se specified in the manual If such changes or modifications should be made you could be required to stop operation of the equipment PREFACE Thank you for purchasing the Canon imageRUNNER 400 330 Series This Manual describes the imageRUNNER 400 330 Series its functions and its methods of use It also describes the various precau tions to be observed in order to ensure safe operation Please read this...

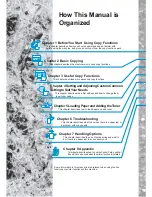
Страница 3: ...py quality Chapter 7 Handling Options This chapter describes the use of accessories and what to do if there is a paper jam in an accessory unit Chapter 8 Appendix This chapter describes how to use the Control Card and Mail Box which can be used when the printer function is installed Chapter 3 Useful Copy Functions This chapter describes more advanced copy functions Chapter 1 Before You Start Using...

Страница 4: ...mandatory for products marketed in the United States The label shown below indicates compliance with the CDRH regulations and must be attached to laser products marketed in the United States DANGER INVISIBLE LASER RADIATION WHEN OPEN AVOID DIRECT EXPOSURE TO BEAM VORSICHT UNSICHTBARE LASERSTRAHLUNG WENN ABDECKUNG GEÖFFNET UND SICHERHEITSVERRIEGELUNG ÜBERBRÜCKT NICHT DEM STRAHL AUSSETZEN CAUTION IN...

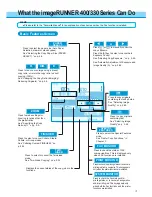
Страница 5: ...Image Quality on p 2 25 Press to check the printing status or to cancel a printing job from a computer This key appears only when the printer functions are installed Press to select the Special Features mode See Useful Copy Functions in Chapter 3 Displays the current status of the copy job or other functions Basic Features Screen TWO SIDED SPECIAL FEATURES Press to copy originals containing text a...

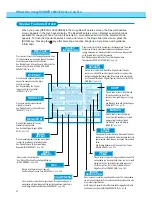
Страница 6: ...ess to copy two pages originals or two pages of an opened book onto a single sheet of copy paper See Superimposing Two Original Images on a Single Copy Sheet OVERLAY on p 3 7 Press to store or recall copy jobs See Storing Often Used Copy Settings in Memory MODE MEMORY on p 3 32 Press to recall a previously set copy job See Recalling a Previous Copy Job RECALL on p 3 39 REC BOOKLET Press when makin...

Страница 7: ...can first input the data to a registered Mail Box then print it whenever desired The printing operation is performed from this machine enabling you to avoid mixing the prints with copies Also you can set a password in the Mail Box enabling you to make prints while preventing other persons from observing the data in the Mail Box Print Monitor Screen By using the Print Monitor screen you can check t...

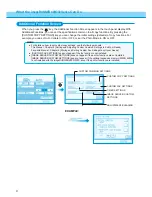
Страница 8: ... is not installed with the imageRUNNER 400S 330S even if the printer functions are installed What the imageRUNNER 400 330 Series Can Do Additional Function Screen CUSTOM COPY SETTINGS CUSTOM COMMON SETTINGS TIMER SETTINGS ADJUSTMENT CLEANING When you press the AdditionalFunctions key the Additional Function Screen appears in the touch panel display With Additional Functions you can set the specifi...

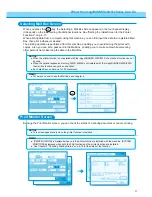
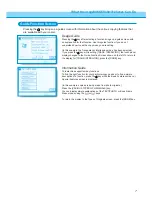
Страница 9: ... This machine supports many functions To find the right function for your particular copy needs or to find a simple description of a function press the Guide key while the Basic Features screen or Special Features screen is displayed In this example copies are being made from photo originals Press the VARIOUS TYPES OF ORIGINALS key You can display simple explanations of the TEXT PHOTO or Book Fram...

Страница 10: ...tic Paper Selection 2 2 Manual Paper Selection 2 3 Using the Stack Bypass 2 4 Changing the Copy Ratio Enlarging Reducing Originals 2 8 Enlarging Reducing Originals to a Standard Size 2 8 Specifying the Copy Ratio by 2 9 Automatically Setting the Copy Ratio Based on the Original and Copy Paper Sizes AUTO ZOOM 2 11 Slightly Reducing Images to Prevent the Original Periphery from Being Cut ENTIRE IMAG...

Страница 11: ... Originals SHEET OVERLAY 3 8 Superimposing Facing Pages in a Book BOOK OVERLAY 3 9 Feeding Different size Originals Together in the Feeder DIF SIZE ORIGINAL 3 10 Making Copies for Use as a Booklet BOOKLET 3 11 Making Copies with Original Images Shifted SHIFT 3 13 Making Copies with Margins MARGIN 3 14 Erasing Shadows and Frame Lines from Copies FRAME ERASE 3 16 Reducing Two Four or Eight Originals...

Страница 12: ...r of Prints by Department DEPT ID MANAGEMENT 4 18 Returning the Custom Common Settings to Their Defaults INITIALIZE CUSTOM COMMON SETTINGS 4 24 Timer Settings 4 25 Setting the Current Date and Time DATE TIME 4 25 Setting the Time to Initiate Auto Sleep after Finishing Operations AUTO SLEEP TIME 4 25 Setting the Time Taken for Display to Return to Basic Features Screen after Finishing Operations AU...

Страница 13: ...d Cleanly 6 16 Original Scanned Using The Feeder Becomes Dirty FEEDER CLEANING 6 17 Streaks Appear on Copy Sheet ROLLER CLEANING 6 18 Self diagnostic Error Display 6 19 Self diagnostic Error Displays 6 19 Service Call Message 6 21 Chapter 7 Handling Options System Configuration 7 2 Cassette Feeding Unit S1 7 3 Parts and Their Functions 7 3 Clearing Paper Jams 7 3 Main Specifications 7 4 Cassette F...

Страница 14: ...4 Parts and Their Functions 7 34 Staple Collate Functions 7 35 Clearing a Paper Jam 7 36 Replacing the Staple Case in the Stapler Unit 7 38 Removing Jammed Staples from the Stapler Unit 7 40 Main Specifications 7 42 Consumables 7 42 Chapter 8 Appendix Operation When User Restrictions are Enabled 8 2 Inserting the Control Card 8 2 Entering the Dept ID and Password 8 3 Using the Mail Box When the pr...

Страница 15: ...f optional items are not displayed in the touch panel display NOTICE Combined use of the Two sided Transparency Interleaving Overlay Image Combination and Image Separation modes cannot be set 1 1 MEMO If you want to make copies in page order begin copying from the last pages and work your way forward Place the original face down so that the top of it is against the top edge of the platen glass See...

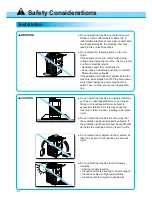
Страница 16: ...ther inflammable substances If inflammable substances come into contact with electrical parts inside the machine this may result in fire or electrical shock Do not place the following items on the ma chine If these items come into contact with a high voltage area inside the machine this may result in a fire or electrical shock Necklaces and other metal objects Cups vases flowerpots and other conta...

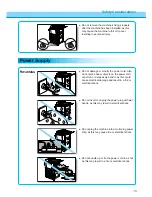
Страница 17: ...so do not place heavy objects on the power cord or pull on or excessively bend it as this could cause electrical damage and result in a fire or electrical shock Do not insert or unplug the power plug with wet hands as this may result in electrical shock Do not plug the machine into a multi plug power strip as this may cause fire or electrical shock Do not bundle up or tie the power cord in a knot ...

Страница 18: ...letely into the extension cord outlet to ensure a firm connection between the power and extension cords Do not use power supplies with voltages other than 120 V AC as this may result in a fire or electrical shock Always grasp the plug portion when unplugging the power plug Pulling on the power cord may expose or snap the core wire or otherwise damage the power cord If the cord is damaged this coul...

Страница 19: ...ical shock Do not use highly flammable sprays near the machine If gas from these sprays comes into contact with the electrical components inside the machine this may result in a fire or electrical shock Do not drop paper clips staples or other metal objects inside the machine Also do not spill water liquids or inflammable substances alcohol benzene paint thinner etc inside the machine If these ite...

Страница 20: ...wer switch for safety when the machine will not be used for a long period of time such as overnight Also unplug the power plug for safety when the machine will not be used for an extended period of time such as during consecutive holidays Do not place your hand in the part of the tray where stapling is performed while a Finisher is attached as this may result in personal injury Safety Consideratio...

Страница 21: ...ly wrung out cloth dampened with a mild cleansing detergent Do not use alcohol benzene paint thinner or other inflammable substances If inflammable substances come into contact with a high voltage area inside the machine this may result in a fire or electrical shock Do not throw a used toner cartridge into open flames as this may ignite the toner remaining inside the cartridge and result in burns ...

Страница 22: ...oner on the jammed copy paper to come into contact with your hands or clothing as this will dirty your hands or clothing If they become dirty wash them immediately with cold water Washing with warm water will set the toner and make it impossible to remove the toner stains When removing copy paper which has become jammed inside the machine remove the jammed copy paper gently to prevent the toner on...

Страница 23: ...rns or a fire WARNING Consumables Do not store toner cartridges or copy paper in places exposed to open flames as this may cause the toner or copy paper to ignite and result in burns or a fire CAUTION Keep toner and other consumables out of the reach of small children If these items are ingested consult a physician immediately ...

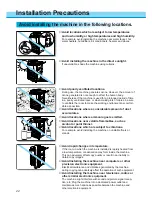
Страница 24: ...nt of dust accumulates Avoid locations where ammonia gas is emitted Avoid locations near volatile flammables such as alcohol or paint thinner Avoid locations which are subject to vibrations For example avoid installing the machine on unstable floors or stands Avoid rapid changes in temperature If the room in which the machine is installed is rapidly heated from a low temperature condensation may f...

Страница 25: ...e power supply Installation Precautions Provide adequate installation space Provide enough space on each side of the machine for unrestricted operation Main Unit only Moving the machine If you intend to move the machine contact your service representative beforehand 51 1296mm 36 3 4 934mm 45 1 2 1155mm cassette extended 36 3 4 934mm 45 1 2 1155mm cassette extended 36 3 4 934mm 45 1 2 1155mm casset...

Страница 26: ... cause a short circuit and result in a fire or electrical shock If there is unusual noise or smoke immediately turn the main power switch OFF then call your service represen tative Using the machine in this state might cause a fire or electric shock Also avoid placing objects around the plug so that the machine can be unplugged whenever necessary Do not turn the main power switch OFF or open the f...

Страница 27: ... Characters on the Touch Panel Display 1 6 Main Power and Control Panel Power 1 8 Flow of Copy Operations 1 9 Placing Originals 1 11 Checking the Copy Mode Settings 1 15 Changing or Canceling a Selected Copy Mode 1 16 Chapter 1 Before You Start Using Copy Functions ...

Страница 28: ...s to the I position to turn the power ON See Main power and Control Panel Power on p 1 8 Feeder Original output tray Right cover Open to remove jammed copy paper See Chapter 6 Troubleshooting Original supply tray Paper drawers Each drawer holds up to 500 sheets 20 lb bond of copy paper The 1st drawer holds LGL to STMT size copy paper The 2nd drawer holds 11 x17 to STMT size copy paper External Vie...

Страница 29: ...g Copy Functions 1 3 Parts and Their Functions Internal View Internal View Toner box Platen glass Front cover Open this cover when clearing a paper jam or adding toner Duplexing unit Copy tray Copies are output to this tray ...

Страница 30: ...hine is in the Sleep mode CLEAR key Press to clear incorrectly entered values or characters Touch panel display Display contrast control Use to adjust the brightness of the touch panel display STOP key Press to stop scanning of originals for copy operations ENERGY SAVER key Press to place the copier in the Energy Saver mode START key Press to start scanning of originals for copy operations ID key ...

Страница 31: ...unction such as Printer is being performed The printing priority between FAX and printer is given to whichever function starts the earliest 2 With direct TX 4 transmission of originals is reserved Direct transmission is executed after the current operation TX 4 or RX 5 has ended 3 When scanning is completed you can send a document 4 TX Transmission 5 RX Reception Next job Previous job Copy Copy FA...

Страница 32: ...rs can be entered Enter CANON 2 MEMO If you make a mistake when entering characters press the BACK SPACE key to delete the character Then enter the correct character again You can also delete all characters you have entered by pressing the C Clear key To continue entering special letters press the mode key to select the desired mode Then press the OK key When you have entered all characters press ...

Страница 33: ...ouch panel display 3 MEMO If you make a mistake when entering special letters press the BACK SPACE key to delete the character Then enter the correct character again You can also delete all characters you have entered by pressing the C Clear key You can also press the number of the desired special letter with the Number keys to select the special letter To continue entering alphabet characters pre...

Страница 34: ... when the main power switch is turned ON 1 Control panel power switch Press the control panel power switch to cancel the sleep mode and resume normal machine operations The Basic Features screen appears in the touch panel display 2 Main Power and Control Panel Power NOTICE When this machine supports FAX functions we recommend that you do not turn the main power switch OFF If you turn the main powe...

Страница 35: ... C ID ABC DEF JKL GHI MNO TUV PRS WXY Reset Guide 1 P Data GHI COPY FAX Error Copying Memory TX RX Error Press the COPY key 1 MEMO If the message Please insert a control card appears insert a control card If the message Enter Dept ID and password appears enter the department ID and password Place your originals See Placing Originals on p 1 11 2 Enter the copy quantity See Entering the Copy Quantit...

Страница 36: ...such as the copy quantity copy paper size and copy ratio during copying Stopping before copying is completed To stop the machine before copying is completed press the Stop key MEMO After you have pressed the Stop key several copies may be output from the machine To interrupt a copying job To interrupt a copying job when you need to make priority copies press the Interrupt key See Interrupting the ...

Страница 37: ...riginals is somewhat faster than that for horizontally placed originals Horizontally placed LTR STMT size originals are referred to as LTRR STMTR 11 17 size originals must be placed horizontally Platen glass Feeder Vertical placement Horizontal placement Vertical placement Horizontal placement There are two ways to place originals for copying The method that you select will depend on the size and ...

Страница 38: ... on the platen glass the size of the original is detected after the feeder or platen cover has been lowered Be sure to lower the feeder or platen cover before copying MEMO Place books and other bound originals on the platen glass in the same way When enlarging LTR STMT size originals to 11 17 size paper place the original horizontally on the platen glass and align it with the LTRR or STMTR marks G...

Страница 39: ...originals or originals with sharp folds Clipped or stapled originals Carbon backed paper or other originals which might not feed smoothly Transparencies and other highly transparent originals Check the condition of originals which have been fed through the feeder many times Originals which have been fed through the feeder many times can become folded or wrinkled and might not feed smoothly Adjust ...

Страница 40: ...izontal placement STMT size originals vertical placement Different size originals You can place different size originals together in one group in the feeder provided that the leading edge of each page is the same length and the originals are the same thickness See Feeding Different size Originals Together in the Feeder on p 3 10 Once copies are made from originals originals are output to the origi...

Страница 41: ...ted copy mode settings 1 MEMO When six or more copy modes have been set use the key to bring up the next screen To return to the previous screen press the key Press the DONE key The display returns to the Basic Features screen 2 Checking the Copy Mode Settings When the copy mode settings are selected on the Special Features screen you can check the current settings ...

Страница 42: ... key for the copy mode you want to change or cancel The copy mode settings screen appears 2 Press the DONE key The display returns to the Basic Features screen 3 Changing or Canceling a Selected Copy Mode From the Setting Confirmation screen you can also change or cancel functions To change a mode example SHIFT Perform the same steps as when setting the mode When the setting is as you want it pres...

Страница 43: ...Originals 2 8 Adjusting Exposure and Image Quality COPY EXPOSURE 2 24 Entering the Copy Quantity 2 27 Using the Memory for Copying 2 28 Interrupting the Current Copy Job to Make Priority Copies INTERRUPT MODE 2 31 Two Sided Copying 2 33 Collating Copies FINISHER 2 39 Chapter 2 Basic Copying ...

Страница 44: ...ake copies in the usual way 3 NOTICE You cannot use Auto Paper Selection when copying the following types of originals Copy these using Manual Paper Selection Non standard size originals Highly transparent originals such as transpar encies Originals with an extremely dark background Originals smaller than STMT in size Auto Paper Selection cannot be used together with the following modes ZOOM XY ZO...

Страница 45: ...the desired paper size 2 The display returns to the Basic Features screen and the selected paper size is displayed Proceed to make copies in the usual way 3 MEMO The paper sizes are displayed in the order in which they are loaded in the paper drawers The paper sizes which are loaded in the paper drawers are shown in the display You can also cancel the mode by pressing the Reset key The machine ret...

Страница 46: ... 11 x 17 Paper weight 17 to 32 lb bond 64 g m2 to 128 g m2 Curl down copy paper before use Curling amount copy paper less than 3 8 post card less than 3 16 There are some types of copy stock which may meet the above specifications but cannot be fed in the stack bypass When copying on transparencies while a paper output accessory except the Finisher E1 is installed the output tray must be set to tr...

Страница 47: ...ck bypass remove any previous remaining paper stack it with the new paper and set it in place after making sure the paper edges are nearly aligned When copying using the stack bypass a paper jam will occur easily if the copy stock is curled Therefore curl down all curled copy stock as shown in the figure before placing it in the stack bypass When copying onto the reverse side of a copy sheet which...

Страница 48: ... Bypass Tray Paper Size Selection on p 4 12 When STACK BYPASS SIZE ENTRY is OFF and one of Two sided Overlay or Image Combination modes has been set pressing the Start key will bring up the paper size setting screen From the sizes displayed on this screen select the size that matches the paper placed on the stack bypass tray When using plain paper think paper or tracing paper The screen on the lef...

Страница 49: ...Basic Copying 2 7 Proceed to make copies in the usual way 6 Press the DONE key 5 Selecting the Copy Paper Size PAPER SELECT Using the Stack Bypass ...

Страница 50: ...ect the AUTO key 2 To enlarge press the E key To reduce press the R key 3 Select a preset copy ratio 4 The display returns to the Basic Features screen and the selected copy ratio is displayed Proceed to make copies in the usual way 5 MEMO To return the copy ratio to 100 press the DIR key You can also cancel the mode by pressing the Reset key The machine returns to the Standard mode Enlarging Redu...

Страница 51: ...f you entered the copy ratio with the Number keys 0 9 you can directly change increase decrease the entered values with the keys in the touch panel display If you make a mistake when entering values press the C Clear key and enter the correct value If you enter a value outside the setting range a message prompting you to enter the appropriate value will appear on screen CITY CITY CITY CITY CITY Co...

Страница 52: ...Press the DONE key 3 Proceed to make copies in the usual way 4 MEMO To return the copy ratio to 100 press the DIR key You can also cancel the mode by pressing the Reset key The machine returns to the Standard mode The display returns to the Basic Features screen and the selected copy ratio is displayed ...

Страница 53: ...parent originals such as transparencies in the Auto Zoom mode Use the Reduction Enlargement or Zoom modes To use the Auto Zoom mode your originals must conform to a standard paper size MEMO If an error occurs between the Auto Zoom copy ratio and the actual copy size you can adjust this with the Zoom Fine Adjustment function See Fine adjusting Zoom When Differences in Original Image and Copy Image ...

Страница 54: ...s when the platen cover or feeder is lowered If the original was placed in the feeder the zoom ratio appears when the Start key is pressed The copy ratio is set within the range of 25 to 800 Automatically Setting the Copy Ratio Based on the Original and Copy Paper Sizes AUTO ZOOM Changing the Copy Ratio Enlarging Reducing Originals Press the ZOOM key 3 Press the AUTO key and then the DONE key 4 Pr...

Страница 55: ... cut slightly on the copy However if you set the Entire Image mode the copied image is automatically reduced slightly based on the copy paper size and copy image size As a result the entire original image is reproduced on the copy without its periphery being cut off Place your original and press the ZOOM key 1 Proceed to make copies in the usual way 3 MEMO You can also cancel the mode by pressing ...

Страница 56: ...rs past the decimal point are discarded If the calculated copy ratio is smaller than 25 it is set to 25 If it is larger than 800 it is set to 800 Calculating the Copy Ratio Based on the Original and Copy Paper Sizes ZOOM PROGRAM Changing the Copy Ratio Enlarging Reducing Originals Making copies with a different XY copy ratio XY ZOOM Designate a different copy ratio for the vertical and horizontal ...

Страница 57: ...key and enter the copy size using the Number keys 4 MEMO If you make a mistake when entering values press the C key and enter the values again When setting the deistance in inches you need to the function in the Additional Functions beforehand See Setting Inch Input on p 4 15 Proceed to make copies in the usual way 5 MEMO To return the copy ratio to 100 press the DIR key To cancel the settings pre...

Страница 58: ...ing the copy ratio AUTO XY ZOOM The XY copy ratio is automatically set to suit the size of the selected copy paper Manually specifying the copy ratio XY ZOOM Manually specify the XY copy ratio in 1 increments Enlarging Reducing Originals at Copy Ratios Set Independently for X and Y Axes XY ZOOM Changing the Copy Ratio Enlarging Reducing Originals LTR LTRR LTRR selected Original Copy X 120 Y 80 Ori...

Страница 59: ... and enter the values for X andY with the Number keys 0 9 or the and keys Then press the OK key When setting an automatic XY copy ratio press the AUTO XY ZOOM key The display returns to the Basic Features screen and the selected copy ratio is displayed 3 MEMO Even if you entered the copy ratio with the Number keys 0 9 you can directly change increase decrease the entered values with the keys in th...

Страница 60: ...of output pages is automatically set Specifying the Copy Ratio by Number of Output Pages See p 2 22 Specify the copy paper size and number of output pages The copy ratio is automatically set Copies Copies assemblées NOTICE Copies output in the Multi page Enlarge mode are output so that adjacent images are overlapping When cutting and pasting these copies together overlap and paste duplicated image...

Страница 61: ...2 34 44 68 44 68 44 68 22 34 33 51 33 51 33 51 8 1 2 11 LTR 8 1 2 11 LTRR 11 17 8 1 2 11 LTR 8 1 2 11 LTRR 11 17 11 17 8 1 2 11 LTR 8 1 2 11 LTRR NOTICE The values shown in the above table are only meant as a guide The actual values may be slightly different The resulting size after the printed copies have been cut and pasted together will be slightly smaller than the size indicated in the above t...

Страница 62: ...the MULTI PG ENLARGE key 2 Press the COPY RATIO S key then press the OK key 3 To set the XY copy ratio to the same copy ratio press the ZOOM key To set the XY copy ratio to different copy ratios press the XY ZOOM key 4 Changing the Copy Ratio Enlarging Reducing Originals Specifying the Copy Ratio by COPY RATIO S ...

Страница 63: ... the values again If you enter the copy ratio with the Number keys you can directly change increase decrease the entered values with the keys on the touch panel display The number of copy sheets an original is copied onto is determined by the copy ratio and selected copy paper size MEMO To return the copy ratio to 100 press DIR To cancel the settings press the ZOOM MULTI PG ENLARGE and C keys in t...

Страница 64: ...r original and press the ZOOM key 1 Press the MULTI PG ENLARGE key 2 Press the NUMBER OF OUTPUT PGS key then press the OK key 3 Press the PAPER SELECT key 4 Changing the Copy Ratio Enlarging Reducing Originals Specifying the Copy Ratio by Number of Output Pages NUMBER OF OUTPUT PGS ...

Страница 65: ...of paper and number of outputs selected MEMO To return the copy ratio to 100 press DIR To cancel the settings press the ZOOM MULTI PG ENLARGE and C keys in that order You can also cancel the mode by pressing the Reset key The machine returns to the Standard mode Changing the Copy Ratio Enlarging Reducing Originals Specifying the Copy Ratio by Number of Output Pages NUMBER OF OUTPUT PGS When XY ZOO...

Страница 66: ...ment screen is displayed 1 Changing the Exposure During Copying The exposure can also be changed while a copy is being produced Press the or key Copy exposure is changed After copying is finished the display returns to the Basic Features screen 2 MEMO Move the indicator above the A keys to the left to make the exposure lighter or to the right to make the exposure darker The copy exposure adjustmen...

Страница 67: ...ICE If you make copies of an original containing half tones such as a printed photograph using the Photo mode moiré may occur If this happens you can soften this moiré effect by using the Sharpness mode See Making Sharp Contrast Copies on p 3 28 Combinations of these three modes cannot be set If you select one of these modes the previously set mode is cancelled MEMO When you have selected the Text...

Страница 68: ...ss the A key The copy exposure is automatically adjusted to the level best suited to the quality of the original 1 Proceed to make copies in the usual way 2 MEMO You can cancel the mode by pressing the Reset key The machine returns to the Standard mode MEMO If the original is a transparency you may not be able to use Automatic Exposure Control If so adjust the copy exposure using Manual Exposure C...

Страница 69: ...quantity MEMO The maximum copy quantity varies according to the copy job settings The copy quantity appears in the right side of the touch panel display Changing the Copy Quantity Press the C Clear key to clear the entered number Then press the Number keys 0 9 to enter the copy quantity again 1 NOTICE After copying begins you cannot change the copy quantity MEMO The copy quantity appears in the ri...

Страница 70: ...ginal has been placed on the platen glass a display such as shown at left appears on the touch panel display depending on the copy mode To scan the next original press the Start key again When scanning is completed press the DONE key After the machine has finished warming up copying starts 3 MEMO If warmup ends while scanning is still in progress copying starts at that point During scanning the im...

Страница 71: ...To copy several originals place the next original and press the Start key again 2 MEMO During scanning the image quality setting can be changed Adjusting exposure during scanning produces a different result from adjusting exposure after copying has started To stop the process press the CANCEL key on the touch panel or press the Stop key on the control panel Press the DONE key The display reverts t...

Страница 72: ...ge asking whether to print the original pages scanned into memory appears select YES or NO as appropriate YES Pages in memory are printed and remaining originals are then scanned NO Pages in memory are not printed When processing is completed the display returns to the Basic Features screen If the screen displayed on the left appears press OK to return to the Basic Features screen Divide the numbe...

Страница 73: ...terrupt mode is set Up to 999 copies can be made in the Interrupt mode MEMO If a department ID was being used to run the current copy job the screen for entering the department ID and password appears See Entering the Dept ID and Password on p 8 3 When managing copying using the control card the control card must be replaced before using the Interrupt mode See Inserting the Control Card on p 8 2 I...

Страница 74: ...the regular mode unless the Interrupt mode is cancelled The Interrupt mode will not be cancelled even by pressing the Reset key MEMO If the Finisher is installed the copy is delivered to the interrupt tray Continue interrupt copy End interrupt copy MEMO If you want to copy another original press the YES key place the new original set the copy mode and press the Start key MEMO When the feeder was u...

Страница 75: ...MEMO The Two sided mode that you have set is displayed above the TWO SIDED key in the Basic Features screen Copy paper used to make two sided copies must conform to the following specifications Paper size 11 x17 to STMT STMTR size and paper less than 182 mm wide cannot be used Paper weight 17 lb bond 64 g m2 to 20 lb bond 80 g m2 NOTICE Be certain to place the original horizontally when making cop...

Страница 76: ...1 2 is displayed above the TWO SIDED key Proceed to make copies in the usual way 3 MEMO When the original is placed on the platen glass follow the instructions that appear on the screen and press the Start key once for each original See Memory Copy of Original on Platen Glass on p 2 29 To cancel the settings press the TWO SIDED and C keys in that order You can also cancel the mode by pressing the ...

Страница 77: ...your originals in the feeder and press the TWO SIDED key 1 Press the 2 2 SIDED key then press the OK key 2 Proceed to make copies in the usual way 3 The display returns to the Basic Features screen and 2 2 is displayed above the TWO SIDED key MEMO To cancel the settings press the TWO SIDED and C keys in that order You can also cancel the mode by pressing the Reset key The machine returns to the St...

Страница 78: ...reen and 2 1 is displayed above the TWO SIDED key MEMO To cancel the settings press the TWO SIDED and C keys in that order You can also cancel the mode by pressing the Reset key The machine returns to the Standard mode Two Sided Copying Making One sided Copies from Two sided Originals 2 1 SIDED Copy Original NOTICE Be certain to place the original horizontally when making copies from LTRR STMTR an...

Страница 79: ... TWO SIDED key 1 Press the BOOK 2 SIDED key then press the OK key 2 Making Two sided Copies from Facing Pages in a Book in One Step BOOK 2 SIDED Two Sided Copying Copy Original NOTICE When using this feature select LTR or STMT size copy paper 1 MEMO If you want to make copies in page order begin copying from the last page and work your way forward Place the original face down so that its top edge ...

Страница 80: ...displayed above the TWO SIDED key 3 Proceed to make copies in the usual way For the next two facing pages place the original and press the Start key again See Memory Copy of Original on Platen Glass on p 2 29 4 MEMO To cancel the setting press the TWO SIDED and C keys in that order You can also cancel the mode by pressing the Reset key The machine returns to the standard mode ...

Страница 81: ... When Staple is set Copies are automatically collated into sets arranged in page order output onto the trays as shown below and then automatically stapled When none of the above Collate Group or Staple are set All copies are output into the top tray as follows 1 2 3 4 1 2 3 4 1 2 3 4 4 3 2 1 1 2 3 4 4 3 2 1 When FINISHER is selected copied papers can be collated into copy sets or groups of the sam...

Страница 82: ...per cannot be corner stapled LTRR STMT STMTR paper cannot be double stapled MEMO STAPLE is only displayed when the optional Finisher C1 Saddle Finisher C2 or Finisher E1 is installed MEMO To cancel the settings press the FINISHER and C keys in that order You can also cancel the mode by pressing the Reset key The machine returns to the Standard mode When STAPLE is selected select the stapling posit...

Страница 83: ...Original Images Shifted SHIFT 3 13 Making Copies with Margins MARGIN 3 14 Erasing Shadows and Frame Lines from Copies FRAME ERASE 3 16 ReducingTwo Four or Eight Originals to Fit on a Single Copy Sheet IMAGE COMB 3 20 Dividing an Original Into Equal Sections and Enlarging Each Sec tion on a Separate Copy Sheet IMAGE SEPARATION 3 24 Inverting Original Images NEGA POSI 3 27 Making Sharp Contrast Copi...

Страница 84: ...make copies in page order begin copying from the first pages and work your way forward Place the original face down so that the original s top edge is against the top edge of the platen glass Press the TWO PAGE SEPARATION key 2 1 1 Original Copy Making Copies of Facing Pages in a Book onto Two Separate Copy Sheets in One Step TWO PAGE SEPARATION NOTICE In the Two Page Separation mode combined use ...

Страница 85: ...y returns to the Basic Features screen 3 Proceed to make copies in the usual way 4 MEMO To cancel the settings press the SPECIAL FEATURES TWO PAGE SEPARATION and C keys in that order You can also cancel the mode by pressing the Reset key The machine returns to the Standard mode Making Copies of Facing Pages in a Book ontoTwo Separate Copy Sheets in One Step ...

Страница 86: ... be printed with the same images as the transparencies or left blank Blank interleaf sheets selected in the Transparency Interleaving mode Making Copies with Sheets of Paper Interleaved between Transparencies TRANSP INTERLVING Making Copies with Sheets of Paper Interleaved between Transparencies TRANSP INTERLVING NOTICE You cannot make more than one set of copies at a time in the Transparency Inte...

Страница 87: ...3 Select the size of the transparencies then press the OK key 4 NOTICE Adjust the slide guides in the stack bypass to fit the size of the transparencies MEMO You can place a stack of transparencies of up to 1 4 in height in the stack bypass NOTICE If the message shown on the left appears in the touch panel display adjust the slide guides and select the size of the transpar encies again In the Tran...

Страница 88: ... screen 5 MEMO When copying interleaf sheets those sheets are counted in the total number of copies Press the DONE key The display returns to the Basic Features screen 6 Proceed to make copies in the usual way 7 MEMO The copies are output with the copied side facing down with the transparency first followed by the interleaf sheet To cancel the settings press the SPECIAL FEATURES TRANSP INTERLVING ...

Страница 89: ...y mode Combined use of the Two sided Two page separation Transparency Interleaving Image Combination Image Separation Multi page Enlargement and Booklet modes cannot be set SHEET OVERLAY See p 3 8 Superimposes two sheet originals onto a single sheet of copy paper BOOK OVERLAY See p 3 9 Superimposes facing pages in a bound original onto a single sheet of copy paper Original Copy SCENE SCENE ...

Страница 90: ...ess the OK key The display returns to Special Features screen 3 Press the DONE key The display returns to the Basic Features screen 4 Proceed to make copies in the usual way 5 MEMO When the original is placed on the platen glass follow the instructions that appear on the screen and press the Start key once for each original When scanning is completed press DONE See Memory Copy of Original on Plate...

Страница 91: ... OVERLAY key then press the OK key The display returns to the Special Features screen 3 Press the DONE key The display returns to the Basic Features screen 4 Proceed to make copies in the usual way For the next two facing pages place the original and press the Start key again See Memory Copy of Original on Platen Glass on p 2 29 5 MEMO To cancel the settings press the SPECIAL FEATURES OVERLAY and ...

Страница 92: ... each page are different e g 11 x17 and LTR cannot be fed together Note that if you mix paper in the order LTRR followed by STMT stapling will result in the copies being stapled the wrong side up You cannot use this mode together with the Multi page Enlargement Entire Image Image Combination Image Separation or Booklet modes Place your originals in the feeder and press the SPECIAL FEATURES key 1 P...

Страница 93: ... 8 7 2 1 6 8 1 Originals Copy Making Copies for Use as a Booklet BOOKLET Place your originals in the feeder and press the SPECIAL FEATURES key 1 Press the BOOKLET key 2 Select original type and size and press the OK key 3 MEMO To make a copy of two sided original with BOOKLET select the size and type of original and press the 2 SIDED ORIGINAL key Saddle stitch and fold Possible only with Saddle Fi...

Страница 94: ...cover page select the YES key otherwise select the NO key and then press the OK key The display returns to the Special Features screen Proceed to make copies in the usual way For the next two facing pages place the original and press the Start key again See Memory Copy of Original on Platen Glass on p 2 29 6 MEMO To cancel the setting press the SPECIAL FEATURES BOOKLET and C keys in that order You...

Страница 95: ...y 2 Select the shift direction by using the arrow keys then press the OK key The display returns to the Special Features screen 3 MEMO The image will shift in the exactly opposite direction of the selected arrow Press the DONE key The display returns to the Basic Features screen 4 Proceed to make copies in the usual way 5 MEMO To cancel the settings press the SPECIAL FEATURES SHIFT and C keys in t...

Страница 96: ...rs Making Copies with Margins MARGIN NOTICE When the Margin mode is set the entire original image is shifted to the left right top or bottom by a selected width and copied When copying an original image that extends to the edge of the sheet part of that image will be cut off Place your original and press the SPECIAL FEA TURES key 1 Press the MARGIN key 2 Left margin selected Right margin selected ...

Страница 97: ... the SPECIAL FEATURES MARGIN and C keys in that order You can also cancel the mode by pressing the Reset key The machine returns to the Standard mode NOTICE If you are using the Margin and Two sided modes together and copying an original that already has a margin follow the instructions below 1 2 sided Set the margin for the back only 2 2 sided You do not need to set the margin Proceed to make cop...

Страница 98: ...e original image when the original is smaller than the selected copy paper size Erasing Shadows and Frame Lines from Copies FRAME ERASE Erasing Shadows and Frame Lines from Copies FRAME ERASE Book Frame Erase not selected Book Frame Erase selected Original Copy Copy Original Copy Original STMT Copy LTR Copy LTR Original Frame Erase mode not selected Original Frame Erase mode selected BOOK FRAME ER...

Страница 99: ...me Lines from Copies FRAME ERASE Erasing Shadows and Frame Lines from Copies Original Copy Copy Binding Erase mode selected Binding Erase mode not selected REQUEST Do not place originals with binding holes in the feeder as this may damage the originals Place your originals and press the SPECIAL FEATURES key 1 Press the FRAME ERASE key 2 ...

Страница 100: ...frame erase selected go to step 6 Binding erase selected go to step 5 NOTICE You can use the Original Frame Erase mode only on original sizes shown in the touch panel display MEMO For book frame erase enter the centre frame erase width centre width The centre width can be set within the range of 1 8 to 1 15 16 MEMO The frame erase width for binding erase can be set with in the range of 1 16 to 3 4...

Страница 101: ...s from Copies Press the DONE key The display returns to the Basic Features screen 6 Proceed to make copies in the usual way 7 MEMO To cancel the settings press the SPECIAL FEA TURES FRAME ERASE and C keys in that order You can also cancel the mode by pressing the Reset key The machine returns to the Standard mode ...

Страница 102: ...ize You cannot use the Image Combination mode with the Different Size Original mode In the Image Combination mode combined use of the Two sided Two page Separation Transparency Interleaving Overlay Image Separation Image Repeat Multi page Enlargement and Entire Image modes cannot be set MEMO The reduction ratio is automatically set so that the originals fit in the selected copy paper size This mod...

Страница 103: ...iginals to fit on one side or both sides of the copy sheet Reducing Two Four or Eight Originals to Fit on a Single Copy Sheet IMAGE COMB Reducing Two Four or Eight Originals to Fit on a Single Copy Sheet 4 3 2 1 8 7 6 R E P O R T 5 4 3 2 8 7 6 R E P O R T 5 1 Originals Copy ...

Страница 104: ...ginals in the feeder and press the SPECIAL FEATURES key 1 Press the IMAGE COMB key 2 After selecting the type of original press the OK key 3 Select the desired Image Combination feature then press the OK key 4 MEMO To make a copy of two sided original with IMAGE COMB select the type of original and press the 2 SIDED ORIGINAL key MEMO To make a two sided copy press the 2 SIDED COPY key ...

Страница 105: ...sual way 7 MEMO When the original is placed on the platen glass follow the instructions that appear on the display and press the Start key once for each original When scanning is completed press the DONE key See Memory Copy of Original on Platen Glass on p 2 29 To cancel the settings press the SPECIAL FEATURES IMAGE COMB and C keys in that order You can also cancel the mode by pressing the Reset k...

Страница 106: ...e Combination Image Repeat Multi page Enlargement Entire Image and Booklet modes cannot be set When copying onto 11 x17 or LGL sized copy paper in the 1 to 4 or 1 to 4 2 1 sided Image Separation modes you must place originals horizontally MEMO The enlargement copy ratio is automatically set to match the designated copy paper size This mode automatically divides an original into equal sections and ...

Страница 107: ...et Original Copy R E P O R T 8 7 6 5 4 3 2 1 4 3 2 1 R E P O R T 4 3 2 1 2 1 MEMO You can place LTR and STMT size originals horizontally or vertically when using this feature When placed vertically each page is divided into upper and lower sections When copying with the setting 1 to 2 2 1 SIDED place the original in the feeder 1 TO 4 2 1 SIDED Divides a two sided original into eight equal sections...

Страница 108: ...e OK key 3 Press the DONE key The display returns to the Basic Features screen 5 Proceed to make copies in the usual way 6 MEMO When the original is placed on the platen glass follow the instructions that appear on the display and press the Start key once for each original When scanning is completed press the DONE key See Memory Copy of Original on Platen Glass on p 2 29 You can cancel settings by...

Страница 109: ... Place your originals and press the SPECIAL FEATURES key 1 Press the NEGA POSI key 2 Press the DONE key The display returns to the Basic Features screen 3 Proceed to make copies in the usual way 4 MEMO To cancel the settings press the SPECIAL FEATURES and NEGA POSI keys in that order You can also cancel the mode by pressing the Reset key The machine returns to the Standard mode ...

Страница 110: ...al Copy High set High not set The world s coral reefs where brilliantly colored fish and a myriad of other creatures of the tropics come together Aptly nicknamed Tropical torests under the sea these spots of breathtaking beuty serve as home to countless varieties of life And to us of the land the warm tropical seas and all the romantic dream like alluring world The world s coral reefs where brilli...

Страница 111: ... screen 3 Press the DONE key The display returns to the Basic Features screen 4 Proceed to make copies in the usual way 5 MEMO To cancel the settings press the SPECIAL FEATURES SHARPNESS and C keys in that order You can also cancel the mode by pressing the Reset key The machine returns to the Standard mode MEMO To copy text and lines clearly the setting should be towards HIGH To copy photographs e...

Страница 112: ...or Image Repeat Automatic setting The original image is copied so that the maximum possible of copies fit in the selected copy paper size Original Copy Entire original Example When 3 times is specified Original Manual setting The original image is copied for the specified number of times Place your originals and press the SPECIAL FEATURES key 1 Images overlap when copied Copy Entire original NOTIC...

Страница 113: ...l the mode by pressing the Reset key The machine returns to the Standard mode Automatic setting Press the OK key MEMO The maximam number of times the image can be set to repeat is 20 Sometimes the designated image will overlap depending on how many times you have manually set it to be repeated Manual setting Press the or key to set You can also set the number of repeats by the Number keys MEMO To ...

Страница 114: ...job that you want to store in the Basic Features or Special Features screen If the copy job you want to store is shown in the Special Features screen press the SPECIAL FEATURES key 1 After pressing the SPECIAL FEATURES key press the MODE MEMORY key 2 Press the STORE ERASE key 3 Press the STORE key 4 MEMO In the display on the left TWO PAGE SEPARATION and MARGIN are set MEMO If the Special Features...

Страница 115: ...ob is stored to the memory key To cancel storing Select the NO key then select another key If you selected a memory key for which a copy job has already been stored The message screen appears to confirm that you want to replace the old copy job settings with the new copy job settings When you have finished storing copy settings the message on the left appears for about two seconds When the copy se...

Страница 116: ...ons 3 34 Storing a Memory Key Name Storing a Memory Key Name Press the SPECIAL FEATURES key 1 Press the MODE MEMORY key 2 Press the STORE ERASE key 3 Press the STORE NAME key 4 Storing Often Used Copy Settings in Memory ...

Страница 117: ...ers on the Touch Panel Display on p 1 6 If you have selected a memory key to which a copy job is stored its settings are displayed Enter the new name and press the OK key 6 MEMO If you press the OK key without any characters entered the name of the memory key will revert back to its initial setting e g M1 or M2 Press the OK key The display returns to the Special Features Screen 7 Press the DONE ke...

Страница 118: ...y key If the contents are cor rect press the OK key The display returns to the Special Features Screen 4 Storing Often Used Copy Settings in Memory Press the DONE key The display returns to the Basic Features screen 5 MEMO Recalling a copy job from memory cancels the current copy job After recalling a copy job from memory you can change the settings stored to the copy job If you press another memo...

Страница 119: ...py Functions 3 37 Erasing a Copy Job Storing Often Used Copy Settings in Memory Erasing a Copy Job Press the SPECIAL FEATURES key 1 Press the MODE MEMORY key 2 Press the STORE ERASE key 3 Select the ERASE key 4 ...

Страница 120: ...s the DONE key The display returns to the Basic Features screen 8 NOTICE Check the copy settings before you erase them MEMO If you have selected a memory key to which a copy job is stored its settings are displayed If there are more stored copy modes than currently displayed you can scroll using the or keys MEMO If you press the YES key the currently stored copy job and name are erased If you want...

Страница 121: ... copy jobs are held in memory even if the power is turned OFF The Standard mode or Additional Function settings are not stored For example when the Photo mode is set to ON in the custom copy settings the Photo mode cannot be recalled using the Recall mode Place your originals and press the SPECIAL FEATURES key 1 Press the REC key 2 Select one of the 1BEFORE 2BEFORE or 3BEFORE keys Check that the c...

Страница 122: ...on Settings to Suit Your Needs Common Functions 4 2 Additional Functions Setting Table 4 5 Custom Settings for Copying FAX and Printing 4 6 Timer Settings 4 25 Zoom Fine Adjustment 4 28 Custom Copy Settings 4 31 Image Server Custom Settings 4 37 ...

Страница 123: ... reactivate the machine press the power switch on the control panel The Basic Features screen will appears on the touch panel display Pressing the COPY key FAX key or PRINT I F key also reactivates the machine MEMO When the FAX function is installed you can set your machine so that the FAX Basic Features screen is displayed when the power is turned on See Selecting the Default Function COPY FAX at...

Страница 124: ...ode 40 mode and Return Directly to Standard mode See Changing the Energy Saver Mode Setting on p 4 15 Auto Drawer Switching If a paper drawer runs out of copy paper during copying the machine automatically locates another paper supply drawer loaded with the same size paper and begins feeding copy paper from that paper drawer MEMO You can set whether or not a drawer is subject to Auto Drawer Switch...

Страница 125: ...py Output Copy pages and fax pages and printer pages can be output facing downward in proper page order MEMO Copies will be output facing upward when the original is one sheet and when the copy quantity is one Common Functions Display Remaining paper Drawer is approximately 40 100 full Drawer is approximately 10 40 full Drawer is less than approximately 10 full Drawer is empty Display when selecti...

Страница 126: ... 30 min 1 to 4 hours AUTO CLEAR TIME 2 min 0 no setting 1 to 9 min TIME UNTIL UNIT QUIETS DOWN 1 min 0 no setting 1 to 9 min DAILY TIMER SETTINGS Sunday to Saturday 00 00 to 23 59 in one minute increments ZOOM FINE ADJUSTMENT X Y 0 settable in 0 1 increments within range 1 0 to 1 0 EXPOSURE RECALIB 9 Steps FEEDER CLEANING Place blank paper in the feeder and then press the START key ROLLER CLEANING...

Страница 127: ...t the COPY or FAX key then press the OK key 2 COPY The Copy Basic Features screen is displayed when the power supply is turned ON FAX The Fax Basic Features screen is displayed when the power supply is turned ON Press the DONE key Repeat this until the Basic Features screen appears again 3 Call up the desired screen as follows AdditionalFunctions Key Selecting the Default Display After Auto Clear ...

Страница 128: ...he DONE key Repeat this until the Basic Features screen appears again 3 Call up the desired screen as follows AdditionalFunctions Key Making the Setting to Allow Different Size Originals Except copy functions gives you the choice whether or not to allow placing of different size originals together in one group in the Feeder provided that the leading edge of each page is the same length When this f...

Страница 129: ...or copy and fax functions It is useful when different paper drawers are to be used for different purposes NOTICE If the stack bypass setting in DRAWER ELIGIBILITY FOR APS ADS is set to ON the setting in STACK BYPASS SIZE ENTRY becomes OFF Alternatively if the setting in STACK BYPASS SIZE ENTRY is set to ON the setting in DRAWER ELIGIBILITY FOR APS ADS becomes OFF MEMO Paper drawers set to ON are u...

Страница 130: ...upports PRINTER function Press the DONE key Repeat this until the Basic Features screen appears again 4 MEMO The 3rd to 6th drawers can be set when the machine is equipped with an optional GP Cassette Feeding Unit When Stack bypass is set to ON The display on the right appears Specify the size of the copy paper to be placed on the stack bypass then press the OK key NOTICE When PRINTER is set the O...

Страница 131: ... the special cassette selected with the paper icon at Special Cassette storing see Identifying the type of Paper in a Cassette Using the Touch Panel Display on p 4 10 is regarded as the tracing paper cassette MEMO The initial setting is ON 1 Select the ON or OFF key then press the OK key 2 Press the DONE key Repeat this until the Basic Features screen appears again 3 Call up the desired screen as ...

Страница 132: ... special cassette When the Finisher E1 is installed a special cassette selected with the paper icon can be used as the tracing paper cassette MEMO The initial settings are as follows SPC 1 A4 SPC 2 A4 SPC 3 LTR SPC 4 LTR Call up the desired screen as follows AdditionalFunctions Key 1 Select the SPC 1 SPC 2 SPC 3 or SPC 4 key 2 NOTICE Be sure to place the same size of copy paper as that specified o...

Страница 133: ... displayed when using the stack bypass tray NOTICE If the setting in STACK BYPASS SIZE ENTRY is set to ON the stack bypass setting in DRAWER ELIGIBILITY FOR APS ADS becomes OFF Alternately if the stack bypass setting in DRAWER ELIGI BILITY FOR APS ADS is set to ON the setting in STACK BYPASS SIZE ENTRY becomes OFF MEMO The initial setting is OFF 1 Select the ON or OFF key then press the OK key 2 O...

Страница 134: ...of the optional Finisher C1 and Saddle Finisher C2 to be used for either the copy fax or printer function NOTICE This setting is not required when the Finisher C1 and the Saddle Finisher C2 are not installed MEMO The factory default settings are as follows Tray A Copy Tray B Fax Tray C Not assigned It is possible to assign a single tray to both functions It is not possible to set the Copy or Print...

Страница 135: ...e is equipped with the Finisher C1 and the Saddle Finisher C2 you can print out both simulta neously If the job currently being printed out is set for double sided copies Booklet or Staple then priority printing is disabled even if set for highest printing priority Shift Stacking If the machine is equipped with a finisher or paper output accessory Finisher C1 Saddle Finisher C2 or Finisher E1 you ...

Страница 136: ...rgy Saver Mode Setting You can change the setting for the Energy Saver mode MEMO The initial setting is 10 1 Call up the desired screen as follows AdditionalFunctions Key 1 Select 10 25 40 or RETURN DI RECTLY TO STANDARD MODE and then press the OK key 2 Press the DONE key Repeat this until the Basic Features screen appears again 3 MEMO The approximate energy savings figures for each mode and the a...

Страница 137: ...esired screen as follows AdditionalFunctions Key 1 MEMO The initial setting is OFF Setting or Changing the System Settings Password This sets the password for the system administrator If the system settings password is set restrictions can be placed on storing or changing the following items Common Setting Restrictions Restrict Use of FAX with Control Card Dept ID Management Custom FAX Setting Res...

Страница 138: ... setting is MAIL BOX 1 Select the MAIL BOX or OTHER key then press the OK key 2 Call up the desired screen as follows AdditionalFunctions Key 1 Press the DONE key Repeat this until the Basic Features screen appears again 3 Setting the Initial Screen for the Printer Functions Select the ON or OFF key then press the OK key 3 Press the DONE key Repeat this until the Basic Features screen appears agai...

Страница 139: ...management purposes With Dept ID Management the following operations can be carried out Setting whether or not to set Dept ID Management Storing the Dept ID and the password MEMO The initial setting is OFF Storing the Dept ID and Password STORE DEPT ID PASSWORD 1 Enter the system settings password then press the OK key 2 Call up the desired screen as follows AdditionalFunctions Key 1 MEMO Enter th...

Страница 140: ...eded touch the position corresponding to the dept and enter the pass word with the Number keys 0 9 5 Press the OK key 6 Press the DONE key Repeat this until the Basic Features screen appears again 7 MEMO If you do not store a password both the copy and FAX function can be used by just entering the Dept ID Press the OK key MEMO When Dept ID Management is set the display below Dept ID Password entry...

Страница 141: ... desired screen as follows AdditionalFunctions Key 1 MEMO Enter the password stored under Set System Settings Password See Setting or Changing the System Settings Password on p 4 16 This step is not required if the system settings password is not stored Press the ON key and then the STORE DEPT ID PASSWORD key 3 Use the and keys to display the department ID password you want to delete Then touch th...

Страница 142: ...als COPY TOTALS 1 Enter the system settings password then press the OK key 2 Call up the desired screen as follows AdditionalFunctions Key 1 MEMO Enter the password stored under Set System Settings Password See Setting or Changing the System Settings Password on p 4 16 This step is not required if the system settings password is not stored Select the ON key then press the COPY TOTALS key 3 This al...

Страница 143: ...To check copy totals Press the or keys to display the desired department After checking the copy totals press the OK key 4 Press the OK key 5 Press the DONE key Repeat this until the Basic Features screen appears again 6 To print the displayed list Press the PRINT LIST key A screen such as shown below appears To stop printing press the CANCEL key When printing is com pleted press the OK key ...

Страница 144: ...under Set System Settings Password See Setting or Charging the System Settings Password on p 4 16 This step is not required if the system settings password is not stored Select the ON key then press the COPY TOTALS key 3 The following instructions describe how to delete the copy totals made so far for all departments Press the CLEAR ALL TOTALS key 4 Select the YES key The message Initialized is di...

Страница 145: ...ress the DONE key Repeat this until the Basic Features screen appears again 3 Returning the Custom Common Settings to Their Defaults INITIALIZE CUSTOM COMMON SETTINGS Returning the Custom Common Settings to Their Defaults INITIALIZE CUSTOM COMMON SETTINGS This function allows you to return the custom common settings to their defaults initial settings NOTICE The settings for Restrict Facsimile Cont...

Страница 146: ...appears again 3 Setting theTime to Initiate Auto Sleep after Finishing Operations AUTO SLEEP TIME If the machine is not operated no keys are pressed for a certain period of time the control panel power switch automatically moves to the OFF position to save power The machine then enters the Sleep mode Call up the desired screen as follows AdditionalFunctions Key 1 Call up the desired screen as foll...

Страница 147: ...TIME UNTIL UNIT QUIETS DOWN Timer Settings Enter the desired Auto Sleep Time with the or keys then press the OK key The Auto Sleep Time settings are 30 minutes 1 to 4 hours in one hour increments 2 Press the DONE key Repeat this until the Basic Features screen appears again 3 Setting theTimeTaken for Display to Return to Basic Features Screen after Finishing Operations AUTO CLEAR TIME Sets the Aut...

Страница 148: ... OFF on different days of the week Setting range Daily from Sunday to Saturday 00 00 to 23 59 in one minute increments The initial setting No setting MEMO When the auto clear time and weekly timer are both set the auto clear time has priority 1 Select the day of the week enter the time with the Number keys and then press the OK key 2 Call up the desired screen as follows AdditionalFunctions Key 1 ...

Страница 149: ...or keys to adjust the copy ratio then press the OK key Adjustment Ranges X horizontal direction 1 0 to 1 0 in 0 1 increments Y vertical direction 1 0 to 1 0 in 0 1 increments 2 Call up the desired screen as follows AdditionalFunctions Key 1 Press the DONE key Repeat this until the Basic Features screen appears again 3 MEMO The Adjustment Cleaning screen is made up of several screens Use the and ke...

Страница 150: ...on feeds paper to the unit and staples a few times so that staples will be immedi ately available for the next job MEMO The required paper is fed automatically The following paper sizes can be used for this function 11 x17 LTRR 1 Press the START key 2 Call up the desired screen as follows AdditionalFunctions Key 1 Press the DONE key Repeat this until the Basic Features screen appears again 4 NOTIC...

Страница 151: ...e the saddle stitch position 2 Call up the desired screen as follows AdditionalFunctions Key 1 Press the DONE key Repeat this until the Basic Features screen appears again 4 NOTICE This setting is not required when the Saddle Finisher C2 is not installed Use the and keys to adjust the saddle stitch position then press the OK key The example shows adjustment for A3 11 17 paper 3 Changing the Saddle...

Страница 152: ... Select the item then press the OK key Lightly dimmed lettering in the list of modes indicates that the mode has already been stored 2 Press the DONE key Repeat this until the Basic Features screen appears again Example Standard keys 1 and 2 are displayed in the touch panel display as shown below 3 Call up the desired screen as follows AdditionalFunctions Key 1 Custom Copy Settings MEMO The Custom...

Страница 153: ... Features screen appears again 3 Auto Orientation Using parameters such as original size and zoom ratio this function automatically rotates the copy image to the most suitable position for the specified copy paper size MEMO The Initial setting is ON 1 Select the ON or OFF key then press the OK key 2 Call up the desired screen as follows AdditionalFunctions Key 1 Press the DONE key Repeat this unti...

Страница 154: ...he Current Standard Settings STANDARD SETTINGS Storing the Current Standard Settings STANDARD SETTINGS Standard Settings refers to a combination of copy modes that the machine is set to after the power is turned ON or when the Reset key is pressed This section describes how to store the Standard Settings Standard Settings can be returned to their initial settings defaults MEMO The Standard mode in...

Страница 155: ...ttings Select the NO key The display returns to the display in step 1 The settings displayed here are the currently set copy settings Press the or keys to display copy modes that do not fit in the display area This screen is displayed for about two seconds 3 Press the DONE key Repeat this until the Basic Features screen appears again 4 Press the STORE key 2 Storing the Current Standard Settings ST...

Страница 156: ... the Standard settings Select the YES key To cancel initialization of the Standard settings Select the NO key The display returns to the display in step 1 This screen is displayed for about two seconds 3 Custom Copy Settings Initializing the Standard Settings 1 Press the INITIALIZE key 2 Call up the desired screen as follows AdditionalFunctions Key 1 Initializing the Standard Settings ...

Страница 157: ...ustom Copy Settings mode can be returned to their factory defaults initial settings 1 Select the YES or NO key To initialize custom copy settings Select the YES key After initializing the custom copy settings the screen below is displayed and then the display returns to the Custom Copy Settings screen 2 1 Custom Copy Settings Restoring Settings to Initial Settings INITIALIZE CUSTOM COPY SETTINGS T...

Страница 158: ...MB is not installed with the image RUNNER 400S 330S even if the printer functions are installed MEMO The Mail box can store up to 70 items Available Box numbers 00 to 99 1 Press the Mail Box number then press the STORE key 2 Call up the desired screen as follows AdditionalFunctions Key 1 Enter the Mail Box name then press the OK key 3 MEMO For details on how to enter the characters see Entering Ch...

Страница 159: ... the OK key The amount of time which can be set is as follows 1 2 3 6 or 12 hours 1 2 or 3 days 5 MEMO If no password is registered press the OK key You can delete the letter number you entered by pressing the C Clear key If you wish to cancel registration press the C key NOTICE Since there is no way to check the password registered please record the password you registered and keep it separately ...

Страница 160: ...en set instead of entering a Mail Box password you can enter the system setting password then press the OK key and advance to the next step Enter the password used when the mail box was registered See Mail Box Setting Storing on p 4 37 If a password is not registered this operation is not required Press the YES or NO key If you wish to delete Select the YES key If you do not wish to delete Select ...

Страница 161: ...Loading Paper 5 2 Adding Toner 5 8 Consumables and Options 5 12 Chapter 5 Loading Paper and Adding theToner ...

Страница 162: ...er Pull out the paper drawer until it stops 1 Open a package of copy paper and remove the paper stack 2 NOTICE Rewrap any remaining paper in its original package and store it in a dry place away from direct sunlight Do not copy on the following types of copy stock Doing so may cause a paper jam Severely curled or wrinkled paper Transparencies for digital full colour copiers Paper on which colour i...

Страница 163: ...sufficient paper load the paper and follow the instructions displayed in the touch panel display The machine resumes output of copies Turn the paper stack over and place it in the paper drawer Even out the edges of the paper stack Load the paper stack against the right wall of the paper drawer 3 NOTICE If the copy paper is curled curl it down before placing it in the paper drawer Make sure that th...

Страница 164: ...per for the First Time When loading paper for the first time you must attach seals on the paper size dial and size plate of the paper drawer and set the size switch to the required paper series setting Carry this out before loading paper MEMO About Paper Size Series The most often used paper sizes in America are the inch series paper sizes 11 x17 LGL LTR and STMT A3 A4 A B series paper sizes are u...

Страница 165: ...ries paper Set the switch to the A B position 4 A B INCH Load the copy paper See Loading Paper on p 5 2 See Adjusting a Paper Drawer to Hold a Different Paper Size on p 5 6 5 NOTICE If you do not set the size switch to the correct setting the selected paper size will not be correctly displayed in the touch panel display This might also cause paper jams dirty copies or make the inside of the machin...

Страница 166: ...n the figure Without releasing the lever slide the length guide to align it with the mark for the desired paper size When the lever is released the length guide is locked 2 Squeeze the lever on the width guide as shown in the figure Without releasing the lever slide the width guide to align it with the mark for the desired paper size 3 A5 B 5 R NOTICE Not adjusting the guides correctly might cause...

Страница 167: ...aper size Set the size switch so that it matches the size of the new copy paper that you loaded If you are using inch series paper Set the switch to the INCH position If you are using A B series paper Set the switch to the A B position 4 A B INCH NOTICE If you do not set the size switch to the correct setting the selected paper size will not be correctly displayed in the touch panel display This m...

Страница 168: ... this machine Never add more than one toner cartridge Example When there is only a small amount of toner remaining during copying the display on the left appears in the touch panel display Follow the procedure below to add toner WARNING Never dispose of waste toner in a fire or incinerator Doing so may result in an explosion Open the front cover of the main unit 1 Push the blue lever to the right ...

Страница 169: ...4 Place the toner cartridge on the toner box as shown in the figure on the right and push it in as far as possible 5 Push the toner cartridge down from above to lock it in place on the toner box Make sure that the black cartridge knob protrudes towards you 6 Cartridge knob Pull out the black cartridge knob to wards you until STOP appears 7 Adding Toner Adding Toner ...

Страница 170: ...ack handle is pushed in the cartridge seal knob is also drawn in When the black toner box handle is in as far as possible make sure that the toner cartridge comes away from the toner box Adding Toner AddingToner CAUTION When removing a used toner cartridge from the toner supply port remove the cartridge carefully to prevent toner from scattering and entering your eyes or mouth If toner enters your...

Страница 171: ...o its original position 11 Raise the blue lever to return it to the original position 12 Close the front cover 13 MEMO If toner is added before copying has been completed press the Start key again The machine will make the remaining copies Adding Toner AddingToner ...

Страница 172: ...lack toner When the Add toner message appears in the touch panel display add toner which has been approved for use with this machine Only black toner can be used with this machine We recommend that you order copy stock and toner cartridges from your service representative before they run out WARNING Do not store copy paper in places exposed to open flames as this may cause the copy paper to ignite...

Страница 173: ...e on p 5 6 You can adjust the paper drawer for the following paper sizes LTR LTRR STMT STMTR Cassette M1 Paper drawers can be adjusted to hold the copy paper size you want to load See Adjusting a Paper Drawer to Hold a Different Paper Size on p 5 6 You can adjust paper drawers for the following paper sizes 11 x17 LGL LTR LTRR STMT STMTR Stamp cartridge This ink cartridge is for the DADF A1 stamp O...

Страница 174: ...Clearing Paper Jams 6 2 Routine Cleaning 6 16 Self diagnostic Error Display 6 19 Service Call Message 6 21 Chapter 6 Troubleshooting ...

Страница 175: ...ocation of the paper jam Example of display indicating how to clear the paper jam CAUTION When removing jammed originals or copy paper take care not to cut your hands on the edges of the original or copy paper When removing jammed paper or when inspecting the inside of the machine do not allow necklaces bracelets or other metal objects to touch the inside of the machine as this may result in burns...

Страница 176: ...e removed The display indicating how to clear the paper jam appears in the touch panel display Repeat the procedure from step 1 If all paper jams have been removed A message prompting you to carry out operations for resuming copying will appear in the touch panel display Follow these instructions Example If the display on the left appears press the Start key to continue making the remaining copies...

Страница 177: ...to the one on the left appears in the touch panel display Check where the jam occurred and follow the procedure below and the procedure that appears in the touch panel display to remove the jammed paper Open the front cover of the main unit 1 Move the green lever in the direction of the arrow 2 Remove any remaining jammed paper from the fixing unit 3 ...

Страница 178: ...n the green lever back to its original position 5 Close the front cover 6 7 CAUTION The parts located around the green knob are subject to high temperatures When removing jammed paper take care not to touch anything in this area except the green knob Follow the instructions in the touch panel display See Display Indicating How to Clear the Jam on p 6 2 ...

Страница 179: ...llow the procedure below and the procedure that appears in the touch panel display to remove the jammed paper Open the front cover of the main unit 1 Lift up the green lever of the duplexing unit with one hand and pull out the jammed paper with the other hand 2 Return the green lever back to its original position 3 Close the front cover 4 Follow the instructions in the touch panel display See Disp...

Страница 180: ...to remove the jammed paper Open the front cover of the main unit 1 Open the left cover of the main unit 2 Raise the lever towards you and pull out the jammed paper 3 NOTICE The front door must be opened before clearing paper jams Remove any paper on the trays before clearing paper jams Clearing Paper Jams Paper Jam in the Copy Tray CAUTION When opening the cover do not touch the connector of the m...

Страница 181: ... cover 6 Follow the instructions in the touch panel display See Display Indicating How to Clear the Jam on p 6 2 7 CAUTION The parts located around the green lever are subject to high temperatures When removing jammed paper take care not to touch anything in this area except the green lever Clearing Paper Jams Paper Jam in the Copy Tray ...

Страница 182: ...ow the procedure below and the procedure that appears in the touch panel display to remove the jammed paper Open the right cover of the main unit 1 Remove any jammed paper 2 Close the right cover 3 NOTICE The right door cannot be opened with the stack bypass opened If the stack bypass is open first close the stack bypass then open the right door Follow the instructions in the touch panel display S...

Страница 183: ...occurred and follow the procedure below and the procedure that appears in the touch panel display to remove the jammed paper Open the right cover of the main unit Check that there is no jammed paper 1 Pull out the drawer indicated in the display 2 Remove any jammed paper 3 NOTICE The right door cannot be opened with the stack bypass opened If the stack bypass is open first close the stack bypass t...

Страница 184: ...to its original position 4 Follow the instructions in the touch panel display See Display Indicating How to Clear the Jam on p 6 2 6 NOTICE If the paper jam message remains in the display follow the directions in the display and check again for any jammed paper Close the right cover 5 ...

Страница 185: ...it 1 Pull out the static charge eliminator by its knob slowly towards you 2 Remove the static charge eliminator cleaning brush 3 MEMO If paper jams occur frequently make sure that the size set on the paper size dial on the drawer matches the size of the paper loaded in the drawer Clean the groove of the static charge eliminator as shown in the figure on the left Insert the brush of the static char...

Страница 186: ...Paper Jams When you have finished cleaning the groove return the static charge eliminator and the brush to their original positions 5 Close the front cover 7 After you have finished cleaning the static charge eliminator return the brush to its original position 6 ...

Страница 187: ...e stack bypass a display similar to the one on the left appears in the touch panel display Check where the jam occurred and follow the procedure below and the procedure that appears in the touch panel display to remove the jammed paper Remove all paper from the stack bypass 1 Pull out any jammed paper from the stack bypass 2 Close the stack bypass 3 ...

Страница 188: ... Stack Bypass Clearing Paper Jams Follow the instructions in the touch panel display See Display Indicating How to Clear the Jam on p 6 2 7 Close the right cover or of the main unit 6 Open the right cover of the main unit 4 Remove any jammed paper 5 ...

Страница 189: ...al shock Clean the platen glass with a cloth dampened with water or a mild cleaning agent then wipe with a dry cloth Original Feeding Belt Move the original feeding belt with your hand as you wipe it with a cloth dampened with water or a mild cleaning agent then wipe with a dry cloth Rear Side of Platen Cover Clean the rear side of the platen cover with a cloth dampened with water or a mild cleani...

Страница 190: ... and keys to scroll to the desired screen and make the required settings When should be pressed the indication is displayed in this manual It takes about 10 seconds to clean the feeder Call up the desired screen as follows AdditionalFunctions Key 1 Place blank LTR size copy sheets in the feeder and then press the START key 2 When Feeder Cleaning is complete the display returns to the Adjustment Cl...

Страница 191: ... It takes about 15 seconds to clean the roller Call up the desired screen as follows AdditionalFunctions Key 1 Press the START key 2 When Roller Cleaning is complete the display returns to the Adjustment Cleaning screen Press the DONE key Repeat this until the Basic Features screen appears again 3 MEMO If you want to stop cleaning press the C Clear key While roller cleaning is being performed the ...

Страница 192: ...pying If a self diagnostic message appears follow the instructions in the touch panel display Romove the paper from the Finisher and press start key Copies from the previous copy job remain in the Finisher Remove the copies from all of the trays then press the Start key Connect the Finisher to the main unit The Finisher is not properly connected to the main unit Connect the Finisher to the main un...

Страница 193: ...llowing the guidance messages in the touch panel display See Clearing Paper Jams on p 6 2 Add toner There is not enough toner to make copies Replace the toner cartridge with a recom mended toner cartridge See Adding Toner on p 5 8 Load paper The machine has run out of paper No more copies can be made The drawer is not correctly inserted Load paper See Loading paper on p 5 2 Insert the drawer as fa...

Страница 194: ...not operate normally the message on the left the service call message will appear in the touch panel display If this message appears follow the procedure described below Unplug the power cable from the outlet WARNING Do not insert or unplug the power plug with wet hands as this may result in electrical shock CAUTION Always grasp the plug portion when unplugging the power plug Pulling on the power ...

Страница 195: ...System Configuration 7 2 Cassette Feeding Unit S1 7 3 Cassette Feeding Unit R1 7 5 Paper Deck B1 7 7 DADF A1 Feeder 7 11 Finisher C1 Saddle Finisher C2 7 16 Finisher E1 7 34 Chapter 7 Handling Options ...

Страница 196: ...d to the machine DADF A1 Feeder See p 7 11 Main Unit Cassette Feeding Unit S1 See p 7 3 Cassette Feeding Unit R1 See p 7 5 Optional Memory 32MB 64MB Control Card V Super G3 Fax board F1 Finisher C1 See p 7 16 Paper Deck B1 See p 7 7 Saddle Finisher C2 See p 7 16 Output Indicator Lamp See p 7 32 Finisher E1 See p 7 34 ...

Страница 197: ...e not to cut your hands on the edges of the original or copy paper When removing jammed paper or when inspecting the inside of the machine do not allow necklaces bracelets or other metal objects to touch the inside of the machine as this may result in burns or electrical shock When removing copy paper which has become jammed inside the machine take care not to allow the toner on the jammed copy pa...

Страница 198: ...Jam on p 6 2 Main Specifications Cassette Feeding Unit S1 Main Specifications 500 sheets 20 lb bond 80g m2 2 Paper feeding system Acceptable paper sizes Cassette Feeding Unit S1 Name 1st drawer LTR LTRR STMT STMTR 2nd drawer 11 x17 LGL LTR LTRR STMT STMTR 17 7 8 23 26 1 4 453mm 585mm 665 1mm Dimensions H W D From Main Unit Power source Approx 86 4 lb 39 2kg Weight ...

Страница 199: ... take care not to cut your hands on the edges of the original or copy paper When removing jammed paper or when inspecting the inside of the machine do not allow necklaces bracelets or other metal objects to touch the inside of the machine as this may result in burns or electrical shock When removing copy paper which has become jammed inside the machine take care not to allow the toner on the jamme...

Страница 200: ... 6 2 Main Specifications 500sheets 20 lb bond 80g m2 4 Paper feeding system Acceptable paper sizes Cassette Feeding Unit R1 Name From Main Unit Power source 1st and 3rd drawers LTR LTRR STMT STMTR 2nd and 4th drawers 11 17 LGL LTR LTRR STMT STMTR 17 7 8 23 26 1 4 453mm 585mm 665 1mm Dimensions H W D Approx 104 lb 47 2kg Weight Main Specifications Cassette Feeding Unit R1 ...

Страница 201: ...e same time as Cassette Feeding Unit R1 Parts and Their Functions CAUTION When removing jammed originals or copy paper take care not to cut your hands on the edges of the original or copy paper When removing jammed paper or when inspecting the inside of the machine do not allow necklaces bracelets or other metal objects to touch the inside of the machine as this may result in burns or electrical s...

Страница 202: ...ck B1 Press the Release button to remove the paper deck from the Main Unit 1 Remove any jammed paper 2 Press the Open button to open the paper deck 3 Paper Jam in the Paper Deck Remove any jammed paper 4 Paper Jam in the Paper Deck ...

Страница 203: ...copied Paper which has been copied on using a digital full colour copier do not copy on the reverse side either Paper which has been printed on using a thermal trans fer printer do not copy on the reverse side either MEMO The Paper Deck holds up to about 3500 sheets of copy paper 20 lb bond 80g m2 For high quality copies use paper recommended by Canon Paper Deck B1 Loading Paper in the Paper Deck ...

Страница 204: ...per drawer Paper Deck B1 Close the Paper Deck and reconnect it to the main unit 4 Main Specifications 3500 sheets 20 lb bond 80g m2 Paper deck capacity Acceptable paper sizes Paper Deck B1 Name LTR 20 1 2 12 3 4 23 519mm 323mm 583mm Dimensions H W D From Main Unit Power source Approx 90 4 lb 41kg Weight CAUTION When returning the Paper Deck to its original position be careful not to get your finge...

Страница 205: ...copying Originals can also be automatically reversed to make two sided copies from two sided originals Parts and Their Functions Parts and Their Functions Original supply tray Auxiliary tray Slide guide Feeder cover Original output tray REQUEST Do not place objects in the document tray Doing so might damage originals that are output onto the tray ...

Страница 206: ...mark is faint or is no longer printed DADF A1 Open the feeder 1 Remove the old stamp cartridge using twee zers while holding down the lock lever with your finger The lock lever is for securing the stamp cartridge 2 Insert the new stamp cartridge using tweezers while holding down the lock lever with your finger as shown in the figure on the right 3 Replacing the Stamp Cartridge When the fax functio...

Страница 207: ...re the jam occurred and follow the procedure below and the procedure that appears in the touch panel display to remove the jammed paper Clearing Paper Jams CAUTION When removing jammed originals or copy paper take care not to cut your hands on the edges of the original or copy paper When removing jammed paper or when inspecting the inside of the machine do not allow necklaces bracelets or other me...

Страница 208: ...jammed originals 3 Lift up the feeder cover holding it by its centre on its left side and remove any jammed originals 4 DADF A1 Clearing Paper Jams Remove all jammed originals and close the inner cover and feeder cover Remove the original on the platen glass 5 ...

Страница 209: ...nal size DADF A1 Feeder Name 13 to 28 Ib bond 50g m2 to 105g m2 Originals 40 sheets minute imageRUNNER 400Series 33 sheets minute imageRUNNER 330Series Original replacement speed 25 sheets 11 17 LGL size 20 Ib bond 80g m2 50 sheets LTR LTRR STMT STMTR size 20 Ib bond 80g m2 Original supply tray capacity 170W Max power consumption 24V From Main Unit Power source 6 3 8 25 3 8 20 3 4 161mm 645mm 527m...

Страница 210: ...at is folded and stapled at the center to form a booklet is delivered to this tray Only installed in Saddle Finisher C2 Front cover lower Open this cover when a paper jam or staple jam occurs in the saddle stitcher unit or when replacing the saddle stitcher unit staple cartridge See When a Paper Jam Occurs in the Saddle Stitcher Unit on p 7 25 Replaceing the Saddle Stitcher Unit Staple Cartridge o...

Страница 211: ...uble staple LTRR STMT or STMTR paper MEMO You cannot use the Transparency Interleaving mode in combination with the Collate function Group function or Staple collate function MEMO When the delivered printing paper reaches the stacking limit of the tray the paper is delivered to another tray that can accept it When the stacking limit of all of the trays that can accept the paper is reached printing...

Страница 212: ...mmend attaching the supplied labels to the trays for identifying their respective use Blank labels are also provided which you can fill out yourself If you make copies while printing a fax the copies are sometimes delivered to the interrupt tray Sliding Function If you make copies with the Collate function and Group function set the first page of the printing paper is shifted approximately 1 1 4 3...

Страница 213: ...the machine do not allow necklaces bracelets or other metal objects to touch the inside of the machine as this may result in burns or electrical shock When removing copy paper which has become jammed inside the machine take care not to allow the toner on the jammed copy paper to come into contact with your hands or clothing as this will dirty your hands or clothing If they become dirty wash them i...

Страница 214: ...Remove jammed paper while lifting up the black roller 5 Return the black roller and gray cover then close the upper cover and the interrupt tray 6 Connect the Finisher to the main unit 7 8 Follow the instructions in the touch panel display See Display Indicating How to Clear the Jam on p 6 2 Clearing Paper Jams ...

Страница 215: ... must be replaced The message on the left will appear in the touch panel display Follow the procedure described below to replace the staple case Open the front cover upper of the Finisher 1 Push down the green lever 2 Pull out the slightly protruding staple cartridge holding it by its left and right sides 3 Replacing the Staple Case in the Stapler Unit ...

Страница 216: ...ulling it straight out 6 Gently push the stapler unit back into the Finisher until the green lever re turns to its original position 7 Make sure that the stapler unit is firmly secured and then close the front cover upper of the Finisher 8 MEMO Only one staple case can be inserted at a time Use only the special staple case for use on this machine Replacing the Staple Case in the Stapler Unit ...

Страница 217: ...e on the left appears Follow the procedure described below to remove any jammed staples Remove the paper waiting to be stapled from the delivery tray 1 Open the front cover upper of the Fin isher 2 Push down the green lever 3 Finisher C1 Saddle Finisher C2 Removing Jammed Staples from the Stapler Unit ...

Страница 218: ...ve all of the staples that slide from the staple case 6 Return the knob of the staple cartridge to its original position 7 Return the staple cartridge to its original position and close the front cover upper 8 MEMO When you close the cover the staple unit automatically performs a dry stapling operation several times to reposition the staples Removing Jammed Staples from the Stapler Unit ...

Страница 219: ...aper or when inspecting the inside of the machine do not allow necklaces bracelets or other metal objects to touch the inside of the machine as this may result in burns or electrical shock When removing copy paper which has become jammed inside the machine take care not to allow the toner on the jammed copy paper to come into contact with your hands or clothing as this will dirty your hands or clo...

Страница 220: ...ck section on the right and remove the paper 6 Remove any jammed paper Close the front cover lower of the Finisher 7 Connect the Finisher to the main unit 8 9 Follow the instructions in the touch panel display See Display Indicating How to Clear the Jam on p 6 2 When a Paper Jam Occurs in the Saddle Stitcher Unit ...

Страница 221: ...rtridge must be replaced The message on the left will appear in the touch panel display Follow the procedure described below to replace the staple cartridge 1 2 Pull forward the stapler unit of the saddle stitcher unit then push it up 3 Pull out the saddle stitcher unit Open the front cover lower of the Finisher Finisher C1 Saddle Finisher C2 Replacing the Saddle Stitcher Unit Staple Cartridge ...

Страница 222: ... to its original position 6 Insert the new staple cartridge Pull out the empty staple cartridge holding it by its left and right sides Push back the saddle stitcher unit then close the front cover lower 7 NOTICE Replace both the inner and outer staple cartridges at the same time Replacing the Saddle Stitcher Unit Staple Cartridge ...

Страница 223: ... appears Follow the procedure described below to remove any jammed staples Open the front cover lower of the Finisher 1 Pull out the saddle stitcher unit 2 Pull forward the stapler unit of the saddle stitcher unit then push it up 3 Finisher C1 Saddle Finisher C2 Grasp the left and right ends of the staple cartridge and remove the cartridge 4 Removing Jammed Staples from the Saddle Stitcher Unit ...

Страница 224: ...ginal position 7 A B Pull forward the stapler unit of the saddle stitcher unit then return it to its original position 8 Push back the saddle stitcher unit then close the front cover lower 9 NOTICE Once you have removed the jammed staples be sure to reposition staples for the saddle stitcher unit See Staple Realignment for Saddle Finisher on p 4 29 Removing Jammed Staples from the Saddle Stitcher ...

Страница 225: ...when inspecting the inside of the machine do not allow necklaces bracelets or other metal objects to touch the inside of the machine as this may result in burns or electrical shock When removing copy paper which has become jammed inside the machine take care not to allow the toner on the jammed copy paper to come into contact with your hands or clothing as this will dirty your hands or clothing If...

Страница 226: ... delivered from the fax or computer the lamp at the top flashes When printing has ended the flashing changes to a steady glow REQUEST If the Finisher Output indicator lamp s cable gets caught in between the copier and the Finisher it could cause electrical damage To prevent this from happening make sure that you bind the cable with the cable strap For more details contact your service representati...

Страница 227: ...s 20 lb bond 80g m2 LTRR LGL 11 17 100 sheets 20 lb bond 80g m2 Collate mode Group mode STMTR LTR 200 sheets 20 lb bond 80g m2 or 1 1 4 30mm LTRR LGL 11 17 100 sheets 80g m2 or 5 8 15mm Interrupt Tray STMT STMTR LTR 50 sheets 20 lb bond 80g m2 LTRR LGL 11 17 30 sheets 20 lb bond 80g m2 Booklet Tray 1 to 5 sheets 25 sets 6 to 10 sheets 15 sets 11 to 15 sheets 10 sets for Saddle Finisher C2 only Cap...

Страница 228: ...g copies into sets arranged in page order Finishing Tray Output sheets are finishing here in separate batches Collating grouping staple collating etc Output Tray Output jobs are delivered to this tray after being finished on the finishing tray In the description on the following pages Finisher E1 is referred to as finisher unless otherwise stated Finisher E1 Parts and Their Functions Parts and The...

Страница 229: ... papers and the stacking limit of the finishing tray is reached printing stops Remove all tracing papers from the finishing tray and pressing the Start key to restart printing If the machine stops during collating a message is displayed in the touch panel display and the Staple Supply indicator lights while stapling is taking place it means that almost all of the staples have been used up and the ...

Страница 230: ...side of the machine as this may result in burns or electrical shock When removing copy paper which has become jammed inside the machine take care not to allow the toner on the jammed copy paper to come into contact with your hands or clothing as this will dirty your hands or clothing If they become dirty wash them immediately with cold water Washing with warm water will set the toner and make it i...

Страница 231: ...the Finisher to the main unit 3 4 Follow the instructions in the touch panel display See Display Indicating How to Clear the Jam on p 6 2 NOTICE When removing jammed paper do not remove any paper from the finishing tray Finisher E1 Main Unit Main Unit Clearing a Paper Jams ...

Страница 232: ...e message on the left will appear in the touch panel display Follow the procedure described below to replace the staple case Move the Finisher away from the machine holding the section indicated in the figure on the left 1 2 Pull out the staple cartridge holding it by its left and right sides Green portion Pull out the empty staple case holding it by its left and right sides 3 Finisher E1 Main Uni...

Страница 233: ...ing it straight out 5 Return the staple cartridge back into its original position 6 Return the Finisher to its original position 7 MEMO Only one staple case can be inserted at a time Use only the special staple case for use on this machine Finisher E1 Main Unit Replacing the Staple Case in the Stapler Unit ...

Страница 234: ...rs the message on the left appears Follow the procedure described below to remove any jammed staples Remove the paper waiting to be stapled from the finishing tray 1 Move the Finisher away from the machine holding the section indicated in the figure on the left 2 Pull out the staple cartridge holding it by its left and right sides Green portion 3 ...

Страница 235: ...sition 6 Gently push the staple cartridge back into its original position 7 Removing Jammed Staples from the Stapler Unit Return the Finisher to its original position 8 MEMO When you return the Finisher to its original position the stapler unit automatically performs a dry stapling operation several times to reposition the staples Follow the instructions in the touch panel display after that ...

Страница 236: ...ple Unit LTR LTRR 30 sheets 20 lb bond 80g m2 LGL 11 X17 15 sheets 20 lb bond 80g m2 Max stapling capacity Less than 40W Power consumption 14 1 4 21 3 4 22 5 8 363mm 553mm 574mm Dimensions H W D 24V From the Main Unit Power source Approx 26 4 lb 12 kg Weight 59 3 8 28 3 8 1507mm 720mm Installation location W D Main Specifications Consumables Staple cartridge Use only the recommended staple cartrid...

Страница 237: ...Operation When User Restrictions are Enabled 8 2 Using a Mail Box When the printer function is installed 8 5 Checking Printing Status 8 15 Main Specifications 8 18 Index 8 20 Chapter 8 Appendix ...

Страница 238: ...rd is inserted check the following Make sure that the control card is inserted in the correct direction Make sure that the control card is inserted as far as it can go Make sure that an unusable control card is not inserted MEMO For details on how to handle the control card see the Control Card Instruction Manual Operations before Using Copy Functions Press the COPY key The screen on the left appe...

Страница 239: ...re starting to make copies MEMO If you press the COPY key when you are not using the control card the message Insert a control card appears in the touch panel display Insert the control card into the card slot For details see Inserting the Control Card on p 8 2 Operations after the Turning Power ON Press the COPY key The screen on the left appears 1 Press the DEPT ID key and enter the depart ment ...

Страница 240: ...enter the department ID and password again 1 NOTICE If you do not press the ID key after finishing your copy job any additional copies will be totaled under the same department ID which you previously entered Operations after Using Copy Functions Press the ID key The Basic Features screen appears in the touch panel display If the department ID and or password that you entered are wrong the message...

Страница 241: ...printer function is installed Print output from a Mail Box Data is sent to a registered Mail Box NOTICE When the printer function is not installed with the imageRUNNER 400S 330S the Mail Box function can not be used either When the optional expansion memory 32MB or 64MB is not installed with the imageRUNNER 400S 330S the Mail Box can not be used either In order to store documents in a Mail Box you...

Страница 242: ...ail Box Setting Storing on p 4 37 FAX Reset Clear Guide 1 2 3 Error C PRINT I F Error Data GHI ABC JKL M MEMO Depending upon the setting the initial screen for extended functions may appear In this case press the MAILBOX key Using a Mail Box Enter the password and press the OK key 3 MEMO Enter the password used when the Mail Box was stored See Mail Box Setting Storing on p 4 37 If a password has n...

Страница 243: ... stored in the Mail Box Using the Mail Box The machine starts printing 5 MEMO To cancel printing press the CANCEL key Data that has been printed is automatically deleted Select the document you wish to print and press the PRINT key 4 ...

Страница 244: ...eforehand See Mail Box Setting Storing on p 4 37 FAX Reset Clear Guide 1 2 3 Error C PRINT I F Error Data GHI ABC JKL M MEMO Enter the password used when the Mail Box was stored See Mail Box Setting Storing on p 4 37 If a password has not been stored this operation is not required Press the desired Mail Box number MEMO You can directly enter the Mail Box number using the Number keys 0 9 MEMO Depen...

Страница 245: ...Multiple Documents Press the MULTIPLE SELECT key and select the documents you wish to print 4 Press the PRINT key 5 The machine starts printing MEMO To cancel printing press the CANCEL key Date that has been printed is automatically deleted 6 ...

Страница 246: ...g Storing on p 4 37 Select the document and press the DETAILS key After checking the de tailed information press the DONE key 4 MEMO Enter the password used when the Mail Box was stored See Mail Box Setting Storing on p 4 37 If a password has not been stored this operation is not required Press the desired Mail Box number MEMO You can directly enter the Mail Box number using the Number keys 0 9 FA...

Страница 247: ...x beforehand See Mail Box Setting Storing on p 4 37 MEMO Enter the password used when the Mail Box was stored See Mail Box Setting Storing on p 4 37 If a password has not been stored this operation is not required Press the desired Mail Box number MEMO You can directly enter the Mail Box number using the Number keys 0 9 FAX Reset Clear Guide 1 2 3 Error C PRINT I F Error Data GHI ABC JKL M MEMO De...

Страница 248: ...g the Mail Box Erasing a Document from the Mail Box Select the document and press the ERASE key 4 Check the document and press the YES key If you do not wish to erase the document press the NO key 5 Press the DONE key 6 ...

Страница 249: ...orehand See Mail Box Setting Storing on p 4 37 MEMO Enter the password used when the Mail Box was stored See Mail Box Setting Storing on p 4 37 If a password has not been stored this operation is not required Press the desired Mail Box number MEMO You can directly enter the Mail Box number using the Number keys 0 9 FAX Reset Clear Guide 1 2 3 Error C PRINT I F Error Data GHI ABC JKL M MEMO Dependi...

Страница 250: ...ing Multiple Documents Press the MULTIPLE SELECT key and select the documents to erase 4 Check the documents and press the YES key If you do not wish to erase the documents press the NO key 6 Press the DONE key 7 Press the ERASE key 5 ...

Страница 251: ...y 2 After checking the detailed information press the DONE key Repeating this operation returns the display to the Basic Features Screen 3 Checking Detailed Information for Printing Documents Checking Detailed Information for Printing Documents NOTICE You cannot check the copying or Fax status or cancel copying or faxing operation from the print status screen MEMO If FAX functions are also install...

Страница 252: ...d and press the CANCEL key 3 Press the YES key or NO key 4 MEMO The canceled document is displayed as NG on the Printing Job History screen Press the DONE key Repeating this operation returns the display to the Basic Features Screen 2 MEMO If FAX functions are also installed after pressing the SYSTEM MONITOR key select the PRINT MONITOR key ...

Страница 253: ...ry press the DONE key Repeating this operation returns the display to the Basic Features Screen 3 Checking the Printing History MEMO When the document has been printed correctly OK is shown Stop is shown for documents for which printing has been cancelled MEMO If FAX functions are also installed after pressing the SYSTEM MONITOR key select the PRINT MONITOR key ...

Страница 254: ...er if using a cassette when the Finisher E1 is installed it is neccessary to set the Special cassette setting Acceptable copy stock Sheet books 3 dimensional objects Up to 4 4 lb bond or 2 kg Acceptable originals 1 8 on all edges Non image areas 6 seconds max LTR size 100 copying AUTO Exposure Control 1st Drawer top drawer selected First copy time Warm up time 11 17 Maximum original size Paper dra...

Страница 255: ...28 3 8 1296mm 720mm Dimensions when the DADF A1 is attached and the original output tray and copy tray are extended 47 1 2 28 3 8 1195mm 720mm Dimensions when the DADF A1 is not attached and the original output tray and copy tray are extended Approx 217 lb 98 5 kg imageRUNNER 400N 330N Approx 183 lb 83 4 kg imageRUNNER 400S 330S Direct 1 1 000 100 Reduction 1 0 786 LGL LTR 1 0 733 11 17 LGL 11 15 ...

Страница 256: ...Image Quality A p 2 26 B Basic Features Screen p 3 BOOKLET p 3 11 C Cassette Feeding Unit R1 p 7 5 Cassette Feeding Unit S1 p 7 3 CLEAR key p 1 4 Collate p 2 39 Common Functions p 4 2 Consumables p 5 12 Control Card p 8 2 Control panel power switch p 1 4 Control Panel p 1 4 COPY EXPOSURE p 2 24 COPY key p 1 4 Copy Ratio by p 2 9 COPY TOTALS p 4 21 Custom Settings for Copying FAX and Printing p 4 6...

Страница 257: ... p 3 FEEDER CLEANING p 6 17 Finisher C1 p 7 16 Finisher E1 p 7 34 FINISHER p 2 39 Flow of Copy Operations p 1 9 FRAME ERASE p 3 16 G Group p 2 39 Guide Function Screen p 7 GUIDE key p 1 4 H Horizontal placement p 1 11 I ID key p 1 4 IMAGE COMB p 3 20 IMAGE REPEAT p 3 30 IMAGE SEPARATION p 3 24 INITIALIZE CUSTOM COMMON SETTINGS p 4 24 INITIALIZE CUSTOM COPY SETTINGS p 4 36 INTERRUPT key p 1 4 INTER...

Страница 258: ...of Originals p 1 11 Output indication function p 7 32 OVERLAY p 3 7 P Paper Deck B1 p 7 7 Paper jams p 6 2 PAPER SELECT p 2 2 Paper Supply Indicator Function p 4 4 Parts and Their Function p 1 2 Photo Mode p 4 33 Placing Originals p 1 11 Power indicator p 1 4 Print Monitor Screen p 5 PRINT MONITOR p 3 PRINT I F key p 1 4 Q Quantity of Copy p 2 27 R RECALL p 3 39 Reducing Originals p 2 8 RESET key ...

Страница 259: ...y p 1 4 System Configuration p 7 2 SYSTEM MONITOR p 3 T 2 ON 1 p 3 20 2 TO 4 2 1 SIDED p 3 25 TIME UNTIL UNIT QUIETS DOWN p 4 26 Toner box p 5 8 Touch Panel Display p 3 Touch panel p 1 4 TRACING PAPER CASSETTE SETTINGS p 4 10 TRANSP INTERLVING p 3 4 Troubleshooting Chap 6 TWO PAGE SEPARATION p 3 2 Two Sided Copying p 2 33 V Vertical placement p 1 11 X XY ZOOM different XY copy ratio p 2 16 Z ZOOM ...

Страница 260: ......
Отзывы: