


Handling rolls
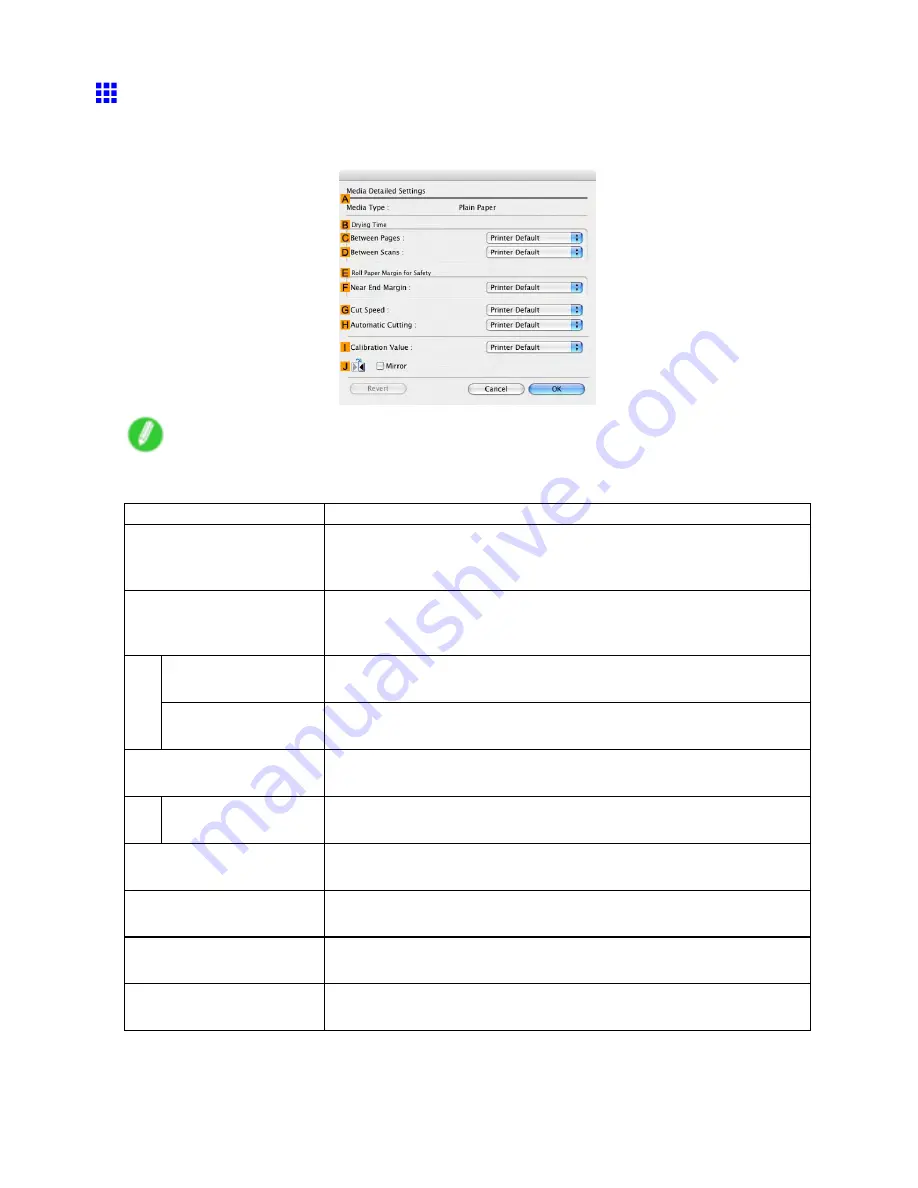
Media Detailed Settings Dialog Box (Mac OS X)
The
Media Detailed Settings
dialog box offers the following settings. For details on settings items, refer to
the printer driver help.
Note
•
To display the
Media Detailed Settings
dialog box, on the
Main
Pane (Mac OS X) (→P.564) , click
Settings
by
Media Type
.
Setting Item
Description
A
Media Type
Select the paper type.
For information on the types of paper the printer supports, refer to the Paper
Reference Guide . (→P.167)
B
Drying Time
Specify the time that the printer waits for ink to dry, as needed. The
Drying
Time
setting is only valid for rolls.
(→P.196)
C
Between Pages
Specify the time the printer waits after printing a page until ejecting the
paper, as needed.
D
Between Scans
Specify the time the printer waits after printing a line on the page until
printing the next line, as needed.
E
Roll Paper Margin for
Safety
You can specify the length of a margin on the leading edge of paper to
ensure that paper susceptible to curling is held rmly against the Platen .
F
Near End Margin
Specify the length of the
Near End Margin
(the leading edge margin) of the
roll, as needed.
G
Cut Speed
Select the speed of automatic cutting, as needed. You can adjust this setting
if paper is not cut well when automatic cutting is used.
H
Automatic Cutting
You can activate or deactivate
Automatic Cutting
and printing of cut lines,
as desired. In this list, specify
Yes
,
No
, or
Print Cut Guideline
.
I
Calibration Value
You can specify whether to apply the results of calibration performed on the
printer to image processing.
J
Mirror
Specify whether to print a mirror image, as needed. Select this option to print
a version of the document or image with the left and right sides inverted.
Handling Paper 207
Содержание imagePROGRAF IPF9100
Страница 1: ...User Manual ENG Large Format Printer ...
Страница 2: ......
Страница 105: ...Hard Disk Note Enter a password if one has been set 2 Select the print job in the list and click Move Printer Parts 91 ...
Страница 124: ...Hard Disk 2 Select the saved job in the list and click Delete For details refer to the RemoteUI help 110 Printer Parts ...
Страница 240: ...Output Stacker 3 Push in the left and right Basket Arms toward the back all the way until they stop 226 Handling Paper ...
Страница 731: ...Cleaning the Printer 4 Plug the power cord into the outlet Maintenance 717 ...
Страница 811: ......
Страница 812: ... CANON INC 2007 ...


