Chapter 1
1-65
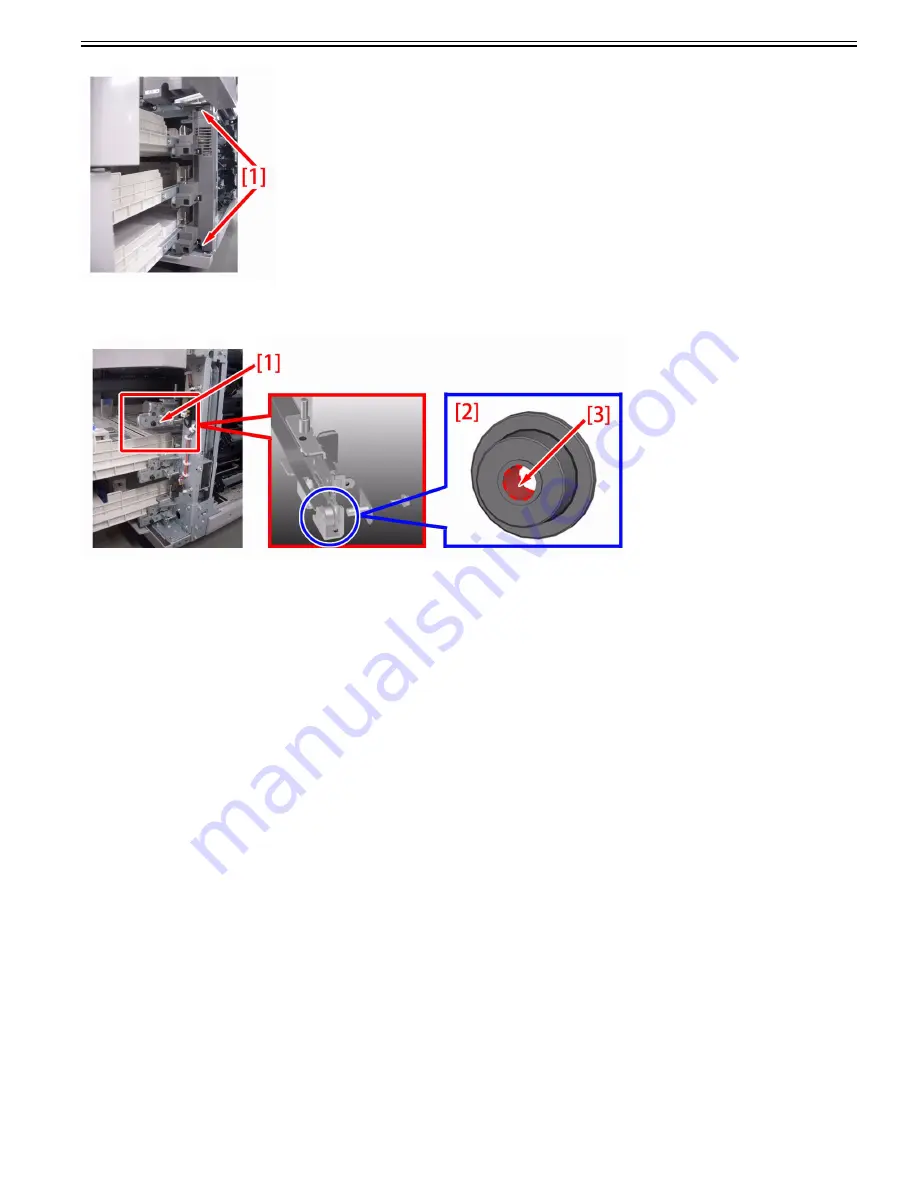
3-5) Remove the screw [1], remove the rail roller [2] from the right cassette rail unit and apply the grease in an amount of a grain of rice on inner periphery [3] of
the roller.
3-6) Reassemble the parts in reverse order from the step 3-5).
4) Install the cassettes in reverse order from the step 1-2).
5) Open and close the cassettes to see if the symptom does not occur.
[Additional part]
HY9-0007 MOLYKOTE EM-50L GREASE
1.1.4 Network
1.1.4.1 Connection Problem
1.1.4.1.1 Unable to obtain device status/Unable to print/Unable to login using log in when immediately recovering from
Deep Sleep
0031-7154
[ Manual-related ]
Description
Immediately after recovering from Deep Sleep, the device status cannot be obtained. Also, printing and log in by a login application failed.
Cause
If you set the network as a loop, data keeps staying in this loop and efficiency of data transfer might be decreased. In order to prevent this symptom, some hubs
have the function called "spanning tree".
If this function is enabled, the device newly connected to the hub can make data communication with network 10 to 50 seconds (time changes due to the conditions)
after the connection.
When the machine enters Deep Sleep mode and then recovers, the machine is temporary disconnected electrically with the network. Therefore, if the machine con-
nects with the spanning tree-installed hub, the machine cannot communicate with network for approximately 1 minute at a maximum after restoring from the Deep
Sleep mode.
Field Remedy
If the machine fails to communicate with the network immediately after recovering from Deep Sleep, perform following remedies.
a) Change settings to avoid entering Deep Sleep
- Settings/Registration > Preferences > Timer/Energy Settings > Sleep Mode Energy Use > High
b) Disable the spanning tree function of the hub
c) Use the hub which supports Rapid Spanning-Tree Protocol (RSTP) that resolved this issue
1.1.5 Jam (Main Unit)
1.1.5.1 0210/020F jam code due to feeding an envelope
0031-8387
[ Verified by Canon Inc. ]
Symptom
When an envelope is fed, 0210 or 020F jam may occur.
Содержание imagePRESS C800 Series
Страница 1: ...Dec 2 2014 Troubleshooting Guide imagePRESS C800 Series...
Страница 2: ......
Страница 6: ......
Страница 8: ......
Страница 9: ...Chapter 1 Correcting Faulty Images...
Страница 10: ......
Страница 14: ......
Страница 71: ...Chapter 1 1 57 3 Hold the staple case by its left and right sides and lower the bracket on the staple case...
Страница 101: ...Chapter 1 1 87 1 Feeding Direction 2 Print Side Down b If you are using No 10 COM10 ISO C5 DL Monarch or Yougatanaga 3...
Страница 110: ...Chapter 1 1 96 Feeding Direction b If you are using No 10 COM10 Monarch DL ISO C5 or Yougatanaga 3...
Страница 112: ...Chapter 1 1 98 Feeding Direction b If you are using No 10 COM10 Monarch DL ISO C5 or Yougatanaga 3...
Страница 114: ...Chapter 1 1 100 7 2 Select the envelope type press OK...
Страница 165: ...Chapter 1 1 151 3 Pull the Tray all the way out...
Страница 167: ...Chapter 1 1 153 5 Remove the Waste Toner Container...
Страница 172: ...Chapter 1 1 158 2 Pull out the staple cartridge holding it by the green tab...
Страница 173: ...Chapter 1 1 159 3 Replace the staple case Remove the old staple case 1 Insert a new staple case 2...
Страница 180: ...Chapter 1 1 166 5 Push in the new staple case until it clicks to insert it...
Страница 181: ...Chapter 1 1 167 6 Close the Cover for the saddle stitch staple cartridge...
Страница 194: ...Chapter 1 1 180 4 Clean the surface A of the Fixing Inlet Guide with lint free paper 1 moistened with alcohol...
Страница 199: ...Chapter 1 1 185 b 1 Take out the Waste Toner Container 1...
Страница 201: ...Chapter 1 1 187 b 2 Install the Waste Toner Joint 1 to the Waste Toner Container 2...
Страница 202: ...Chapter 1 1 188 b 3 Put the Waste Toner Bag 1 on the Waste Toner Joint and fix it with the Waste Toner Band 2...
Страница 206: ...Chapter 1 1 192 b 9 Remove the Prism 1 1 Screw 2 1 Hook 3...
Страница 207: ...Chapter 1 1 193 b 10 Clean the toner adhered to the 2 A parts on the prism...
Страница 208: ...Chapter 1 1 194 b 11 Clean the toner adhered to the A part of the Waste Toner Container...
Страница 210: ...Chapter 1 1 196 2 Pull out the punch waste tray...
Страница 212: ...Chapter 1 1 198 3 Discard the punch waste into a receptacle Make sure that the punch waste tray is completely emptied...
Страница 216: ...Chapter 1 1 202 2 Below the stapler unit is the staple waste tray Pull out the staple waste tray...
Страница 217: ...Chapter 1 1 203 3 Discard the staple waste...
Страница 239: ...Chapter 1 1 225 3 Press Memory Media 4 Select the target memory media...
Страница 240: ...Chapter 1 1 226 5 Select the storage destination folder and then press Scan 6 Specify the desired scan settings...
Страница 250: ...Chapter 1 1 236 Select Share files and folders using SMB Windows Select the account to be used...
Страница 255: ...Dec 2 2014...
Страница 256: ......


