Chapter 1
1-51
- No: A job for the pages scanned into memory is canceled. Scan the whole pages again.
[Reference]
Delete the unnecessary files stored in the Mail Box and Fax/I-Fax Inbox in the case of frequent display of memory full.
1.1.3.4 Other Defect
1.1.3.4.1 Saddle stitch position of the paper are not exactly in the middle of the booklet / Folds of the paper are not exactly
in the middle of the booklet (Saddle Finisher -AM2)
0031-5507
[ Manual-related ]
Description
If you are using the Saddle Stitch mode of the Saddle Finisher-AM2, and you notice that the folds of the paper are not exactly in the middle of the booklet or the
saddle stitch position of the paper are not exactly in the middle of the booklet, you can make adjustments to the saddle stitch fold placement or saddle stitch position
to compensate for this error.
[Caution]
- If you want to adjust both the stitch position and the fold placement, adjust the stitch position first, and then adjust the fold placement. To adjust the fold placement,
see "Saddle Stitch Fold Placement Adjustment."
- If both the stitch position and the fold placement are in the center of the paper after adjusting the stitch position, the adjustment of the fold placement is not nec-
essary.
Field Remedy
a) Change Fold/Stitch Position
1) Press Settings/Registration > Adjustment/Maintenance > Adjust Action > "Change Fold/Stitch Position".
2) Select the paper size to change > adjust the saddle stitch position by pressing up or down arrow key > press OK.
b) Adjust Saddle Stitch Fold Position
1) Press Settings/Registration > Adjustment/Maintenance > Adjust Action > "Adjust Saddle Stitch Fold Position".
2) Select the paper size to change > adjust the saddle stitch fold placement by pressing up or down arrow key > press OK.
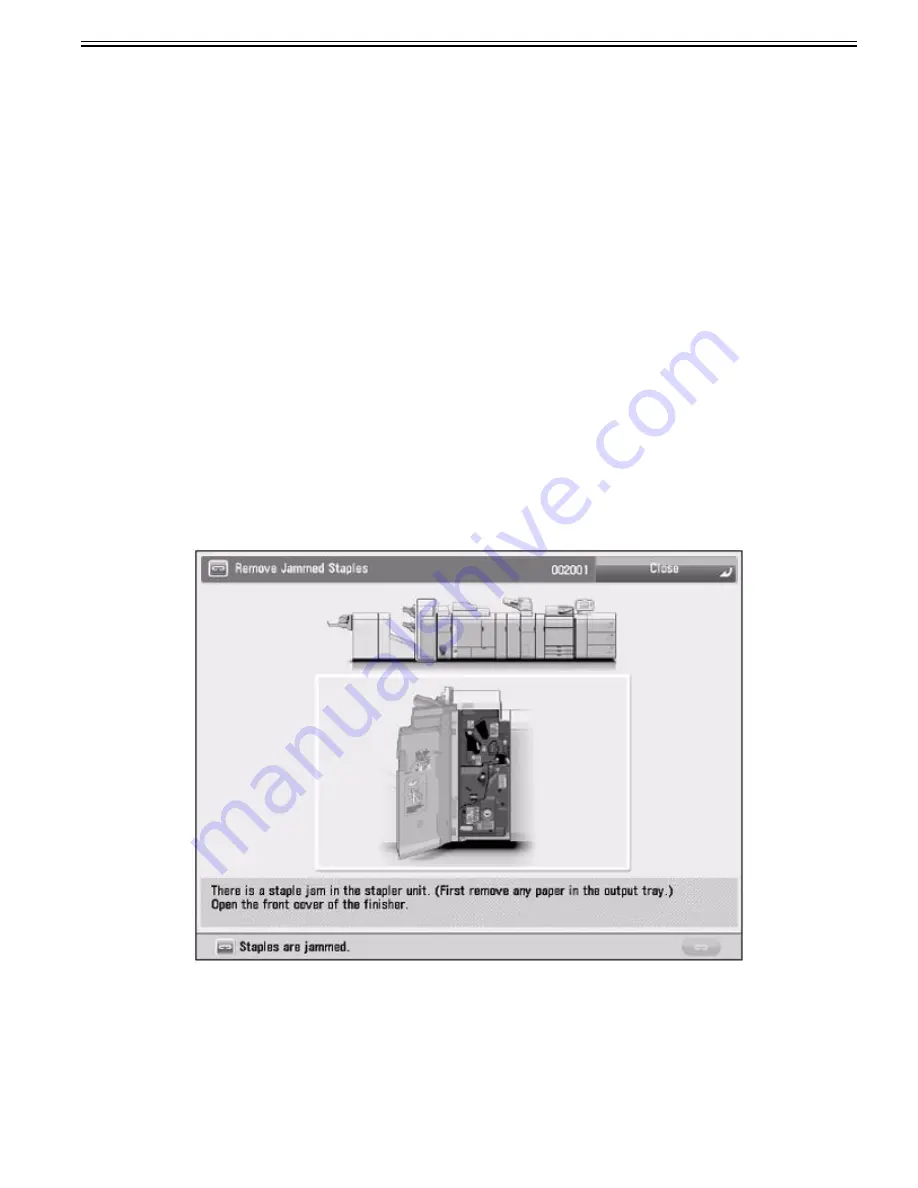
1.1.3.4.2 How to clear a staple jam which occures in staple unit (Finisher-AM1/Saddle Finisher-AM2)
0031-5513
[ Manual-related ]
Description
If a staple jam occurs, the location of a staple jam and procedures for
clearing the jam are displayed.
If you press [Close], you can continue operations, such as scanning originals, even if the jammed paper is not removed.
[Caution]
Take care when handling the optional equipment that is attached to the machine. When an optional unit's cover is opened to replace a staple cartridge, discard the
punch waste, discard the trim waste, discard the staple waste, or clear paper or staple jams, prints may still be output if other optional units are operating normally,
and are not involved in the paper or staple jam removal procedure.
Field Remedy
1) Remove the paper waiting to be stapled from the delivery tray.
Содержание imagePRESS C800 Series
Страница 1: ...Dec 2 2014 Troubleshooting Guide imagePRESS C800 Series...
Страница 2: ......
Страница 6: ......
Страница 8: ......
Страница 9: ...Chapter 1 Correcting Faulty Images...
Страница 10: ......
Страница 14: ......
Страница 71: ...Chapter 1 1 57 3 Hold the staple case by its left and right sides and lower the bracket on the staple case...
Страница 101: ...Chapter 1 1 87 1 Feeding Direction 2 Print Side Down b If you are using No 10 COM10 ISO C5 DL Monarch or Yougatanaga 3...
Страница 110: ...Chapter 1 1 96 Feeding Direction b If you are using No 10 COM10 Monarch DL ISO C5 or Yougatanaga 3...
Страница 112: ...Chapter 1 1 98 Feeding Direction b If you are using No 10 COM10 Monarch DL ISO C5 or Yougatanaga 3...
Страница 114: ...Chapter 1 1 100 7 2 Select the envelope type press OK...
Страница 165: ...Chapter 1 1 151 3 Pull the Tray all the way out...
Страница 167: ...Chapter 1 1 153 5 Remove the Waste Toner Container...
Страница 172: ...Chapter 1 1 158 2 Pull out the staple cartridge holding it by the green tab...
Страница 173: ...Chapter 1 1 159 3 Replace the staple case Remove the old staple case 1 Insert a new staple case 2...
Страница 180: ...Chapter 1 1 166 5 Push in the new staple case until it clicks to insert it...
Страница 181: ...Chapter 1 1 167 6 Close the Cover for the saddle stitch staple cartridge...
Страница 194: ...Chapter 1 1 180 4 Clean the surface A of the Fixing Inlet Guide with lint free paper 1 moistened with alcohol...
Страница 199: ...Chapter 1 1 185 b 1 Take out the Waste Toner Container 1...
Страница 201: ...Chapter 1 1 187 b 2 Install the Waste Toner Joint 1 to the Waste Toner Container 2...
Страница 202: ...Chapter 1 1 188 b 3 Put the Waste Toner Bag 1 on the Waste Toner Joint and fix it with the Waste Toner Band 2...
Страница 206: ...Chapter 1 1 192 b 9 Remove the Prism 1 1 Screw 2 1 Hook 3...
Страница 207: ...Chapter 1 1 193 b 10 Clean the toner adhered to the 2 A parts on the prism...
Страница 208: ...Chapter 1 1 194 b 11 Clean the toner adhered to the A part of the Waste Toner Container...
Страница 210: ...Chapter 1 1 196 2 Pull out the punch waste tray...
Страница 212: ...Chapter 1 1 198 3 Discard the punch waste into a receptacle Make sure that the punch waste tray is completely emptied...
Страница 216: ...Chapter 1 1 202 2 Below the stapler unit is the staple waste tray Pull out the staple waste tray...
Страница 217: ...Chapter 1 1 203 3 Discard the staple waste...
Страница 239: ...Chapter 1 1 225 3 Press Memory Media 4 Select the target memory media...
Страница 240: ...Chapter 1 1 226 5 Select the storage destination folder and then press Scan 6 Specify the desired scan settings...
Страница 250: ...Chapter 1 1 236 Select Share files and folders using SMB Windows Select the account to be used...
Страница 255: ...Dec 2 2014...
Страница 256: ......


