background image

7. Processing the Image (QA Mode Screen)

 – 74 –

3

Set the REX.

Touch   or   to select a setting from

1 to 16383

.

Or, touch the frame and enter the value from the ten key window.
The larger the number, the lighter the entire image. The smaller the number, the darker 
the entire image.

BONE #2

The low density area can be seen almost the same as in BONE 
#1. However, soft tissue in a high density area can be observed 
more clearly.

CHEST #2

This is the version of the CHEST gray scale curve that 
supports high contrast.

BONE #3

This is the version of the BONE #1 gray scale curve that 
supports high contrast.

BONE #4

This is the version of the BONE #2 gray scale curve that 
supports high contrast.

REX usage examples

To observe over time a patient whose image has been taken before, take the image 
using the same exposure conditions, contrast, and gray scale curve as before.
You can also observe under the same conditions by setting the gray scale to REX 
ADJUST. and setting the REX to the same value as before.

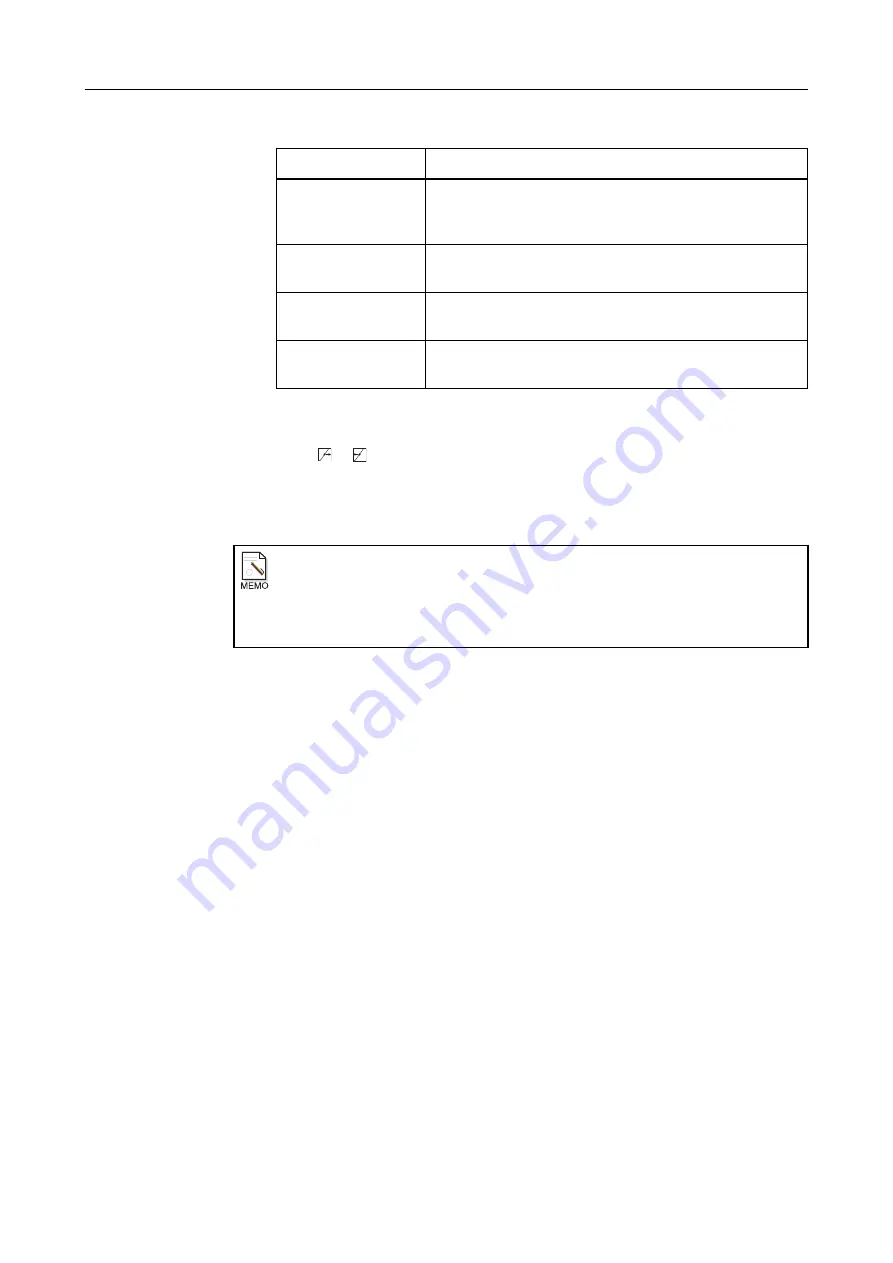
Table 7.4.2: Gray scale Curves and Their Characteristics

Name

Features

Содержание CXDI-1

Страница 1: ...the instrument be sure to read this manual thoroughly Also read the manuals of other instruments in this system Keep the manual where it is easily accessible Canon CXDI 1 System Digital Radiography Operation Manual ...

Страница 2: ...ks of Microsoft Corporation in the United States and or other countries Ethernet is a trademark of Xerox Corporation Swiss 721 is a trademark of Bitstream Inc Swiss 721 is copyright 1991 1998 Bitstream Inc and have been licensed to Canon Inc TrueType is a trademark of Apple Computer Other systems and product names in this manual are the trademarks of each manufacturer that developed them This soft...

Страница 3: ...lecting and Changing the Exposure Mode 15 2 2 1 Selecting an Exposure Mode 15 2 2 2 Changing Generator Parameters after Exposure Mode Selection 18 2 3 Taking an Image 20 2 3 1 Starting Exposure 20 2 3 2 Cancelling the Exposure 22 2 3 3 Displays after Exposure 23 2 4 Operations from the Exposure Ready Condition 25 2 4 1 Operations from the Exposure Ready Condition 25 2 4 2 Selecting Image Output De...

Страница 4: ... 58 6 4 1 Deleting All the Images 58 6 4 2 Selecting and Deleting Study Images 58 6 5 Reproducing the Image s 59 6 5 1 Resending the Image 60 6 5 2 Resending the Study Images 61 Processing the Image 63 7 Processing the Image QA Mode Screen 65 7 1 Displaying the QA Screen 65 7 2 Operations Available on QA Screen 66 7 3 Adjust TRIM and Adjust ROI 68 7 3 1 Trimming the Image 68 7 3 2 Changing the Den...

Страница 5: ...etting the Parameters 97 8 2 Performing Calibration 99 9 Self test 103 9 1 Self test using a sensor unit with a removable grid unit 103 9 2 Self test using the sensor unit with a grid unit which cannot be removed CXDI 40G COMPACT 106 Troubleshooting 109 10 Before Calling a Service Engineer 111 10 1 Fatal Error 112 10 2 Alert 113 10 3 Error 114 10 4 Warning 119 10 5 Attention 122 11 Questions and A...

Страница 6: ...ion Reason During a Study 139 B 2 4 Cancelling a Rejected Image During a Study 140 B 3 Operations after a Study is Completed 142 B 3 1 Cancelling a Rejected Image and Outputting Again 142 B 3 2 Rejecting an Image and Outputting Again 144 B 3 3 Changing the Rejection Reason and Outputting Again 146 C Using the Sensor Unit Attach Detach Function 149 C 1 Attach Detach Function of the Sensor Unit 149 ...

Страница 7: ...t and REX ADJUST right Notation 2 Buttons that do not change names when pressed but switch between normal and highlighted white character displays indicate that a function has been enabled Example Each time you touch EDGE ENHANCEMENT the button switches between a highlighted display white characters and a normal display edge enhancement adjustments are enabled when highlighted Operation When EDGE ...

Страница 8: ...tting is presented on another page the chapter is indicated by page number Note that when Setup Guide is written please refer to the separate Setup Guide Example Touch PRINT SETTING Setup Guide Description Printer settings are provided in detail in the Setup Guide Notation 5 When an operation or description in a chapter continues from an odd numbered page to an even numbered page Continued on the ...

Страница 9: ...Starting Up Shutting Down 1 Starting Up Shutting Down the CXDI ...

Страница 10: ... 2 Notes on Starting Up Shutting Down the CXDI When Turning OFF the Power Never turn OFF the power during the shutdown process This may result in hardware failure or loss of data ...

Страница 11: ... OFF or if HELLO DIALOG Setup Guide is set to DISPLAY Welcome Message Window 2 Close the welcome message Touch CLOSE to close the welcome message When the LOGIN screen appears Depending on the installation setup by a service engineer the LOGIN screen page 131 may be displayed when the CXDI is started up Input the user name and password then touch OK To disable displaying the Welcome message at sta...

Страница 12: ...s displayed only with sensor units CXDI 11 CXDI 12 and CXDI 22 4 The progress bars are displayed when using a sensor unit which has a direct Ethernet connection to a PC PATIENT button Output indicator Preview image buttons Present date and time MULTI VIEW button Sending images after exposure DESTI PREF button CHANGE button Patient data area Exposure condition parameters 3 Message area 1 Study desc...

Страница 13: ...mation message Are you sure you want to shutdown the system will be displayed Touch OK 3 Turn off the power A window opens with the message It is now safe to turn off the power Refer to the hardware manual and turn OFF the power Depending on the type of hardware used the power may turn OFF automatically after the message appears Difference between SHUTDOWN and SHUTDOWN after trans Touching SHUTDOW...

Страница 14: ...he system if restarting is required after changing settings etc 1 Display the System screen Touch SYSTEM on the exposure screen 2 Select CXDI RESTART Touch CXDI RESTART A window will open and the confirmation message Do you want to restart the CXDI will be displayed Touch OK ...

Страница 15: ...Exposure and Output 2 Taking an Image 3 Output Control Process Viewer ...

Страница 16: ...the camera is left in the READY condition Therefore touch CANCEL or END STUDY to cancel the exposure 3 Never press the exposure button on the x ray generator while you are performing operations from the operation unit This may result in freezing the system and data may be lost 4 Never press the exposure button on the x ray generator when READY is not indicated in the message area 5 After x ray exp...

Страница 17: ...e screen tray type screen or category type screen is displayed Exposure Screen Category Type Screen CXDI exposure starts from this exposure screen Basically all you have to do to take an image is enter patient data and then select an exposure mode The taken image will appear and can be checked on the operation unit Preview Image Screen The following pages describe the exposure modes and methods fo...

Страница 18: ...anging the Exposure Mode 2 3 Taking an image Preview Image 2 4 Operations from the Exposure Ready Condition 2 5 END STUDY Retake CANCEL RETAKE No Display of Preview Image CANCEL END STUDY Next exposure after changing patient data Next exposure without changing patient data Display Preview Image Exposure ...

Страница 19: ... the cursor and enter the name in 63 or fewer alphanumeric characters 3 Enter the ID Required Touch the frame to display the cursor and enter the ID in 32 or fewer alphanumeric characters 4 Enter the accession number Optional depending on the setting Touch the frame to display the cursor and enter the accession number in 16 or fewer alphanumeric characters Depending on the installation setup by a ...

Страница 20: ...culated and displayed automatically in the Age field if Automatically Calculate Age in PATIENT INFO Setup Guide has been set to CALC If the patient is less than one year old the age will be displayed as 0 Directly entering the patient s age Depending on PATIENT INFO settings Setup Guide the patient s age can be entered directly without entering a birth date Touch the Age field move the cursor and ...

Страница 21: ...n Automatically show study data input screen has been selected the study information screen will appear instead When items set to ESSENTIAL in ESSENTIAL DATA have not been entered a warning message will appear Study information saved during study When new values other than the study description are entered at the study information screen during the study the entered values will be automatically sa...

Страница 22: ...om a Magnetic Card Reader optional unit Please contact your Canon representative or distributor 2 1 3 Acquiring Data by HIS RIS or from a Database File Please contact your Canon representative or distributor Study Description button display When study description is set to ENABLE in STUDY INFO Setup Guide the study description will be constantly displayed in the exposure screen or it will appear a...

Страница 23: ...r unit button 2 Touch the required exposure mode button on the tray On the category type screen touch the category tab of the category in which the required exposure mode is found If there are six or more categories use or to scroll through them Case when exposure mode is selected automatically When AUTO PRESS Setup Guide has been set to ENABLE the sensor unit and exposure mode will be selected au...

Страница 24: ... window will open and the message Printer settings have changed Set the printer settings again will appear Touch OK to open the print setting window Setup Guide and change the settings as required When a warning message concerning the grid appears If the grid of the sensor unit is replaceable it is possible to register whether to display the grid warning message for each exposure mode when editing...

Страница 25: ...xposure the message area turns green and READY will appear in the message area On the tray type screen the image display area also turns green Exposure Screen Tray Type Changing the Exposure Mode If you have selected the wrong exposure mode touch the correct button again to select the correct exposure mode ...

Страница 26: ...parameters 4 Save the parameters as necessary To save the current conditions as default parameters for the chosen exposure mode touch SAVE PARAM 5 Return to the exposure screen Touch OK If the values of the parameters do not change successively If ENABLE has been selected in PARAMETER TABLE Setup Guide only the values set there will be available as options Entering a password If a window opens and...

Страница 27: ...dition of the exposure screen will be canceled Note however that if SAVE PARAM has been applied for changed values values changed will be loaded when selecting the exposure mode Changing the exposure parameters on the tray type screen On the tray type screen the exposure parameters can also be changed by using and They can also be changed by touching the parameter frame and entering the value from...

Страница 28: ... patient Position the patient such that the area to be imaged is within the exposure area of the sensor unit As necessary take a means to keep the patient still 2 Press the exposure button Press the exposure button of the x ray generator when the patient is correctly positioned and READY is displayed on the touchscreen A progress bar will be displayed in the message area and the image will be tran...

Страница 29: ...screen QA screen or preview image screen may be displayed depending on the settings Magnified image screen page 92 When AUTO DISPLAY in MAGNIFY SETTING window Setup Guide is set to DISPLAY the magnified image screen will appear Magnified Image Screen QA Mode Screen page 65 When QA Screen in DISPLAYING PARAMETER CHANGE QA SCREEN DURING EXPOSURE Setup Guide is set to VALID the QA mode screen will ap...

Страница 30: ...n you touch END STUDY page 27 CANCEL RETAKE When retaking an image A window will open and the message Retaking will be canceled To retake select RETAKE on Preview screen To take another image select an exposure mode will be displayed Touch OK Proceed to 2 4 Operations from the Exposure Ready Condition page 25 REX check It is recommended that the REX page 73 always be checked as it may be very diff...

Страница 31: ...edure below to perform image processing or to retake the image QA Process Error 1 Close the window Touch OK 2 Display the image Refer to 4 Browsing Images Preview Image Screen page 35 and display the image 3 Perform one of the following operations Processing the Image Refer to 7 Processing the Image QA Mode Screen page 65 and adjust the parameters Retaking the Image Refer to 4 5 Retaking an Image ...

Страница 32: ...2 Taking an Image 24 If print setting window appears Change the print settings Setup Guide Touching changes the display ...

Страница 33: ...ide is set to SEND Depending on the installation setup by a service engineer the IMAGE DESTINATION window may open automatically when you touch SEND page 27 The image output indicator blinks green during image output To output all the images which have not been output yet and end the exposure of the current patient Touch END STUDY Depending on the installation setup by a service engineer the IMAGE...

Страница 34: ...Preview Image Screen left and Multi View Screen 4 shots screen right To reject a bad image Touch the preview image button and touch Reject on the preview image screen page 40 To change the print settings Touch the preview image button and touch PRINT SETTING Setup Guide on the preview image screen To process the image Touch the preview image button and touch QA on the preview image screen page 65 ...

Страница 35: ... white characters and normal display It is enabled when highlighted 4 Set the output destination Touch OK Close the IMAGE DESTINATION window When DESTI PREF is not displayed Depending on the installation setup by a service engineer DESTI PREF may not be displayed In that case touch SEND or END STUDY to open the IMAGE DESTINATION window Output priority When there are many studies waiting to be outp...

Страница 36: ...t OFF is selected for that printer at the IMAGE DESTINATION window the green film size frame will be displayed in the preview image screen and the image will be trimmed to that film size during output If you wish to output the entire irradiation field settings must be changed by the service engineer ...

Страница 37: ...t blinks green during image output To perform an exposure of the next patient Enter new patient data page 11 To shut down the CXDI Refer to 1 2 Shutting Down the CXDI page 5 and shut down the CXDI Automatic display of the IMAGE DESTINATION window Depending on the installation setup by a service engineer the IMAGE DESTINATION window may open automatically when you touch END STUDY ...

Страница 38: ...2 Taking an Image 30 ...

Страница 39: ... image output process will stop and UNSELECT or MODIFY will be displayed MODIFY will be displayed only when a printer or storage has been selected as the output destination To restart the image output process touch UNSELECT Item Description State IDLE Image is waiting to be output QA Image is being processed SEND Image is being transferred Priority Time Date and time the first image of the patient...

Страница 40: ...er note that if you select OFF and close the window that device will not be displayed and you will not be able to return it to ON the next time the window is opened 5 Set the priority Each time you touch Priority the button switches between highlighted display white characters and normal display The selected study is given output priority when this button is highlighted 6 Close the CHANGE DESTINAT...

Страница 41: ...Viewing the Images 4 Browsing Images Preview Image Screen 5 Viewing Multiple Images Multi View Screen 6 Browsing Completed Studies Study List ...

Страница 42: ...e images of studies that are not displayed in the list are automatically deleted and cannot be reproduced 2 Taking an image immediately after executing RESEND or RESEND ALL places a heavy load on the hardware and may interfere with the exposure Therefore RESEND and RESEND ALL should be executed only after all the exposures have been finished if possible 3 Once images are deleted they cannot be res...

Страница 43: ... From the exposure screen touch SYSTEM SETUP MENU CUSTOMIZE DISPLAY On the CUSTOMIZE DISPLAY screen Setup Guide select DISPLAY for PREVIEW IMAGE Selecting an image from the exposure screen Touch a preview image button However note that Reject PRINT SETTING QA and RETAKE cannot be selected for images that were output by touching SEND Number of the currently displayed image out of the total number o...

Страница 44: ...layed unless a printer has been set as the output destination To process the image Touch QA page 65 To retaking an image Touch RETAKE page 41 To return to the exposure screen Touch OK The system enters the ready condition To view several images of the current patient Touch MULTI VIEW page 43 A green frame indicating the film size or irradiation field will be displayed REX page 73 Film size Orienta...

Страница 45: ...exposure mode will be used Button Description or The previous or the next image will be displayed or The first or the last image will be displayed AEC Automatic Exposure Control area The AEC Setup Guide setting range can be displayed on the preview image screen if the setup has been performed by the service engineer When the AEC display is enabled Disp AEC will appear on the preview image screen T...

Страница 46: ...rity Each time you touch Priority the button switches between highlighted display white characters and normal display The selected study is given output priority when this button is highlighted When DESTI PREF is not displayed Depending on the installation setup by a service engineer DESTI PREF may not be displayed In these cases touch OK to close the preview image screen then touch END STUDY at t...

Страница 47: ...4 Browsing Images Preview Image Screen 39 4 Set the output destination Touch ON OFF and select ON for the device to which the image is to be output 5 Close the IMAGE DESTINATION window Touch OK ...

Страница 48: ... output destination is limited to local temporary storage 1 Display the preview image screen Preview Image Screen 2 Reject the image Each time you touch Reject the button switches between highlighted display white characters and normal display The image is rejected when this button is highlighted An image that has been rejected cannot be retaken and print settings cannot be made In addition a red ...

Страница 49: ...review image screen Preview Image Screen 2 Select RETAKE Touch RETAKE A window will open and the confirmation message The original image will be rejected Do you want to retake the image will be displayed Touch OK The exposure screen appears and the system enters the ready condition with the same exposure mode selected as that used for the current image You cannot select a different exposure mode f...

Страница 50: ...ode will be rejected n is the exposure number of the valid image will be displayed Touch OK Also you can invalidate all the valid images from the preview image screen When image processing parameters have been changed before retaking the image When parameters are changed on the QA screen after exposure and then RETAKE is touched to retake an image the parameters used are as follows Changes made to...

Страница 51: ...g the images From the exposure screen touch SYSTEM SETUP MENU CUSTOMIZE DISPLAY to display the CUSTOMIZE DISPLAY screen Setup Guide then set the number of images to be displayed on the preview image screen to 4 SHOTS 1 or 9 SHOTS 1 2 Display the Multi View screen Touch MULTI VIEW on one of the exposure screen preview image screen or CALL IMAGES screen select CALL IMAGES in the study list Multi Vie...

Страница 52: ...e Print information Film size film orientation multi format layout are displayed Print preview image This displays the image that was cut to the film size shown in the print information Rejected images are not displayed The display order is the printer setting order Printer 1 and Printer 3 first Printer 2 and Printer 4 last and this becomes the output number order Number of films This displays the...

Страница 53: ...46 To reject a bad image Directly touch the image to be rejected to open the window page 47 To display a preview image Directly touch the image to open the window page 47 Images output using SEND AFTER EXPOSURE Images that have been output using SEND AFTER EXPOSURE Setup Guide will appear in sepia tone and the window will not open even if these images are touched directly ...

Страница 54: ... the Output Order Change the output number The images will be output to output destinations other than a printer in the order they were taken 1 Open the window Directly touch an image on the right side of the screen to open the window 2 Change the output number Change the number using or 3 Determine the output number Touch OK The image output number will change as will the output number of the rem...

Страница 55: ...that image cannot be changed but the output order of the other images will change However when an image that was rejected as a result of retaking is made the valid image a window will open and the confirmation message The No n image Exposure Mode will be rejected n is the exposure number of the valid image will be displayed Touch OK Reject 5 3 3 Checking Images on the Preview Image Screen 1 Open t...

Страница 56: ...before the Exposure 1 Display parameter changing screen Select exposure mode then touch CHANGE on the exposure screen 2 Open the print setting window Touch PRINT SETTING on the parameter changing screen 3 Set the multi format Touch the multi format button on the print setting window to open the multi format window and set the format Multi Format Window 4 Take multiple images using the set multi fo...

Страница 57: ...ilm In addition a preview of the output number 3 and 4 images can be displayed by touching below the print preview Multi Format 5 4 2 Choosing Multi Format after the Exposure The method for changing the print setting after the exposure is described below 1 Display the preview image screen or the CALL IMAGES screen Display the preview image screen page 35 or the CALL IMAGES screen page 59 2 Open th...

Страница 58: ...images are assigned to one film In comparison when only the first two images can be printed in multi format the number of divisions is set to 2x2 for the first and second image but the number of divisions for the third image is set to 1x1 As a result only the first and second images are assigned to one film 2 When a different reduction ratio has been selected If a different reduction ratio is incl...

Страница 59: ...ever if any of images 2 to 5 are reproduced and printed images 2 to 5 are all assigned to one film at 2x2 and output Furthermore if LOCAL TEMP STORAGE STORAGE or EXTERNAL DISK STORAGE has also been selected as the destination images 2 through 5 will be output to it Image1 Multi format 1x1 Image2 Multi format 2x2 Image3 Multi format 2x2 Image4 Multi format 2x2 Image5 Multi format 2x2 RESEND RESEND ...

Страница 60: ...5 Viewing Multiple Images Multi View Screen 52 ...

Страница 61: ...cation where the image is stored If the images are saved in multiple locations click Storage destination folder the currently selected folder name is displayed to select it from the list Touch the name of the folder to be referenced to display the studies stored in that folder 3 Select the study If there are more than 12 studies use and to scroll through the list In addition touch the display item...

Страница 62: ...ist Setup Procedure To add an item to the study list Select an item in the Unused Column and touch Add to move that item to the Used Column To delete an item from the study list Select an item in the Used Column and touch Delete to move that item to the Unused Column To change the position of an item in the list Select an item in the Used Column and touch Up or Down to change the display order Ite...

Страница 63: ...t device name A Trans Result Successful A transfer request was sent but the transfer failed A transfer request was not sent B Cnt of Success Trans However 9 or more times will be indicated by C Transfer count display However 99 or more times will be indicated by Item Previous Trans Result Cnt of Success Trans Trans Result device name A B A C Description If a list in an external storage medium is d...

Страница 64: ... can be selected UNSELECT and RANGE will also appear To select a series of successive studies touch RANGE to highlight the button white characters To cancel all of the selections touch UNSELECT 3 RESEND ALL window appears Touch RESEND ALL RESEND ALL Window 4 Select a device for sending the image Touch ON OFF next to the destination name and select ON for the device for sending the image ON OFF wil...

Страница 65: ...ppears If the output location is different from that at exposure when the study is resent a window opens with a message In this window touch Cancel to close the window and then go to output location settings Setup Guide to check the settings Message Examples ...

Страница 66: ... 2 Select DELETE Touch DELETE A window will open and the confirmation message Do you want to delete it will be displayed Touch OK Entering password If a window opens and password entry Setup Guide is requested touch the password frame to display the password screen and enter the password To select multiple studies When multiple studies can be selected UNSELECT and RANGE will also appear To select ...

Страница 67: ...ttons have the following functions To display the multi view screen Touch MULTI VIEW to switch to the multi view screen page 43 To display the QA screen Touch QA to switch to the QA screen page 65 To change the print settings Touch PRINT SETTING Setup Guide to open the print setting window PRINT SETTING will not be displayed unless a printer has been set as the output destination To resend only th...

Страница 68: ... Touch RESEND RESEND Window 2 Select the device for sending the image Touch ON OFF next to the destination name and select ON for the device for sending the image ON OFF will not be displayed for devices with invalid settings Setup Guide 3 Set the priority Each time you touch Priority the button switches between highlighted display white characters and normal display The selected study is given ou...

Страница 69: ...you touch Priority the button switches between highlighted display white characters and normal display The selected study is given output priority when this button is highlighted 4 Resend the study Touch RESEND ALL If all images contained in a study are rejected If you touch RESEND or RESEND ALL after all images contained in a study were rejected page 40 a window will open and the confirmation mes...

Страница 70: ...6 Browsing Completed Studies Study List 62 ...

Страница 71: ...Processing the Image 7 Processing the Image QA Mode Screen ...

Страница 72: ... the parameters of the edge enhancement process or DEP are set to excessively high values artifacts may occur and the useful information in the image may be degraded If you think the image looks as if it has been over processed set the parameters to lower values or void the process ...

Страница 73: ...of the following ways QA Mode Screen To set the QA mode screen to appear automatically after the exposure From the exposure screen select SYSTEM SETUP MENU SYSTEM SETUP and in the DISPLAYING PARAMETER CHANGE QA SCREEN DURING EXPOSURE set the QA Screen to VALID To perform QA processing after the exposure Touch QA on the preview image screen page 35 To perform QA processing after completing the stud...

Страница 74: ...g Standard Frequency Processing MLT F Frequency Processing MLT M Frequency Processing and MLT S Frequency Processing LUT Tab To set the image processing parameters Touch the tabs to set the parameters The parameters cannot be changed for images loaded from external storage media in the study list To adjust the trimming area or density adjustment area page 68 Touch Adjust TRIM Adjust ROI to select ...

Страница 75: ...processed from the study list To use the image processing software To use the image processing software touch STD FREQUENCY to open the window and then select MLT F FREQUENCY MLT M FREQUENCY or MLT S FREQUENCY NOTE Advance setting by a service engineer is required to use MLT F FREQUENCY or MLT M FREQUENCY For the operating procedures of the image processing software refer to the operation manual s...

Страница 76: ...trimming the trimming area becomes the film size 2 Select ADJUST TRIM Touch ADJUST TRIM ADJUST ROI and select ADJUST TRIM 3 Set the trimming area Touch two points on the image The new trimming area is indicated by a red line Limitations on trimming areas The following limitations apply to trimming areas After a printer is set no settings can be made that exceed the printable size If an area of les...

Страница 77: ...T ROI 2 Set the density adjustment area Touch two points on the image The area you have selected will be indicated by a reddish purple frame The reference point is changed and the density of the entire image changes 3 Exit the screen Touch OK Annotations When you change the image trimming range annotations fixed or free may be out of the image Changing the gray scale When AUTO ADJUST is touched to...

Страница 78: ... and REX adjustment Reached EXposure index and the type can be selected using AUTO ADJUST REX ADJUST AUTO ADJUST left and REX ADJUST right 7 4 1 AUTO ADJUST The gray scale is adjusted based on the Fixed ROI Setup Guide or analysis value calculated from the Automated ROI See Setup Guide for details about the ROI 1 Select AUTO ADJUST Touch AUTO ADJUST REX ADJUST and select AUTO ADJUST LUT graph The ...

Страница 79: ... linear lookup table INV LINEAR This lookup table reverses the image density STAN CONTRAST This is a standard S shape curve It is usually used for examining bones BONE 1 While maintaining contrast in a low density area soft tissue can be observed in the high density area BONE 2 A low density area can be seen almost the same as in BONE 1 However soft tissue in the high density area can be observed ...

Страница 80: ...trast and lower values result in lower contrast Table 7 4 1B Setting Values Density Setting 1 2 3 4 5 6 7 8 9 10 Density 0 3 0 4 0 5 0 6 0 7 0 8 0 9 1 0 1 1 1 2 Setting 11 12 13 14 15 16 17 18 19 20 Density 1 3 1 4 1 5 1 6 1 7 1 8 1 9 2 0 2 1 2 2 Setting 21 22 23 24 25 26 27 28 29 Density 2 3 2 4 2 5 2 6 2 7 2 8 2 9 3 0 3 1 Brightness By adjusting the brightness the density of the whole area can b...

Страница 81: ...Select the characteristic gray scale curve Touch to open the window and select the gray scale curve Table 7 4 2 Gray scale Curves and Their Characteristics Name Features CHEST This is an S shape curve for examining the chest LINEAR This is a linear lookup table INV LINEAR This lookup table reverses the image density STAN CONTRAST This is a standard S shape curve It is usually used for examining bo...

Страница 82: ... the version of the CHEST gray scale curve that supports high contrast BONE 3 This is the version of the BONE 1 gray scale curve that supports high contrast BONE 4 This is the version of the BONE 2 gray scale curve that supports high contrast REX usage examples To observe over time a patient whose image has been taken before take the image using the same exposure conditions contrast and gray scale...

Страница 83: ...ng area as the analysis value for chest PA exposure In the above graph the analysis value is 1220 Suppose 1 9 D has been specified as the density at the analysis value position The gray scale curve shifts in the horizontal direction The amount by which it shifts is determined by the position where the arrow from the analysis value intersects with the arrow from the density Next an explanation of t...

Страница 84: ...ting from 1 to 11 The displayed value on the left is the saved value and the value on the right is the modified value The effect is proportional to the setting value Higher values result in higher emphasis and lower values result in lower emphasis 3 Set the enhancement frequency Touch or to select a setting from 1 to 11 The displayed value on the left is the saved value and the value on the right ...

Страница 85: ...as of lesser interest without changing the view of the microstructure of the area of main interest The effect of changes by modifying the parameters can be checked in the QA screen DEP Screen 1 Enable DEP Touch and highlight white character DEP 2 Set the high density effect Touch or to select a setting from 10 to 10 The value on the left is the value analyzed automatically DEP analysis value The v...

Страница 86: ...500 If the setting is 1 the level will be 2300 Efficacy of high density When the efficacy of high density is increased the range of pixels will narrow after the image is processed at a higher level than the compression starting level Table 7 6 1B Setting Values Starting Level Changes high density Setting 10 9 8 7 6 5 4 3 2 1 0 Starting Level Change 1000 900 800 700 600 500 400 300 200 100 0 Settin...

Страница 87: ...ue on the right is the efficacy that will be added to the analyzed value on the left side table below A larger starting level results in a wider effect range and a smaller starting level results in a narrower range Suppose the starting level is 1500 If the setting is 1 the starting level will be 1600 If the setting is 1 the level will be 1400 Table 7 6 1C Setting Values Corresponding Efficacy low ...

Страница 88: ...low density As shown at the right a smaller starting level for low density results in a narrower effect range shaded part Distribution frequency Pixel value Distribution frequency Pixel value Efficacy range Efficacy range Starting level low Starting level high ...

Страница 89: ...ng area page 68 and if ADJUST ROI was selected adjust the density adjustment area page 69 3 Move the frame Touch or to move the frame A red frame is moved if ADJUST TRIM was selected and a red purple frame is moved if ADJUST ROI was selected 7 7 2 Changing Marks 1 Select the mark name Touch to select from the list 2 Enable the mark Touch and highlight white character View When View is enabled Anno...

Страница 90: ...witched When Link is displayed the display position of the linked annotation is also switched automatically Display Button Description Indicates the orientation of the image using when viewing a patient facing the CXDI from the x ray generator side FLIP Flips the image vertically Flips the image horizontally ROTATE Rotates the image 90 counterclockwise Rotates the image 180 Rotates the image 90 cl...

Страница 91: ...o any selected location on the image ANNOTATION Screen when free annotation is activated 1 Open the DETAIL SETUP window Touch FIXED ANNOTATION when free annotation is activated or DETAIL DETAIL SETUP Window 2 Select the annotation setting value Touch Use System Settings Don t Use System Settings Use System Settings Use Saved Image Setting in the case of a study list and select the setting value ...

Страница 92: ...r multi text Touch on the window and select a multi text from the preset list or touch the multi text frame to enter text from the displayed software keyboard For display of multi text annotations see Setup Guide Multi Text List Window 5 Close the window Touch OK Link Setting and annotation If the Link Setting has been set to ENABLE link annotations will not be reflected even if you touch SAVE PAR...

Страница 93: ... FREE ANNOTATION FREE ANNOTATION Window Software keyboard display When Automatic display of keyboard is enabled through the Optional Setting under the Annotation Setup Setup Guide ADD TEXT KEYBD and ADD TEXT LIST will be displayed in the FREE ANNOTATION window Touch ADD TEXT KEYBD to display the software keyboard or ADD TEXT LIST to display the TEXT window By touching these buttons step 5 and step...

Страница 94: ...ust the arrow Adjust the POSITION and WIDTH 4 Close the ADD ARROW window Touch OK 5 Determine the position of text to be added Touch ADD TEXT to open the ADD TEXT window and then touch one point on the image A red will be displayed determining the text position ADD TEXT Window Display Description POSITION Touch or to move the arrow WIDTH Touch the button to open the WIDTH window and select the thi...

Страница 95: ...se the FREE ANNOTATION window Touch EXIT Display Operation POSITION Touch or to move the text TEXT Touch the inside of the text field to input text from the software keyboard When selecting text from the list touch to open the TEXT window and then select TEXT Window FONT Touch the button to open the FONT window and then touch to select the font and size from the list ...

Страница 96: ... annotation has gone out of an image due to trimming rotating or flipping the image or when an arrow or text extends out of the image when inputting a free annotation will be displayed on the left side of the list in the FREE ANNOTATION window If you attempt to exit the QA screen with a free annotation extending from the image a window will open and the message Free annotation is out of frame Are ...

Страница 97: ...ing the Image QA Mode Screen 89 3 Change the settings To change the arrow see step 3 under 7 8 2 1 Adding free annotations page 85 and to change the text see step 6 under 7 8 2 1 Adding free annotations page 85 ...

Страница 98: ... 9 1 Setting the Dosage Dependent Sharpness Adjustment 1 Enable the dosage dependent sharpness Touch and highlight white character D DEPEND MTF IMP 2 Set the type Touch to open the window and select the body part Type Button Window 3 Set the intensity as required Touch or to select a setting from 0 to 3 The displayed value on the left is the saved value and the value on the right is the modified v...

Страница 99: ...etting COLLIMATION MASK Processing Function NOTE Advance setting by a service engineer is required to use the COLLIMATION MASK processing function The white areas around the periphery of the image are blackened out Each time you touch COLLIMATION MASK the button switches between highlighted display white characters and normal display and it is enabled when highlighted Without COLLIMATION MASK Proc...

Страница 100: ...us touch RESET 3 Return to the QA screen Touch CLOSE Button Description MAG The image is displayed after LUT processing is completed QA MAG The image is displayed after all image processing is completed The display processing time is longer than when MAG is selected Display on high definition monitors The system can be set by a service engineer to display images on a high definition monitor instea...

Страница 101: ... touch so that the button is displayed Option Window 7 11 1 Setting Image Compression The image is compressed when saved to storage or to an external storage medium For details on the storage procedure see Setup Guide 7 11 2 GAMMA Adjustment 1 Open the GAMMA Adjustment window Touch for gamma adjustment GAMMA Adjustment Window Entering a password If a window opens and password entry Setup Guide is ...

Страница 102: ...played in the preview image screen or QA screen or magnified image image displayed in the magnify image screen to display the numeric input keys and then enter the gamma value in a range from 1 00 to 2 50 3 Close the GAMMA Adjustment window Touch OK This closes the window and saves the entered values as system setting values ...

Страница 103: ...CXDI Adjustment 8 Calibration 9 Self test ...

Страница 104: ... such as when the whole imaging area of the sensor unit will be exposed Although calibration can be performed even by irradiating part of the sensor unit you will not be able to obtain a normal image for the areas that have not been irradiated by x rays 2 Do not put any lead mark on the sensor unit or place any object between the sensor unit and the X ray tube Such an object will appear on all the...

Страница 105: ...the last calibration exposure times The number of times that calibration exposures will be made Bucky msec Displayed when the sensor unit using the movable grid is selected Exposure Parameters Starting from the top the parameters are displayed in the following order X ray tube voltage X ray tube current exposure time mAs value and tube sensor distance Last Grid Grid name used previously It is not ...

Страница 106: ... parameters Set the number using or Or touch the frame and enter the value from the ten key window or parameter table 7 Set the timeout for warning Set the period from the completion of calibration until a warning is displayed to perform the next calibration Touch hour day week to select the unit of time Touch or to set the display duration Or touch the frame and enter the value from the ten key w...

Страница 107: ...s ready to perform an x ray exposure Preparing for Exposure Screen 2 Press the exposure button Press the exposure button on the x ray generator Data processing starts If data processing succeeds and two or more exposures are set it is possible to proceed with the next exposure Be sure to perform calibration exposures only for the number of set exposures Data Processing Success ...

Страница 108: ...g the error details touch OK to close the window Touch EXIT to cancel calibration or RETAKE to perform calibration again When the grid stripes have been detected in the course of the calibration of the CXDI 40G COMPACT A window is opened and an error message is displayed After checking the error details touch OK to close the window To cancel calibration touch EXIT to perform calibration again chec...

Страница 109: ... change the sensor unit 6 Return to the menu screen Touch EXIT 7 Return the x ray generator to the settings for normal exposure Be sure to change the settings of the x ray generator to those for normal exposures When calibration has failed A window is opened and an error message is displayed After checking the error details touch OK to close the window Touch EXIT to cancel calibration or RETAKE to...

Страница 110: ...8 Calibration 102 ...

Страница 111: ...isplays the Self Test Screen From the exposure screen touch SYSTEM SELF TEST Self Test Screen 2 Select the sensor unit If multiple sensor units can be used first select a sensor unit by touching that sensor unit button 3 Remove the grid unit If a sensor unit with removable grid unit is selected in step 2 remove the grid unit If TEST START is touched while the grid unit is attached it will display ...

Страница 112: ...he x ray generator to match the displayed parameters Ready State 5 Press the exposure button Press the exposure button on the x ray generator The self test is started The self test consists of five parts from TEST1 to TEST5 The self test is finished when TEST5 is completed When the test is successfully completed Passed is displayed for TEST1 to TEST5 ...

Страница 113: ...the menu screen Touch EXIT If the test fails A window opens and an error code is displayed After recording the error code touch OK to close the window Make a note of the error code and contact a Canon representative or distributor ...

Страница 114: ...to the steps described in 9 1 Self test using a sensor unit with a removable grid unit see page 103 1 Display the Self Test Screen From the exposure screen touch SYSTEM SELF TEST Self Test Screen 2 Start the self test Without removing the grid touch TEST START Although the exposure parameters for the self test can be changed as a basic rule their optimal values were set by the service technician a...

Страница 115: ...button 4 Return to the menu screen When the exposure parameters are to be changed When the exposure parameters are to be changed touch EXP COND The Exposure Parameter Screen is displayed Set the optimum parameters Exposure Parameter Screen ...

Страница 116: ...9 Self test 108 ...

Страница 117: ...Troubleshooting 10 Before Calling a Service Engineer 11 Questions and Answers ...

Страница 118: ...r inquiry be sure to make a note of the type of error that occurred its number and details and then explain the situation in as much detail as possible 2 If an error occurs immediately after taking an image with PREVIEW IMAGE set to DISPLAY on the CUSTOMIZE DISPLAY screen Setup Guide do not touch ERR displayed in the lower right side of the message area until the preview image appears ...

Страница 119: ... The entire screen blinks in red and an error window opens Alert An error window opens and a red ERR warning blinks in the lower right corner of the message area Error An error window opens and a red ERR warning is displayed in the lower right corner of the message area Warning A yellow ERR warning blinks in the lower right corner of the message area Touch ERR to open the error window Attention A ...

Страница 120: ...the error code and contact a Canon representative or distributor Detected an Error 101 Capture Board SelfCheck Error Detected Capture Board Error 102 Capture Device Open Error Failed to open capture device 103 READ Timeout Error Failed to transmit data Do not disconnect sensor during data transmission 104 Requested I O pending error Failed to access the device 105 CXDCAP INI Open Error Install CXD...

Страница 121: ...d an Error 119 Image Error Touch OK to close the window Perform operations according to the messages displayed Note the error code and contact a Canon representative or distributor An error occurred in the image Call a service person Check the image in the Preview screen and also in the high resolution monitor or by using MAG or QA MAG in the QA screen Also turn the power box off and on again to r...

Страница 122: ...ANCEL Grid component will be re initialize 125 Sensor Unit Grid Error Touch OK to close the window and then check the image Perform exposure again if there are any abnormalities Because of the Grid error this image may have a quality problem 126 Sensor Unit Temperature Error Touch OK to close the window and try again after a while The internal temperature of the Sensor Unit exceeded the temperatur...

Страница 123: ...rn off the CXDI When these errors occur note the error code and contact a Canon representative or distributor Detected Illegal Parameter Error 141 LUT Write Error Touch OK to close the window and then see 8 Calibration page 97 to perform calibration Quit the exam and perform calibration 143 Calibration Table Error Perform Calibration 144 Sensor Unit Configuration Error Touch OK to close the window...

Страница 124: ...riodic noise is detected in acquisition data It is necessary to remove the grid before calibration 310 REX Warning Touch OK to close the window and adjust the dose REX is detected value It is below lower limit setting values Check generator setting and exposure conditions If exposure conditions were correct adjust IP parameters 311 REX Warning REX is detected value It is over maximum limitation se...

Страница 125: ...rror code and contact a Canon representative or distributor Exposed image cannot be stored because the capacity of internal storage memory is insufficient 521 Queue File Open Error Queue file is not found 533 Reject Info Output Error Touch OK to close the window and then see 1 2 Shutting Down the CXDI page 5 and turn off the CXDI When these errors occur note the error code and contact a Canon repr...

Страница 126: ... the system shut it down 5102 Grid Error Touch OK to close the window and remove the grid from the sensor unit Remove Grid for this exposure 5202 Grid ID Error Touch OK to close the window and check the grid in the sensor unit Replace with the recommended grid Grid Name Installed grid Grid Name 5203 Grid ID Error Touch OK to close the window and remove the grid from the sensor unit This is a none ...

Страница 127: ... wait until the temperature in the sensor unit drops The internal temperature of the Sensor Unit is too high Do not leave the Sensor Unit in READY condition 160 Capture Board Error Touch OK to close the window and then see 1 2 Shutting Down the CXDI page 5 and turn off the CXDI When these errors occur note the error code and contact a Canon representative or distributor Detected Capture Board Erro...

Страница 128: ...ze and retry 515 Internal Storage Error Touch OK to close the window and then see 1 2 Shutting Down the CXDI page 5 and turn off the CXDI When these errors occur note the error code and contact a Canon representative or distributor Selected directory for storage can only be read 516 Internal Storage Error Selected directory for storage does not exist or attribution is incorrect 517 Internal Storag...

Страница 129: ...ose the window and then check the settings Transmission of the storage commitment request failed Connection to output equipment is not possible Check the network or port number settings Retry 541 DICOM Transfer Error Transmission of the storage commitment request failed An error occurred during transmission with the output equipment Retry 542 DICOM Parameter Error Transmission of the storage commi...

Страница 130: ...esponse Check receiving device 508 DICOM Printer Status Warning Although transfer finished properly receiving device reported a warning in DICOM printer status Check receiving device 511 External Storage Attention Touch OK to close the window Replace the external disk before it reaches full capacity Remaining space in external storage is less than setting values 550 Internal Counter Mismatch Error...

Страница 131: ...ry again If it still doesn t work refer to the hardware manual and reset the system Q1 4 What is the green mark blinking at the upper right side of the exposure screen A1 4 It indicates that the image is being transferred or the image is being processed It disappears after the process ends Q1 5 What are the S and I displayed in the message area of the exposure screen A1 5 They are the original IDs...

Страница 132: ...y cannot be changed directly from the category type screen Touch CHANGE to display the screen for changing parameters Q2 5 Although the exposure parameters have been changed they returned to the previous settings after an exposure was performed A2 5 Unless you touch SAVEPARAM and save the parameters after changing them page 18 the changed parameters will return to the previous settings after an ex...

Страница 133: ...ing the movable grid with the X ray irradiation When it is not set properly vertical lines may appear on the image Q3 3 What is the difference between the fixed ROI and phototimer A3 3 In the Fixed ROI settings the adjustment range for LUT processing page 70 is set By setting the phototimer the position of the phototimer installed in the CXDI is set Q3 4 What is an X ray monitor A3 4 It is used to...

Страница 134: ...ge 65 Check the IP PARAMETER for the exposure method Setup Guide Perform calibration page 97 Execute SELF TEST page 103 Q4 3 The image is completely white or black A4 3 There are several causes Typical examples and remedies are shown below The X ray dose may be wrong or the CXDI system may not be synchronizing with the x ray generator Check the settings of the x ray generator You have pressed the ...

Страница 135: ...shes with nothing selected no image is output In this case after the output destination is selected the image in the Study List page 53 can be loaded and output 3 Check that there is no problem with the printer etc where the image is going to be output 4 Check that there is no problem in the network Q5 2 Part of the printed image was missing A5 2 Check the printer settings Setup Guide In handling ...

Страница 136: ...11 Questions and Answers 128 ...

Страница 137: ...Appendix A Logging in User Authentication Function B Using the Rejection Reason Input Function C Using the Sensor Unit Attach Detach Function D Turning the Power of the Power Box On Off ...

Страница 138: ...he user authentication function 2 Only logged in users can use the CXDI when the user authentication function is set A user name and password are required to log in to the CXDI when the user authentication function is set Note on Rejection Reason Input Function Advance setting by a service engineer is reguired to use the rejection reason input function ...

Страница 139: ...nd the exposure screen will not be displayed unless the correct user name and password are entered For details about user registration see Setup Guide Login Screen SHUTDOWN display SHUTDOWN will be displayed only in the initial Login screen after starting up the CXDI When you touch SHUTDOWN a window will open and the confirmation message Are you sure you want to shutdown the system will appear Tou...

Страница 140: ...screen Touch the box for the User Name in the login screen User Name Input Screen 2 Enter the user name Enter the user name then touch OK The Password Input screen is displayed Password Input Screen 3 Enter the password Enter the password then touch OK After the user name and password registered to the CXDI are entered the exposure screen is displayed ...

Страница 141: ...ser Authentication Function 133 Logout button display After logging in a logout button is displayed at the bottom left of the exposure screen The logout button displays the currently logged in user name Logout Button ...

Страница 142: ...h OK Logout Confirmation Screen A 3 2 Auto Logout If the Auto Logout function is enabled a logout is performed automatically if no screen operations are performed for a certain period of time For details about Auto Logout settings see Setup Guide Conditions when the Auto Logout function will not activate The Auto Logout function will not activate under the following conditions At the User Manageme...

Страница 143: ...n when an image is rejected page 40 during exposure The entered rejection reason is output to a CSV Comma Separated Value format file except when reproduced from the study image list Rejection Reason Input Window CSV format file output Information other than the rejection reason can be output to a CSV format file if the setup has been performed by the service engineer For details please contact a ...

Страница 144: ...w image button on the exposure screen The image can be displayed immediately after exposure for certain settings Preview Image Screen 2 Display the the image to be rejected Touch a preview image button When displaying from the multiview screen touch MULTI VIEW 3 Display the rejection reason input window Touch Reject When the multiview screen is displayed directly touch the image to open the window...

Страница 145: ... is displayed the rejection reason is displayed on the image It is not displayed in the multiview screen B 2 2 Entering the Rejection Reason during Retake When retaking an exposure the image selected for retake always becomes a reject image 1 Display the preview image screen Touch a preview image button on the exposure screen The image can be displayed immediately after exposure for certain settin...

Страница 146: ...ection Reason Input Window 4 Select or enter the rejection reason Select the rejection reason from the Reject Reason List If the reason you want to enter is not found in the Reject Reason List touch the Reject Reason input box to display the keyboard and enter the reason 5 Reject the image Touch OK The exposure screen appears and the system enters the ready condition with the same exposure mode se...

Страница 147: ...ately after exposure for certain settings Preview Image Screen 2 Display the image whose rejection reason you will change Touch a preview image button To select from the multivew screen touch MULTI VIEW 3 Display the process selection dialog box Touch Reject When the multiview screen is displayed directly touch the image to open the window and then touch Reject Process Selection Dialog Box 4 Displ...

Страница 148: ... Change the rejection reason Touch OK When the preview image screen is displayed the rejection reason is displayed on the image It is not displayed in the multiview screen B 2 4 Cancelling a Rejected Image During a Study Cancel rejection of the image 1 Display the preview image screen Touch a preview image button on the exposure screen Preview Image Screen 2 Display the image whose rejection you w...

Страница 149: ...uch the image to open the window and then touch Reject Process Selection Dialog Box 4 Cancel the rejection Touch VALIDATE IMAGE Cancelling rejection of an image that has been retaken When rejection of a retaken image is cancelled the other image is rejected and the rejection reason input window is opened Enter the rejection reason for the image to be rejected ...

Страница 150: ...g image RESEND or study RESEND ALL B 3 1 Cancelling a Rejected Image and Outputting Again This describes how to play back an image from the study list cancel the rejection and then resend the image 1 Display the study list From the exposure screen touch SYSTEM STUDY LIST Displaying the Study List 2 Display the CALL IMAGES screen Touch the required study and touch CALL IMAGES CALL IMAGES Screen ...

Страница 151: ...touch the image to open the window and then touch Reject Process Selection Dialog Box 5 Cancel the rejection Touch VALIDATE IMAGE 6 Output the images Touch RESEND or RESEND ALL The RESEND window or RESEND ALL window is opened Set the output destination to ON and then touch RESEND or RESEND ALL Cancelling rejection of an image that has been retaken In contrast to rejection during exposure even if r...

Страница 152: ...n In this operation rejected images can be output to temporary internal storage only 1 Display the study list From the exposure screen touch SYSTEM STUDY LIST Displaying the Study List 2 Display the CALL IMAGES screen Touch the required study and touch CALL IMAGES CALL IMAGES Screen 3 Display the image to be rejected Touch a preview image button When displaying from the multiview screen touch MULT...

Страница 153: ...w 5 Select or enter the rejection reason Select the rejection reason from the Reject Reason List If the reason you want to enter is not found in the Reject Reason List touch the Reject Reason input box to display the keyboard and then enter the reason 6 Reject the image Touch OK 7 Output the images Touch RESEND or RESEND ALL The RESEND window or RESEND ALL window is opened Set LOCAL TEMP STORAGE t...

Страница 154: ...be sure to select local temporary storage as the output destination 1 Display the study list From the exposure screen touch SYSTEM STUDY LIST Displaying the Study List 2 Display the Preview Image Screen Touch the image in the study list and then touch CALL IMAGES Preview Image Screen 3 Display the image whose rejection reason you will change Touch a preview image button When displaying from the mu...

Страница 155: ...dow Touch CHANGE REJECT REASON 6 Select or enter the rejection reason Select the rejection reason from the Reject Reason List If the reason you want to enter is not found in the Reject Reason List touch the Reject Reason input box to display the keyboard and then enter the reason 7 Change the rejection reason Touch OK 8 Output the images Touch RESEND or RESEND ALL The RESEND window or RESEND ALL w...

Страница 156: ...B Using the Rejection Reason Input Function 148 ...

Страница 157: ...r of the power box first NOTE Do not remove the connector or disconnect the power of the power box while image data is being transferred Image data that has been taken will be lost NOTE Always attach detach the sensor unit from the exposure screen Attaching detaching the sensor unit while on another screen may result in malfunction or loss of data NOTE If a dialog box is being displayed on the exp...

Страница 158: ...ing the Sensor Unit 1 Display the exposure screen 2 Turn off the power of the power box Power off will be automatically detected and a disconnection dialog box will be displayed 3 Remove the connector Disconnect the sensor cable relay connector of the sensor unit ...

Страница 159: ...C Using the Sensor Unit Attach Detach Function 151 4 Complete detaching the sensor unit Touch OK on the dialog box The sensor unit icon will change to indicate the sensor unit is not connected ...

Страница 160: ...ing a Detached Sensor Unit 1 Display the exposure screen 2 Connect the detached sensor unit Connect the sensor cable relay connector of the sensor unit 3 Turn on the power of the power box Power on is automatically detected and a connection dialog box is displayed ...

Страница 161: ...nsor unit icon display will change If connecting an unregistered sensor unit The message Sensor Unregistered Error is displayed if a sensor unit having serial number that has not already been registered is connected After confirmation touch OK to close the window and connect a sensor unit having a registered serial number ...

Страница 162: ...C Using the Sensor Unit Attach Detach Function 154 ...

Страница 163: ...e the system is being moved NOTE Do not turn off the power of the power box while transferring image data Image data that has been taken will be lost NOTE Always turn the power of the power box on off from on the exposure screen Turning the power of the power box on off while on another screen may result in malfunction or loss of data NOTE If a dialog box is being displayed on the exposure screen ...

Страница 164: ...of the Power Box On Off 156 D 2 Turning the Power of the Power Box On Off 1 Display the exposure screen 2 Turn off the power of the power box Power off is automatically detected and a disconnection dialog box is displayed ...

Страница 165: ... box Touch OK The sensor unit icon will change to indicate the sensor unit is not connected With a mobile system power consumption can be reduced by putting the system in this state while it is being moved 4 Turn on the power of the power box Power on will be detected and a connection dialog box will be displayed ...

Страница 166: ...D Turning the Power of the Power Box On Off 158 5 Close the connection dialog box Touch OK The exposure screen will be displayed ...

Страница 167: ... Annotation 83 Free Annotation 85 FREQUENCY 76 G Gray scale adjustment 70 H HIS 8 14 I ID 11 L LOCAL CALENDER 12 LOCAL TEMP STORAGE 61 Login 132 Logout 134 LUT 70 M Mag 92 Magnetic card reader 14 Magnified image screen 21 92 Marker 82 Memo 98 Message area 17 MULTI VIEW 50 Multi format 49 50 Multi View Screen 43 N Name 11 NUM 11 Number of exposures 96 O Output order 46 P POSITION 81 Preview image b...

Страница 168: ...ST 73 RIS 8 14 S SAVE PARAM 18 67 Self test 103 Sex 11 SHUTDOWN 5 Study description 4 14 STUDY INFO 13 Study List 53 T Timeout for warning 98 Transfer 55 Tray type Screen 4 9 U User Authentication Function 131 V View 81 W Welcome Message Window 3 Y Year 12 ...

Страница 169: ......

Страница 170: ... 81 3 3758 2111 CANON U S A INC CANON MEDICAL SYSTEMS 15955 Alton Parkway Irvine CA 92618 3616 U S A Telephone 1 949 753 4160 CANON EUROPA N V Medical Products Division Bovenkerkerweg 59 61 1185 XB Amstelveen The Netherlands Telephone 31 20 545 8926 PUB L IE 4135I Ver 7 2 0509P0 001 Printed in Japan ...

Отзывы: