Notation
Notation 3
Button names are indicated by
[Button1]>, [Button2]>, [Button3] and so on
when they are touched in order.
Example
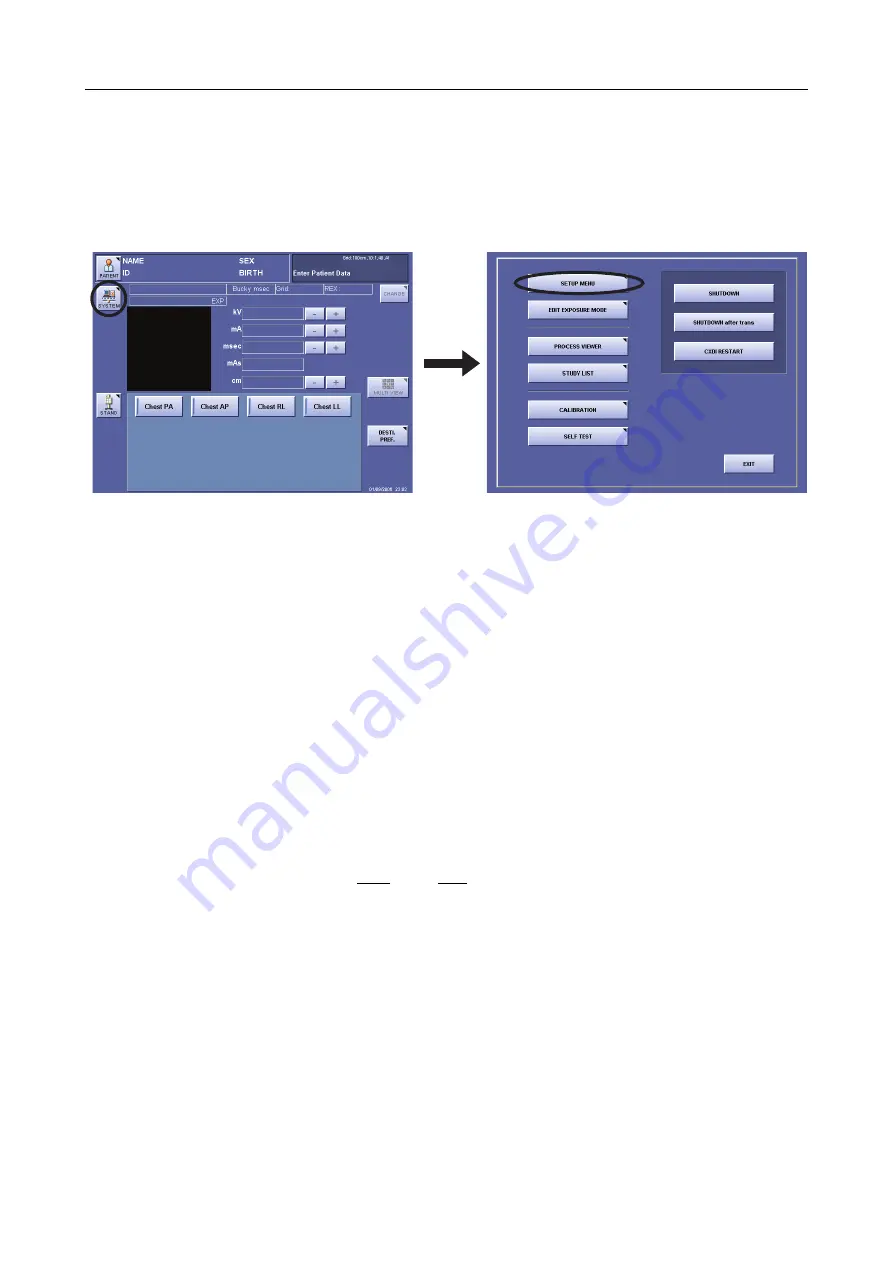
: On the exposure screen, touch
[SYSTEM] > [SETUP MENU]
in this order.
Operation
: Touch
[SYSTEM]
on the first screen, and then touch
[SETUP MENU]
on the next screen.
Touch [SYSTEM] (left), and then touch [SETUP MENU] (right).
Notation 4
When a more detailed explanation for an operation or setting is presented on another page, the chapter is indicated by
(
→
page number)
.
Note that when
Setup Guide
is written, please refer to the separate
Setup Guide
.
Example
: Touch
[PRINT SETTING] (
→
Setup Guide)
.
Description
: Printer settings are provided in detail in the
Setup Guide
.
Notation 5
When an operation or description in a chapter continues from an odd-numbered page to an even-numbered page,
“Continued on the following page >>”
appears at the bottom right of the odd-numbered page.
Notation 6
This operation manual assumes the use of a touch panel.
If using a mouse, replace the expression “touch” with “click”.
Содержание CXDI-1
Страница 9: ...Starting Up Shutting Down 1 Starting Up Shutting Down the CXDI ...
Страница 15: ...Exposure and Output 2 Taking an Image 3 Output Control Process Viewer ...
Страница 38: ...2 Taking an Image 30 ...
Страница 60: ...5 Viewing Multiple Images Multi View Screen 52 ...
Страница 70: ...6 Browsing Completed Studies Study List 62 ...
Страница 71: ...Processing the Image 7 Processing the Image QA Mode Screen ...
Страница 103: ...CXDI Adjustment 8 Calibration 9 Self test ...
Страница 110: ...8 Calibration 102 ...
Страница 116: ...9 Self test 108 ...
Страница 117: ...Troubleshooting 10 Before Calling a Service Engineer 11 Questions and Answers ...
Страница 136: ...11 Questions and Answers 128 ...
Страница 156: ...B Using the Rejection Reason Input Function 148 ...
Страница 162: ...C Using the Sensor Unit Attach Detach Function 154 ...
Страница 169: ......


