-20-
Note:
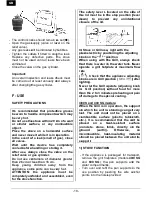
Never position containers on the grill
hot plate.
Preheating
Let the grill hotplate preheat for about 3
minutes
(knobs
in
Grill
position
( )) to reach the ideal temperature
for cooking.
Cooking
-
The grill hotplates are coated with high
quality enamel, which allows healthy
cooking. Adding a slight film of oil is
recommended before any grilling.
They have two zones:
1.
Plain surface for contact cooking,
perfect for small slices of meat or fish,
small vegetables, toasts…
2.
Perforated surface, ideal for grills.
-
Because fats are collected in the water
tank, cooking is perfectly healthy (no
residual or burnt fats) and foods retain all
their taste and smoothness.
-
The grill hotplate reaches its maximum
temperature (ideal for sealing grills) after
about 3 minutes preheating.
-
Arrange the food on the grill hotplate.
-
It is also possible to modulate the
intensity of cooking depending on the
position of food on the grill hotplate:
maximum power in the centre of each
burner, more moderate towards the
outside.
-
When cooking is finished turn the knob
corresponding to the burner clockwise to
position (
).
Switching off
-
Close the regulator or gas cylinder valve.
-
After the flames have gone out, close
the stove valves by putting the knobs in
position (
).
G - REMOVING OR CHANGING
THE GAS CYLINDER
- Check that the gas cylinder valve or
regulator lever is in the closed position.
- Place the adjusting knobs in position
(
) by turning them clockwise.
- Disconnect the regulator from the gas
cylinder.
- Install the new gas cylinder.
- Connect the regulator to the new gas
cylinder (check the condition of the
regulator seal, before connecting it to the
gas cylinder).
H -
STORING THE APPLIANCE
FOR TRANSPORT
IMPORTANT: Start by removing the gas
cylinder, and check that all the valves are
in the (
) position and that the appliance
has completely cooled down.
400 SG and 600 SG models
•
If the appliance has been used as a Grill,
remove the grill hotplates and the water
compartments.
•
If the appliance has been used as a stove,
remove the pan supports from both burners.
-
Put the water compartments in place after
having emptied and cleaned them as
necessary.
-
Turn the pan supports over to be able to
insert the starred upper part into the
notches in the water compartment.
-
Fit the grill plates so that the pan support
wire attachment points pass through the
slots in the grill hotplates.
GB
Содержание 400 SG
Страница 4: ...4 A B C D E F...
Страница 5: ...5 F G H P...
Страница 168: ...168 F 20 cm 26 cm 16 cm L L BG...
Страница 170: ...1 2 BG 25 cl 1 2 170 1 2 2 3 OFF 1 2 3 3 OFF 1 3 Grill 1 2 2 3 3 OFF 1 3 Grill 2 3 3 1 3 Grill...
Страница 171: ...171 3 G H 400 SG 600 SG BG...
Страница 172: ...172 600 SG 4 4 2 Velcro 4 G 1 600 SG 30 2 XP D 36 110 BG...
Страница 173: ...173 1 50 m B 600 SG 8 9 7 2 2 2 7 1 0 BG...
Страница 176: ...176 C CAMPINGAZ 904 907 6 kg 13 kg 28 mbar 37 mbar 30 mbar 30 mbar 37 mbar 50 mbar 50 mbar D XP D 36 110 M 20x1 5 GR...
Страница 178: ...178 F F F F 20 26 16 L L GR...
Страница 180: ...250 ml 1 2 2 3 GR 250 ml 1 2 3 180 250 ml 1 2 OFF 3 OFF 3 1 2 1 2 3 1 1 2 3...
Страница 181: ...181 G 400 SG 600 SG 600 SG 4 GR...
Страница 182: ...182 4 2 4 I I I I Venturi SG 600 30 b b b b XP D 36 110 1 50 m GR...
Страница 183: ...183 600 SG IOEI O EO IOEI O EO IOEI O EO IOEI O EO A I OUI A I OUI A I OUI A I OUI Venturi Venturi venturi Venturi GR...


