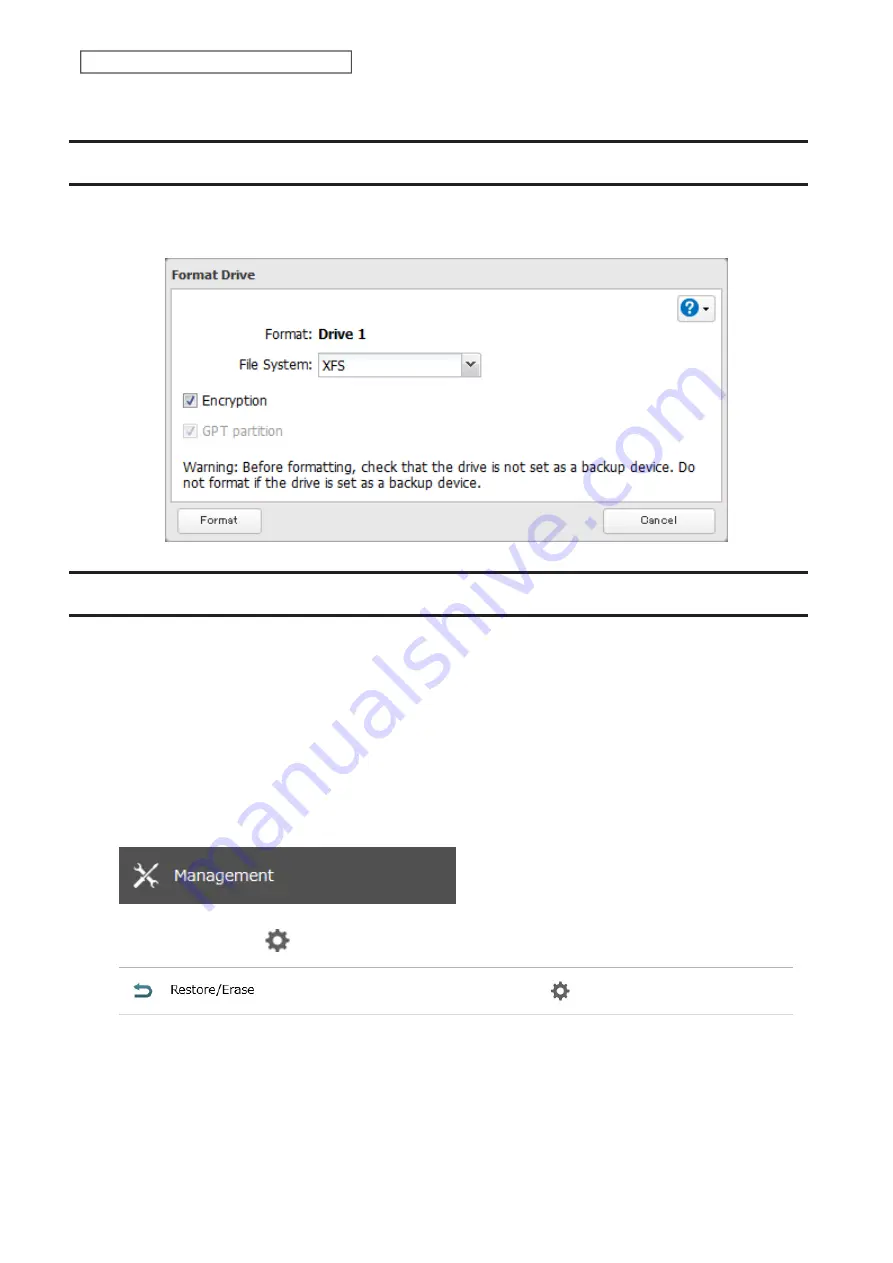
• For drives that are 2.2 TB or larger, make sure that the “GPT partition” checkbox is selected.
Encrypting Drives
Internal drives (and arrays) can be encrypted with 256-bit AES during formatting. Encrypted drives and arrays are
then readable only from that specific LinkStation. To decrypt a drive or array, clear the “Encryption” checkbox and
format it again.
Erasing Data on the LinkStation Completely
Under some circumstances, data from formatted drives can be recovered. The drive erasure process in this section
does a much more thorough job of erasing data. This procedure is recommended for removing all data from a drive
in a way that makes it nearly impossible to recover with current tools. The LinkStation will then be in the following
state:
• Both drives in JBOD
• An empty shared folder on each drive
• All settings returned to their default values
• All logs deleted
Follow the procedure below to completely and permanently erase all data from your LinkStation.
1
From Settings, click
Management
.
2
Click the settings icon (
) to the right of “Restore/Erase”.
59
Chapter 3 RAID Modes and Drive Management
Содержание Link Station LS710D
Страница 24: ...3 Click Create Folder 23 Chapter 2 File Sharing...
Страница 26: ...2 Tap Create Folder 3 Enter the desired folder name and tap OK 4 Tap OK when finished 25 Chapter 2 File Sharing...
Страница 31: ...2 Tap Create User 30 Chapter 2 File Sharing...
Страница 34: ...3 Click Add Group 33 Chapter 2 File Sharing...
Страница 73: ...5 Click Add 72 Chapter 4 Backup...
Страница 79: ...3 Click Edit 4 Click Browse 5 Select the shared folder and click OK 78 Chapter 4 Backup...
Страница 81: ...2 Click Time Machine 80 Chapter 4 Backup...
Страница 82: ...3 Click Select Backup Disk 4 Select the shared folder then click Use Disk 81 Chapter 4 Backup...
Страница 93: ...4 Click the Options tab 5 Click Edit 92 Chapter 5 Cloud Services and Remote Access...
Страница 97: ...7 Enter the desired job name and click Next 96 Chapter 5 Cloud Services and Remote Access...
Страница 98: ...8 Select Backup and click Next 97 Chapter 5 Cloud Services and Remote Access...
Страница 100: ...10Specify the sync period and click Next 99 Chapter 5 Cloud Services and Remote Access...
Страница 106: ...7 Enter the desired job name and click Next 105 Chapter 5 Cloud Services and Remote Access...
Страница 107: ...8 Select Restore and click Next 106 Chapter 5 Cloud Services and Remote Access...
Страница 112: ...6 Enter the desired job name and click Next 111 Chapter 5 Cloud Services and Remote Access...
Страница 115: ...9 Specify the sync period and click Next 114 Chapter 5 Cloud Services and Remote Access...
Страница 122: ...4 Click the Options tab 5 Click Edit 121 Chapter 5 Cloud Services and Remote Access...
Страница 127: ...3 Tap NAS Setup 126 Chapter 5 Cloud Services and Remote Access...
Страница 130: ...129 Chapter 5 Cloud Services and Remote Access...
Страница 147: ...6 Select a file to move and click Action 7 Click Move 146 Chapter 6 Multimedia...
Страница 152: ...7 Click Delete 8 Click Delete again 151 Chapter 6 Multimedia...
Страница 184: ...5 Configure your settings then click OK 6 Click OK when finished 183 Chapter 9 Advanced Features...


