In SSL, this key contains the server certificate, and depending on your computer environment, a check may be
performed to determine the trustworthiness of the certificate. The server certificate included in the LinkStation’s
default settings was created by Buffalo, and in some cases, the security certificate warning message may appear in
your browser or another security software. If this occurs, disregard the message and continue.
Note:
Use TLS 1.2 SSL Certificate.
SSL Private Key (server.key)
This file is the server private key, and it is usually not revealed. The server.key file is paired with the server.crt file to
decrypt data encrypted by the SSL certificate.
Note:
The passphrase for the private key must be removed before importing to the LinkStation.
Updating SSL Key Files
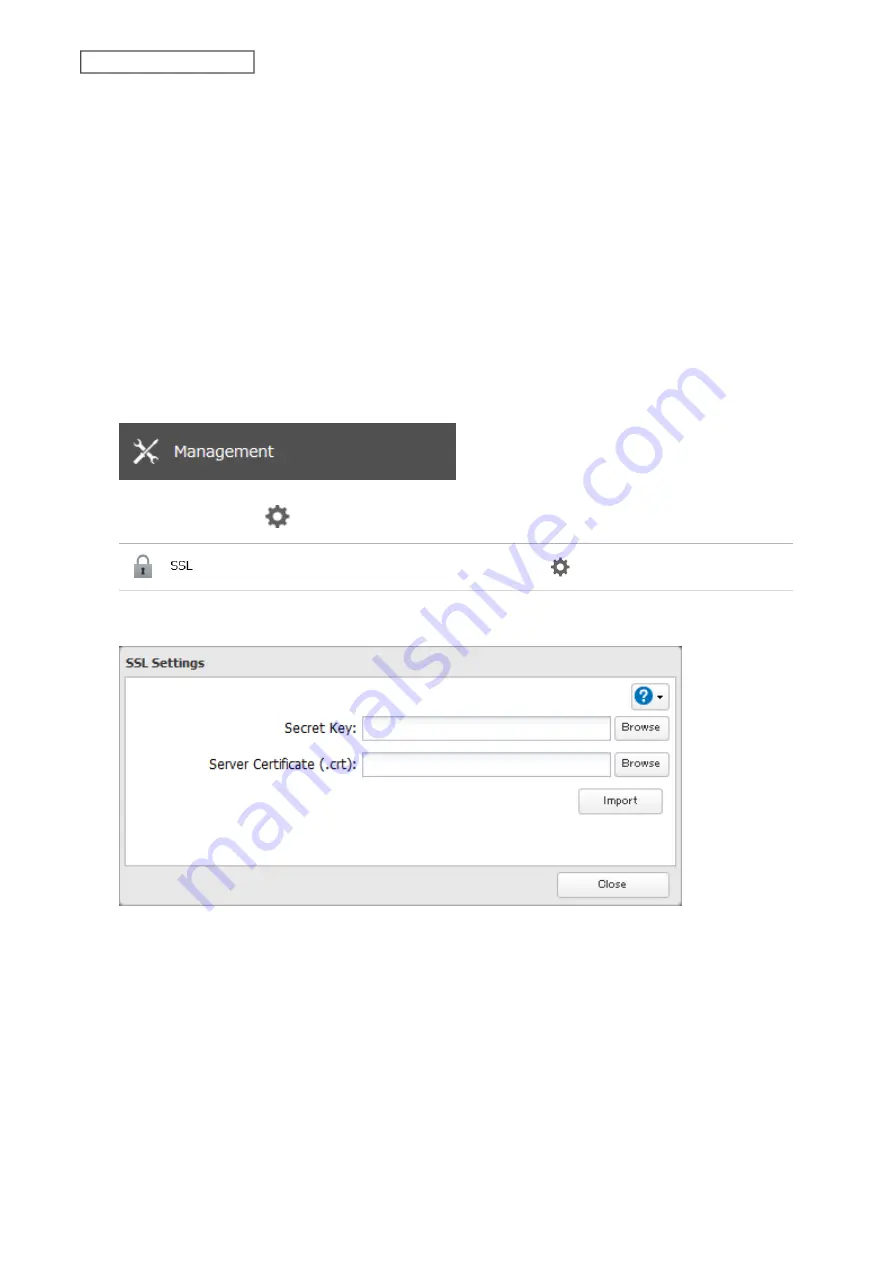
To update a server certificate and a private key for SSL, follow this procedure.
1
From Settings, click
Management
.
2
Click the settings icon (
) to the right of “SSL”.
3
Register “server.key” for “Secret Key” and “server.crt” for “Server Certificate (.crt)”, then click
Import
.
Notes:
• Place the SSL key files (server.key, server.crt) directly below the C root drive. The SSL key files may be unable to be
updated if they are placed in folders or paths that contain multibyte characters.
• If Settings cannot be displayed after updating, initialize the LinkStation settings.
• Updating the firmware initializes an SSL key.
172
Chapter 9 Advanced Features
Содержание Link Station LS710D
Страница 24: ...3 Click Create Folder 23 Chapter 2 File Sharing...
Страница 26: ...2 Tap Create Folder 3 Enter the desired folder name and tap OK 4 Tap OK when finished 25 Chapter 2 File Sharing...
Страница 31: ...2 Tap Create User 30 Chapter 2 File Sharing...
Страница 34: ...3 Click Add Group 33 Chapter 2 File Sharing...
Страница 73: ...5 Click Add 72 Chapter 4 Backup...
Страница 79: ...3 Click Edit 4 Click Browse 5 Select the shared folder and click OK 78 Chapter 4 Backup...
Страница 81: ...2 Click Time Machine 80 Chapter 4 Backup...
Страница 82: ...3 Click Select Backup Disk 4 Select the shared folder then click Use Disk 81 Chapter 4 Backup...
Страница 93: ...4 Click the Options tab 5 Click Edit 92 Chapter 5 Cloud Services and Remote Access...
Страница 97: ...7 Enter the desired job name and click Next 96 Chapter 5 Cloud Services and Remote Access...
Страница 98: ...8 Select Backup and click Next 97 Chapter 5 Cloud Services and Remote Access...
Страница 100: ...10Specify the sync period and click Next 99 Chapter 5 Cloud Services and Remote Access...
Страница 106: ...7 Enter the desired job name and click Next 105 Chapter 5 Cloud Services and Remote Access...
Страница 107: ...8 Select Restore and click Next 106 Chapter 5 Cloud Services and Remote Access...
Страница 112: ...6 Enter the desired job name and click Next 111 Chapter 5 Cloud Services and Remote Access...
Страница 115: ...9 Specify the sync period and click Next 114 Chapter 5 Cloud Services and Remote Access...
Страница 122: ...4 Click the Options tab 5 Click Edit 121 Chapter 5 Cloud Services and Remote Access...
Страница 127: ...3 Tap NAS Setup 126 Chapter 5 Cloud Services and Remote Access...
Страница 130: ...129 Chapter 5 Cloud Services and Remote Access...
Страница 147: ...6 Select a file to move and click Action 7 Click Move 146 Chapter 6 Multimedia...
Страница 152: ...7 Click Delete 8 Click Delete again 151 Chapter 6 Multimedia...
Страница 184: ...5 Configure your settings then click OK 6 Click OK when finished 183 Chapter 9 Advanced Features...


