conditions, the settings will not be transferred: users share the same name with groups already existing on the
migration target Buffalo NAS device; groups share the same name with users on the migration target Buffalo NAS
device.
• If the migration target Buffalo NAS devices have already added some shared folders, users, and groups, the
transferred settings may exceed the maximum number of allowed shared folders, users, or groups. After
migration finishes, open Settings and verify that all settings were properly transferred.
Restoring Factory Defaults
The settings on the LinkStation can be restored to factory defaults using Settings or an USB memory device.
Initializing from Settings
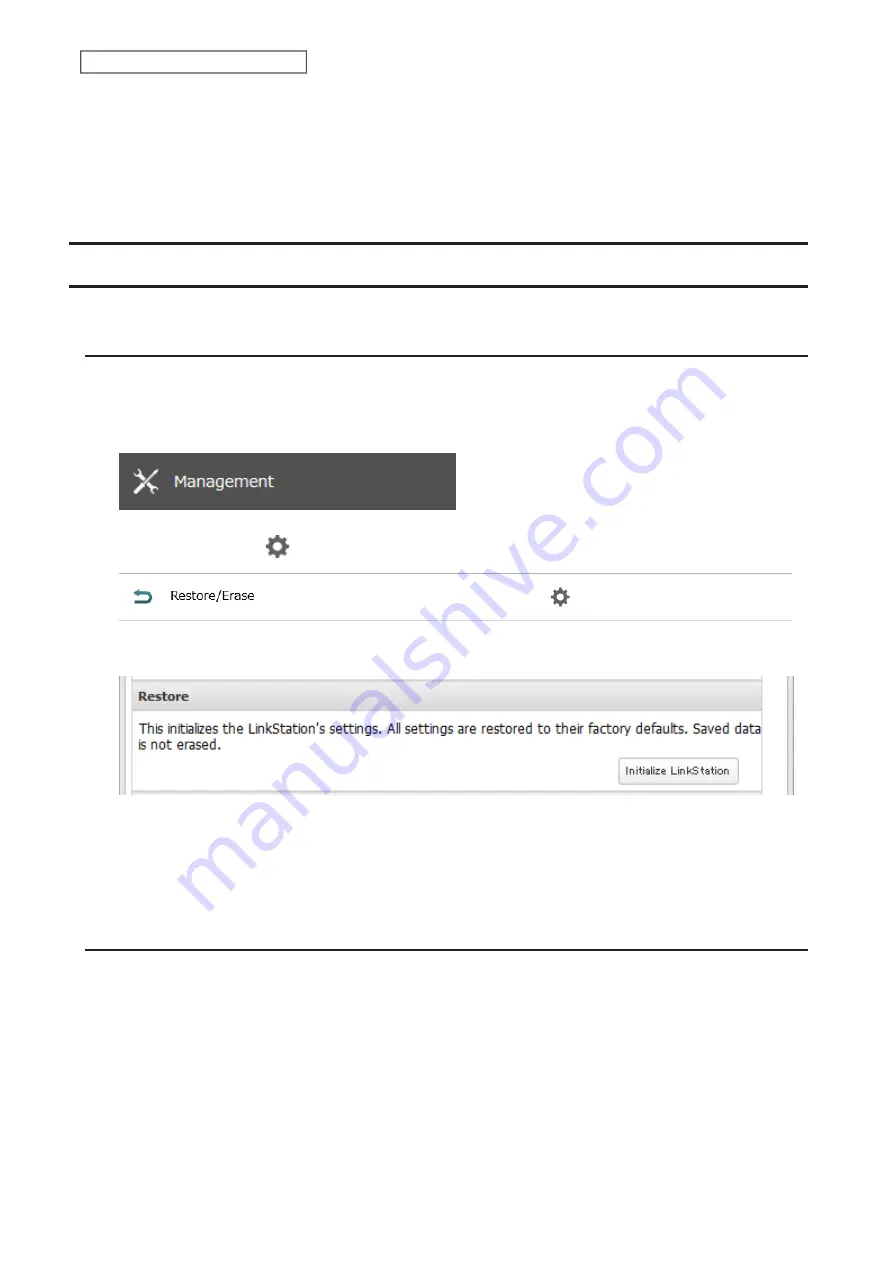
To initialize the LinkStation to its factory defaults from Settings, follow the procedure below.
Note:
Initializing the LinkStation using Settings will not initialize the settings under content management.
1
From Settings, click
Management
.
2
Click the settings icon (
) to the right of “Restore/Erase”.
3
Click
Initialize LinkStation
.
4
The “Confirm Operation” screen will open. Enter the confirmation number, then click
OK
.
5
The settings will be restored to its factory default settings. The
I26
message will appear on NAS Navigator2
while settings are being restored. When it disappears, the initialization is finished.
Initializing Using the USB Initialization Drive
A USB initialization drive will restore the settings on your LinkStation to their factory defaults. You can initialize them
without logging in to Settings. Follow the procedure below to create a USB initialization drive.
Notes:
• You can use the USB initialization drive to initialize settings on the same LinkStation unit that created it.
• Normally, making and using a USB initialization drive will not affect data on the LinkStation. However, always
back up your data regularly!
• This USB initialization drive can be used to recover the system if your LinkStation doesn’t boot at all. In this case, if
the data partition is damaged, then all your data will be deleted by the recovery process.
• The USB initialization drive should be a USB memory device that is compatible with USB 3.2 Gen 1/3.1 Gen 1/3.0
specifications.
156
Chapter 7 Settings Backup/Restoration
Содержание Link Station LS710D
Страница 24: ...3 Click Create Folder 23 Chapter 2 File Sharing...
Страница 26: ...2 Tap Create Folder 3 Enter the desired folder name and tap OK 4 Tap OK when finished 25 Chapter 2 File Sharing...
Страница 31: ...2 Tap Create User 30 Chapter 2 File Sharing...
Страница 34: ...3 Click Add Group 33 Chapter 2 File Sharing...
Страница 73: ...5 Click Add 72 Chapter 4 Backup...
Страница 79: ...3 Click Edit 4 Click Browse 5 Select the shared folder and click OK 78 Chapter 4 Backup...
Страница 81: ...2 Click Time Machine 80 Chapter 4 Backup...
Страница 82: ...3 Click Select Backup Disk 4 Select the shared folder then click Use Disk 81 Chapter 4 Backup...
Страница 93: ...4 Click the Options tab 5 Click Edit 92 Chapter 5 Cloud Services and Remote Access...
Страница 97: ...7 Enter the desired job name and click Next 96 Chapter 5 Cloud Services and Remote Access...
Страница 98: ...8 Select Backup and click Next 97 Chapter 5 Cloud Services and Remote Access...
Страница 100: ...10Specify the sync period and click Next 99 Chapter 5 Cloud Services and Remote Access...
Страница 106: ...7 Enter the desired job name and click Next 105 Chapter 5 Cloud Services and Remote Access...
Страница 107: ...8 Select Restore and click Next 106 Chapter 5 Cloud Services and Remote Access...
Страница 112: ...6 Enter the desired job name and click Next 111 Chapter 5 Cloud Services and Remote Access...
Страница 115: ...9 Specify the sync period and click Next 114 Chapter 5 Cloud Services and Remote Access...
Страница 122: ...4 Click the Options tab 5 Click Edit 121 Chapter 5 Cloud Services and Remote Access...
Страница 127: ...3 Tap NAS Setup 126 Chapter 5 Cloud Services and Remote Access...
Страница 130: ...129 Chapter 5 Cloud Services and Remote Access...
Страница 147: ...6 Select a file to move and click Action 7 Click Move 146 Chapter 6 Multimedia...
Страница 152: ...7 Click Delete 8 Click Delete again 151 Chapter 6 Multimedia...
Страница 184: ...5 Configure your settings then click OK 6 Click OK when finished 183 Chapter 9 Advanced Features...


