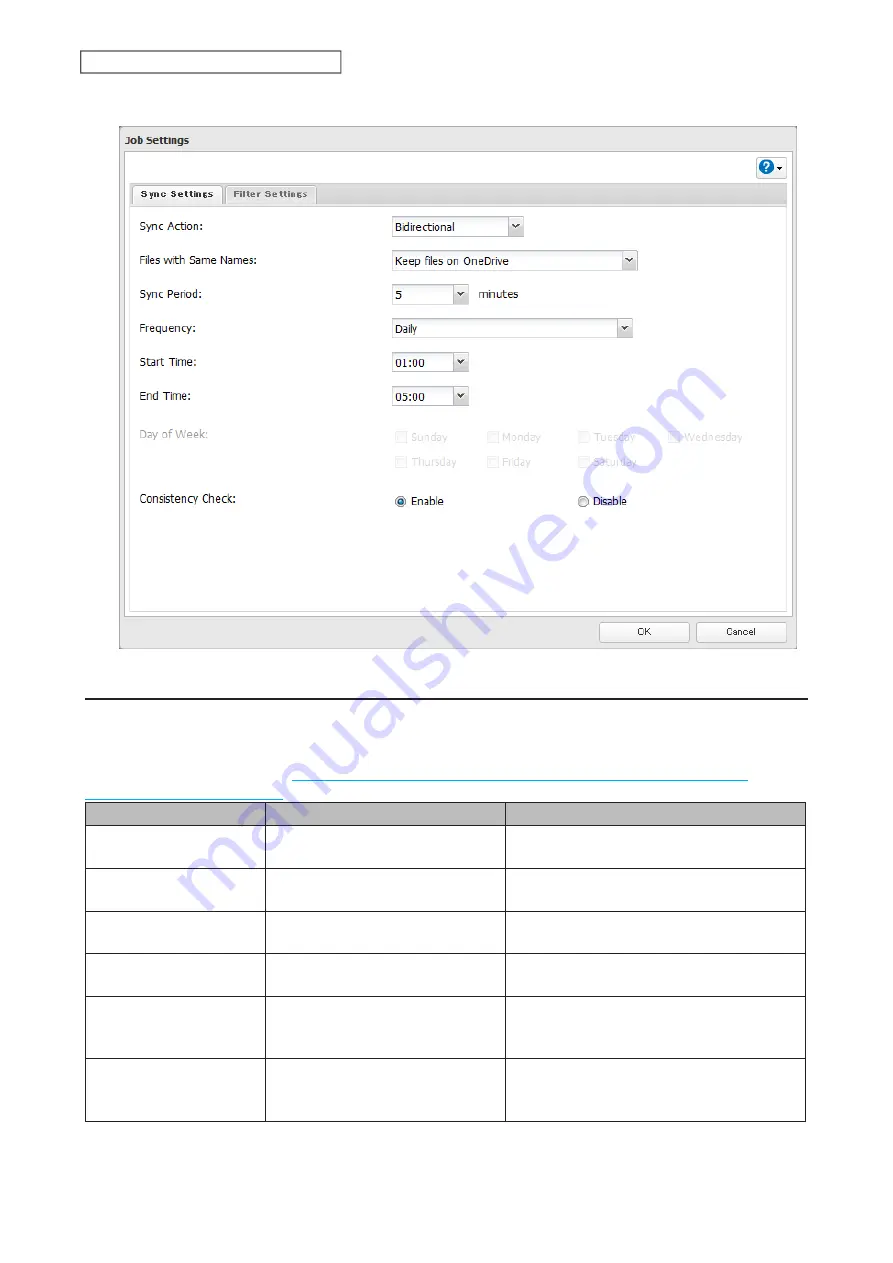
6
Configure the desired settings and click
OK
.
Corrective Actions for in Case of Error
You may encounter error messages that contain the following error codes when creating OneDrive Sync jobs;
the error log may contain the following error codes as well. If you encounter one of the following error codes,
refer to the table below and try the respective corrective action. If the error code is not listed on the table, refer
to the Microsoft website instead:
https://docs.microsoft.com/en-us/onedrive/developer/rest-api/concepts/
.
Code
Description
Corrective Action
access_denied
Access denied for the requested
information.
To link with OneDrive, please consent to the
request from OneDrive.
server_error
The authentication server
encountered a temporary error.
Please wait for about 10 minutes and try
again.
temporarily_unavailable
The authentication server is too
busy.
Please wait for about 10 minutes and try
again.
authcode_notfound
The authentication server is too
busy.
Please wait for about 10 minutes and try
again.
auth_server_error
The authentication server
encountered a temporary error.
The authentication server will recover within
UTC 12:00 midnight–8:45 a.m. (Mon–Fri).
Please wait until it recovers.
auth_server_
maintenance
The authentication server is
currently undergoing maintenance.
Maintenance will finish within UTC 12:00
midnight–8:45 a.m. (Mon–Fri). Please wait
until maintenance finishes.
122
Chapter 5 Cloud Services and Remote Access
Содержание Link Station LS710D
Страница 24: ...3 Click Create Folder 23 Chapter 2 File Sharing...
Страница 26: ...2 Tap Create Folder 3 Enter the desired folder name and tap OK 4 Tap OK when finished 25 Chapter 2 File Sharing...
Страница 31: ...2 Tap Create User 30 Chapter 2 File Sharing...
Страница 34: ...3 Click Add Group 33 Chapter 2 File Sharing...
Страница 73: ...5 Click Add 72 Chapter 4 Backup...
Страница 79: ...3 Click Edit 4 Click Browse 5 Select the shared folder and click OK 78 Chapter 4 Backup...
Страница 81: ...2 Click Time Machine 80 Chapter 4 Backup...
Страница 82: ...3 Click Select Backup Disk 4 Select the shared folder then click Use Disk 81 Chapter 4 Backup...
Страница 93: ...4 Click the Options tab 5 Click Edit 92 Chapter 5 Cloud Services and Remote Access...
Страница 97: ...7 Enter the desired job name and click Next 96 Chapter 5 Cloud Services and Remote Access...
Страница 98: ...8 Select Backup and click Next 97 Chapter 5 Cloud Services and Remote Access...
Страница 100: ...10Specify the sync period and click Next 99 Chapter 5 Cloud Services and Remote Access...
Страница 106: ...7 Enter the desired job name and click Next 105 Chapter 5 Cloud Services and Remote Access...
Страница 107: ...8 Select Restore and click Next 106 Chapter 5 Cloud Services and Remote Access...
Страница 112: ...6 Enter the desired job name and click Next 111 Chapter 5 Cloud Services and Remote Access...
Страница 115: ...9 Specify the sync period and click Next 114 Chapter 5 Cloud Services and Remote Access...
Страница 122: ...4 Click the Options tab 5 Click Edit 121 Chapter 5 Cloud Services and Remote Access...
Страница 127: ...3 Tap NAS Setup 126 Chapter 5 Cloud Services and Remote Access...
Страница 130: ...129 Chapter 5 Cloud Services and Remote Access...
Страница 147: ...6 Select a file to move and click Action 7 Click Move 146 Chapter 6 Multimedia...
Страница 152: ...7 Click Delete 8 Click Delete again 151 Chapter 6 Multimedia...
Страница 184: ...5 Configure your settings then click OK 6 Click OK when finished 183 Chapter 9 Advanced Features...


