CHAPTER 4 PROGRAMMING WITH COMMANDS
PD-3000
105
Programming
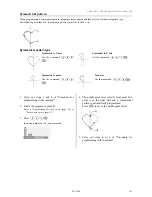
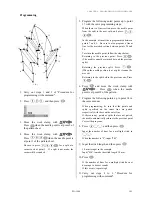
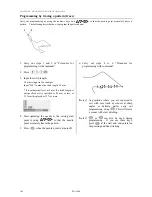
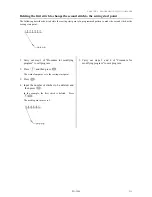
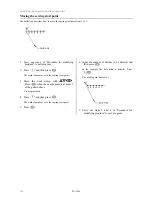
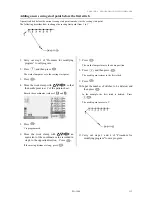
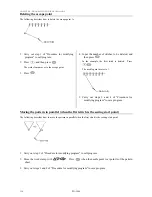
1. Carry out steps 1 and 2 of "Procedure for
programming with command".
2. Press
, and then press
.
3. Move the work clamp with
.
Press
when the needle point is at point 2 of
the pattern sheet.
4. Move the work clamp with
.
Press
when the needle point is
at point 3 of the pattern sheet.
Be sure to press
for a split at a
corner such as point 3. If a split is not made, the
corner will be rounded.
5. Program the following noted points up to point
17 with the curve programming steps.
When there is a liner section, move the needle point
from the split to the next split, and press
.
In the example, a linear line is programmed between
points 7 and 9. Be sure to also program a linear
line for the matched section between points 24 and
26.
To return the needle point, follow the steps below.
Returning to the previous point: Press
.
(The needle cannot be returned beyond the previous
split.)
Returning the previous split: Press
.
(When the needle position is at a split, it cannot be
moved.)
Returning to the split before the previous one: Press
.
6. Press
and move the work clamp with
. Press
when the needle
point is at point 18 of the pattern.
7. Program the following points up to point 34 in
the same manner.
When programming, be sure that the points and
splits specified on the inner line are paired
respectively with those on the outer line.
If there are any points or splits that are not paired,
the needle automatically returns to the previous point.
Correct the program.
8. Press
, and then press
.
Input the number of lines for a multiple stitch in
.
When the number is "5", input "505".
9. Input the stitch length, and then press
.
3.0 mm is input in the example.
Input "030" to make the stitch length 3.0 mm.
10. Press
.
If the number of lines for a multiple stitch has not
been input, a buzzer sounds.
If this occurs, repeat step 8.
11.
Carry out steps 4 to 6 "Procedure for
programming with command".
19
18
1
2
3
4
5
6
7
8
9
10
12
13
14
15
16
17
34
33
32
31
30
28
27
26
25
24
23
22
21
20
11
29
(A)
Содержание PD-3000
Страница 8: ...PD 3000 ...
Страница 9: ...PD 3000 Chapter 1 Read Me ...
Страница 12: ...CHAPTER 1 READ ME 4 PD 3000 ...
Страница 13: ...PD 3000 Chapter 2 Setting Up Your Programmer ...
Страница 28: ...CHAPTER 2 SETTING UP YOUR PROGRAMMER 20 PD 3000 ...
Страница 29: ...PD 3000 Chapter 3 Programming with Icons ...
Страница 95: ...PD 3000 Chapter 4 Programming with Commands ...
Страница 152: ...CHAPTER 4 PROGRAMMING WITH COMMANDS 144 PD 3000 ...
Страница 153: ...PD 3000 Chapter 5 Extended Option Output ...
Страница 180: ...CHAPTER 5 EXTENDED OPTION OUTPUT 172 PD 3000 Block diagram Connector layout of the main circuit board ...
Страница 181: ...PD 3000 Chapter 6 Reading Saving Deleting Program and Formatting Media ...
Страница 190: ...CHAPTER6 READING SAVING DELETING PROGRAM AND FORMATTING MEDIA 182 PD 3000 ...
Страница 191: ...Chapter 7 Checking Copying Moving Changing Program ...
Страница 199: ...PD 3000 Chapter 8 Displaying Sewing Machine Program ...
Страница 201: ...PD 3000 Chapter 9 Displaying a Clock ...
Страница 203: ...CHAPTER 9 DISPLAY A CLOCK PD 3000 195 Setting a clock 1 Select Press 2 Select Press 3 Set the time Press ...
Страница 204: ...CHAPTER 9 DISPLAY A CLOCK 196 PD 3000 ...
Страница 205: ...PD 3000 Additional Information ...


