SEWING THE STITCHES
142
Button Sewing
Buttons with 2 or 4 holes can be attached, using the machine.
a
Select .
→
The feed dogs are lowered automatically.
b
Raise the presser foot.
c
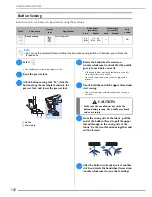
Attach button sewing foot “M”, slide the
button along the metal plate and into the
presser foot, and lower the presser foot.
a
Button
b
Metal plate
d
Rotate the handwheel toward you
(counterclockwise) to check that the needle
goes into each hole correctly.
*
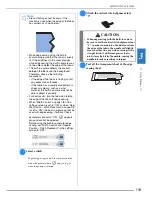
If the needle does not reach the holes on the left
side, adjust the stitch width.
*
To attach the button more securely, repeat the
process.
e
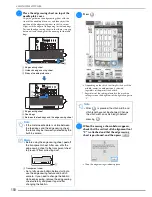
Gently hold the end of the upper thread and
start sewing.
→
The machine stops automatically when sewing is
finished.
f
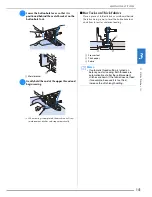
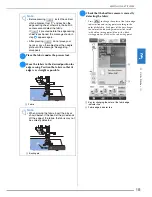
From the wrong side of the fabric, pull the
end of the bobbin thread to pull the upper
thread through to the wrong side of the
fabric. Tie the two thread ends together and
cut the threads.
g
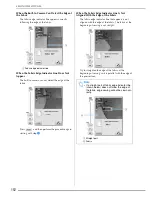
After the button is attached, select another
stitch and rotate the handwheel toward you
(counterclockwise) to raise the feed dogs.
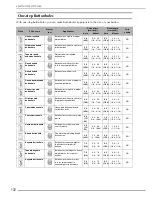
Stitch
Stitch name
Presser
foot
Applications
Stitch width
[mm (inch)]
Stitch length
[mm (inch)]
Twin
needle
Auto
Manual
Auto
Manual
Button sewing
Attaching buttons
3.5
(1/8)
2.5 - 4.5
(3/32 - 3/16)
—
—
NO
Note
• Do not use the automatic thread cutting function when sewing buttons. Otherwise, you will lose the
thread ends.
CAUTION
• Make sure the needle does not strike the
button during sewing. The needle may break
and cause injury.
Содержание 882-W04
Страница 7: ...IMPORTANT SAFETY INSTRUCTIONS 5 ...
Страница 72: ...CHANGING THE NEEDLE 70 ...
Страница 90: ...USEFUL FUNCTIONS 88 ...
Страница 186: ...USING THE MEMORY FUNCTION 184 ...
Страница 326: ...TROUBLESHOOTING 324 ...
Страница 335: ...ENTERING STITCH DATA 333 MY CUSTOM STITCH 8 A new point is entered and moves to it c Use to move the point ...
Страница 338: ...USING STORED CUSTOM STITCHES 336 ...
Страница 373: ......
Страница 374: ......
Страница 375: ......
Страница 376: ...English 882 W04 W05 XF0228 0011 Printed in Taiwan ...

