background image


30 

APPENDIX F

– CONFIGURE WI-FI CONNECTION 


To use the wireless capabilities of a printer equipped with the optional 802.11b wireless interface (Wi-
Fi), it will first be necessary to setup the printer with information and security settings that match the 
settings of the IEEE 802.11b compatible wireless server/router you are connecting to.  Printer 
purchased after April-2014 is able to support IEEE 802.11g compatible wireless server/router. 
 
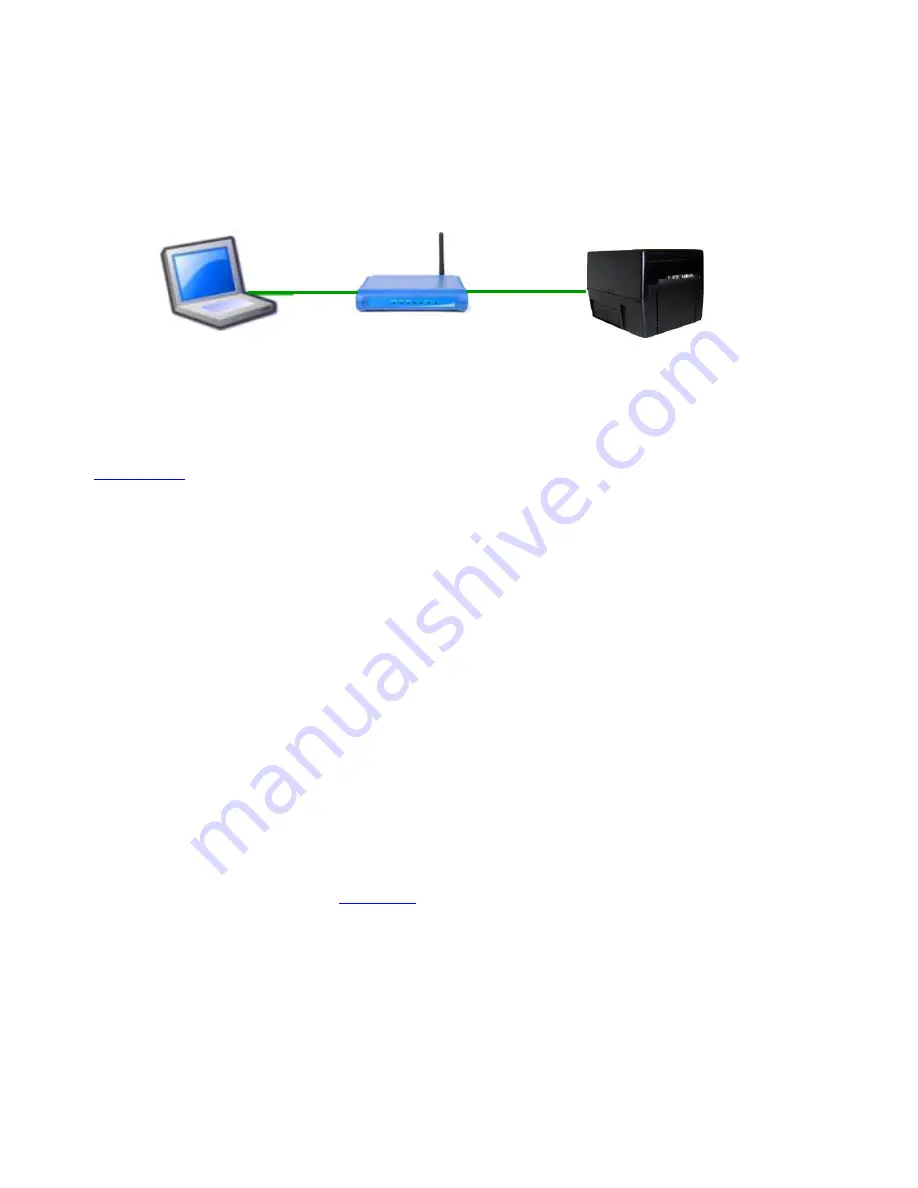
Our Wi-Fi printer is designed to work with a wireless router. 


To initially configure the wireless settings, it will be necessary to connect to the printer via the Parallel, 
RJ12, USB or Ethernet (if so equipped) interface using a Windows or MAC based system.   
 
This may be done using our Configure and Test program for Windows or Customer program for MAC 
(see 

Appendix F

).  The printing of a ticket via this program will confirm it is communicating with the 

printer. 
 
To use the wireless capabilities in FGL and PCL 26/46 model printers equipped with a wireless 
interface, it will first be necessary to setup the printer with information and security settings that match 
the wireless settings of the local wireless server/router.  To configure the printer with the correct 
security settings, it is necessary to acquire these settings directly from the wireless server/router or 
see your network administrator.  Also to initially configure the wireless settings it will be required to 
temporarily connect a cable between the printer and the host computer.   
 
We recommend that the Wi-Fi be configured by either your system administrator or IT support staff.   
 

The below steps walk you through the Wi-Fi setup in the Infrastructure mode.  

The Wi-Fi router must be configured 

to support an IEEE 802.11b Wi-Fi device

.


Printers manufactured after April 2014 are able to support an 

IEEE 802.11g Wi-Fi device. 


1.  The printer will need to be connected to the host computer via a cable (parallel, serial, USB or optional Ethernet 

if your printer has it.  For initial install the printer must be as close as possible to the Wi-Fi router itself. This will 
ensure maximum single strength.  Once you have confirmed the Wi-Fi is operational, the printer may be moved 
to its desired location.  
 

2.  You will want to confirm you are able to print a ticket using our Configure and Test program for Windows or 

Customer program for MAC (see 

Appendix C

).  The printing of a ticket via this program will confirm it is 

communicating with the printer. 
 

3.  Click on the Setup 

Wi-Fi 

button. 


4.  When the Configure Printer Wi-Fi and Security menu comes up you have a few choices. 

a. 

Wireless Mode


– Infrastructure (using a Wi-Fi network router) or Ad Hoc (peer to peer).  


b. 

Disable Wireless 

– You would choose this if you wanted to disable the Wi-Fi 

Enable with Static IP


– This would be for networks that require a static IP address.  

Enable with DHCP IP

 - Automatically attempts to get an IP address from Local Server (this is the most 

common one and the one we will be using for the rest of the steps). 
 

Содержание LEMUR -C

Страница 1: ...LEMUR C TICKET PRINTERS Operator s Manual RevA 04 05 22...

Страница 2: ...8 1 7 Ticket Width Adjustment UPG 17 8 2 Cutter Assembly 18 9 0 General Cleaning 19 10 0 Logic Board 20 10 1 1 Logic Board Removal 20 10 1 2 Logic Board Installation 20 11 0 Spare Parts List 21 13 0...

Страница 3: ...t stock improper operating conditions etc are excluded from this warranty Warranties for printers are 1 year from date of shipment NOTE The print head is a consumable part and is warranted for 90 days...

Страница 4: ...or additional details 2 0 Unpacking the Printer The printer is shipped in a ruggedized container Please save packing material for future use Remove the printer and accessories from the box and inspect...

Страница 5: ...0V configuration United Kingdom only The supply plug must comply with BS1363 3 pin 13 amp and be fitted with a 5A fuse which complies with BS1362 The mains cord must be HAR or BASEC marked and be of t...

Страница 6: ...et See section 5 0 Ticket Load Procedure NOTE You want to make sure that the black timing mark is in the correct location before loading the tickets into the paper path See www bocasystems com tickets...

Страница 7: ...rinted on a 2 x 5 5 concert size ticket Above sample was printed on a 3 25 x 2 cinema size ticket Your printout may vary depending on printer configuration and ticket stock used Click here to return t...

Страница 8: ...k If you have any ticket load issues then make sure the paper guild slider bar is properly adjusted see 8 1 4 Ticket Width Adjustment Two typical ticket formats and feed directions are shown below The...

Страница 9: ...cket Width Adjustment Above shows ADJ2 or ADJW path Above shows RADJW path Two typical ticket formats and feed directions are shown below The black timing mark on the back of the ticket stock must be...

Страница 10: ...6 1 RDY 8 6 CTS USB USB 2 0 compliant devices ETHERNET Optional is a standard RJ45 Ethernet cable connection WI FI Optional is compatible with 802 11b g Wi Fi router and supports security settings WEP...

Страница 11: ...reases will seriously exponentially degrade the head life The thermal paper can affect the electrical head life in two ways Insensitive slow papers will typically encourage the user to increase the vo...

Страница 12: ...the printer should be done by qualified persons with power off and the AC cord unplugged from the printer Following any procedure requiring the removal of covers and or doors please verify that they...

Страница 13: ...ting bracket forward or backwards to achieve the desired cut or tear location On a Lemur with auto cut the cut position should be a 1 16 1 8 away from the ticket perforation On a Lemur without auto cu...

Страница 14: ...hen it has paper stock loaded in the printer Once a year the opto eye should be blown off with air This interval will vary depending upon the environment and the quality of the ticket stock Below imag...

Страница 15: ...oad opto and detecting the black timing mark on the back of the ticket stock cut tear opto 1 Remove the print head see 8 1 4 Thermal Print Head 2 Using inert dusting gas canned air or equivalent blow...

Страница 16: ...CABLE FROM PRINT HEAD 3 Lift up on the cam lock assembly located above the head mounting block or plate to remove pressure from the thermal head Photo A 4 Lift up on the head mounting plate thermal h...

Страница 17: ...ate Refer to section 8 1 3 Thermal Print Head 3 Apply a small amount of Isopropyl alcohol onto a paper towel to clean the rubber roller 4 Clean only the part of the rubber roller where the ticket stoc...

Страница 18: ...de Adjust the slider bar down to the proper ticket width making sure the bar is not too tight against the ticket The ticket should move freely in the paper guide Click here to return to Table of Conte...

Страница 19: ...djust the rail down to the proper ticket width making sure the rail is not too tight against the ticket The ticket should move freely in the paper path Above shows UPG adjusted for 2 wide media Above...

Страница 20: ...a ticket jam could occur The cutter area should be blown out with air periodically to prevent debris from building up inside the cutter area The required cleaning interval varies greatly depending on...

Страница 21: ...to the logic board This is normally done by removing the electronics cover or rear access panel a Remove 4 Philip head screws that are located on the bottom of the printer 2 Side the print module ass...

Страница 22: ...E Main Logic Board Ethernet option for printer with CJ46 type logic board 15 LC46 Main Logic Board Standard 15 LC46 cd Main Logic Board with optional RJ12 cash drawer mode 15 LC46 ecd Main Logic Board...

Страница 23: ...22 5 10 9 11 12 13 10 2 6 15 9 16 16 17 18 19 20 22 21 8 11A 14 14A 14B 6A...

Страница 24: ...the print head cam lock assembly is fully locked in the closed position Consult Thermal Print Head section For Lemur R see Thermal Print Head c Check that the ticket stock is being loaded correctly C...

Страница 25: ...cket cut opto f Contact your system provider or BOCA for further assistance 11 PRINTER SKIPS TICKETS AND DIES a See 10 12 TICKET JAM ENTERING THE CUTTER AREA a Make sure the entrance to the cutter are...

Страница 26: ...you are looking to make the cutout just big enough to fit the printer then we recommend making the cutout 0 50 larger than the height and width of the printer Attach the top plate to the printer using...

Страница 27: ...printer s control panel if your printer has an optional LCD display ETHERNET Quick Installation Guide Connect the printer to your network the IP address will be automatically assigned by your DHCP se...

Страница 28: ...driver connection https www bocasystems com documents Testing 20a 20BOCA pdf MAC Allows Ethernet Wi Fi USB HID interfaces or print driver connection https www bocasystems com documents Testing 20a 20B...

Страница 29: ...ted then clicks on the Enable FGL for PCL button For the MAC customer program under the Select Printer Operation choose Enable FGL Commands HP Click on the Yes Click the Yes button and then the OK but...

Страница 30: ...low provides an overview of an iPad connecting to a BOCA printer with optional Bluetooth interface Click on the setting icon When setting menu comes up click on Bluetooth Turn Bluetooth ON if it was O...

Страница 31: ...ttings it will be required to temporarily connect a cable between the printer and the host computer We recommend that the Wi Fi be configured by either your system administrator or IT support staff Th...

Страница 32: ...ecurity Mode Allows the user to communicate through the network using WPA or WPA2 Personal wireless encryption When this security encryption mode is chosen it will be required to enter the WPA Shared...

Страница 33: ...ialization it will establish wireless communication with the local network Depending on your network a connection can be established in less than 60 seconds or as long as 5 minutes If it fails then se...

Страница 34: ...tware We recommend that the print driver is installed by either your system administrator or IT support staff These print drivers are intended to be installed on Windows PC platforms X86 AMD64 or IA64...

Страница 35: ...nstalled by either your system administrator or IT support staff Below is a link that provides details on how to installed the print driver www bocasystems com documents MAC_Driver_Install_Guide_2021...

Страница 36: ...er has a nice clean edge Not crumpled or tape stuck to it Begin loading the tickets through the entrance slot with a smooth motion until it stops At this point the printer will automatically grad and...

Страница 37: ...e serviced just like a standard Lemur C printer Thermal head See 8 1 3 Thermal Print Head Platen See 8 1 4 Platen Rubber Driver Roller Cutter Assembly See 8 2 Cutter Assembly General Cleaning The inte...

Страница 38: ...ay vary from above photo 1 Attach the spindle onto the roll holder arm using the two Philip Hex head screws 2 Affix the rubber feet to the bottom roll holder arm plate Align the two floor plate pieces...

Страница 39: ...the printer Install the two self tapping 1 4 hex head screws and tighten 4 Flip both the Lemur and attached floor plate so all rubber feet are facing down 5 Align the two holes on the roll holder up...

Страница 40: ...ve substance that may cause a paper jam or damage the print head 7 Place the roll onto the spindle so the media turns in a clockwise direction 8 Install the adjustable stopper disc onto the spindle an...

Страница 41: ...This service will become available one week after the platinum plan begins The following items are not covered by the service plans Preventative Maintenance the customer is responsible to provide a re...

Страница 42: ...for covered printers at BOCA s sole discretion as needed Email support for non warranty non contract printers is billable at 100 00 per incident However BOCA may at its sole discretion choose to waiv...

Страница 43: ...42 APPENDIX M REFERENCE DRAWING...

Отзывы: