background image

V4.5 


©2015-2019 AUBO.All rights reserved. 


138 


Figure 11-17 Move Line 

Move Track 


Figure 11-18 Move Track 

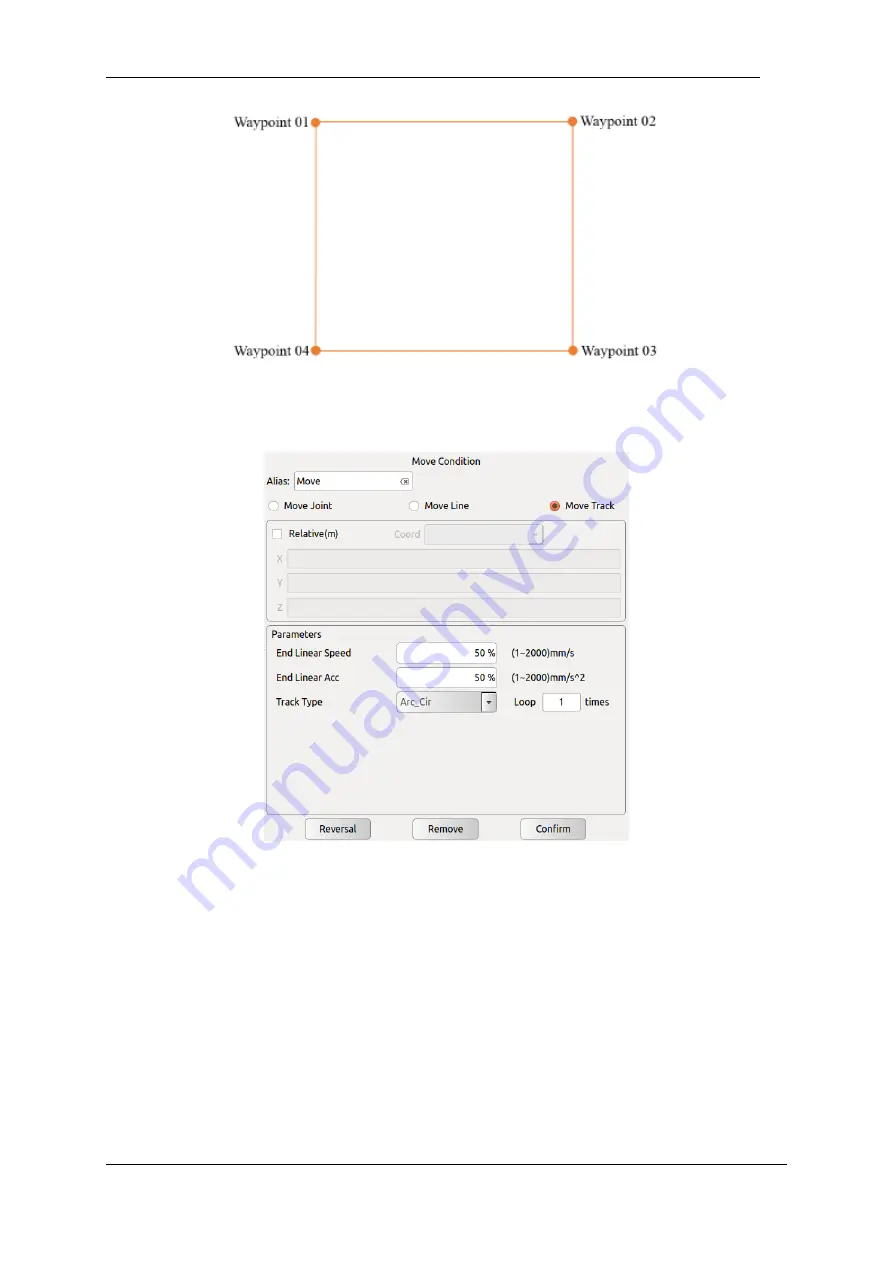
In multiple waypoints move track, the corresponding speed and acceleration of joint space and Cartesian 
space is continuous and the speed of start and end waypoint is zero during the operation. It provides three 
modes: 

Arc-Cir

Arc and circumference, 

moveP

Smooth transition of linear trajectory, 

B-

Spline

B-spline curve. When writing a Move Track, you need at least three waypoints for each Move 

condition (there is no upper limit for theory), and you need to insert an Axis Move command before the 
command. The node under this Move command needs to move with the first path of the track. The points 
are the same. 

Arc 

Use three-point method to determine the arc and follow a sequence move from start waypoint to end 
waypoint. It belongs to Cartesian space trajectory planning. Pose changes only influenced by the start point 

Содержание AUBO-i10

Страница 1: ...USER MANUAL AUBO i10 CB4 Please read this manual carefully before using the product...

Страница 2: ......

Страница 3: ...by AUBO Beijing Robotics Technology Co Ltd This manual is applicable to AUBORPE V 4 5 For details please refer to the version information section of this manual Please check the actual product versio...

Страница 4: ...ology Co Ltd assumes no responsibility for any errors or omissions in this document AUBO Beijing Robotics Technology Co Ltd assumes no responsibility for incidental or consequential damages arising fr...

Страница 5: ...use 18 Emergency situations 19 Emergency stop device 19 Recovering from the emergency condition 20 Emergency move for joint 20 Excessive force protection 20 2 TRANSPORTATION AND PRECAUTIONS 21 3 MAINT...

Страница 6: ...age mode 49 8 INTERNAL ELECTRICAL INTERFACE 53 Introduction 53 Electrical warnings and cautions 53 Control box communication interface 54 Control box I O power supply 55 Internal power supply 55 Exter...

Страница 7: ...85 Power on the manipulator 85 Preparation 85 Power on System 86 Power off the manipulator 87 Start system quick 87 10 TEACH PENDANT 88 Instruction 88 Teach Pendant Operation Interface 88 User login 8...

Страница 8: ...ion 106 Tool Calibrate 107 Coordinate Calibration 108 Robot Safety Settings 112 System Setting tab 113 Language Tab 113 Date Time tab 114 Network Tab 115 Password Tab 115 Lock Screen 116 Update Tab 11...

Страница 9: ...t 146 Block Comment 147 Goto 147 Message 148 Empty 149 Advanced Command Condition Tabs 149 Thread 149 Script 149 Offline Record 150 Record Track 151 Variable Tab 153 Timer 154 Inserch Timer 154 Timer...

Страница 10: ...V4 5 2015 2019 AUBO All rights reserved vi...

Страница 11: ...eir own robot control system based on the application interaface provide by the AUBO platform Meanwhile AUBO robot is equipped with a dedicated programmable operation interface which allows the user t...

Страница 12: ...ed as below Name Quantity Manipulator AUBO i10 1 Teach Pendant 1 Control Box 1 Teach Pendant cable 1 Manipulator cable 1 Power cable 1 Manipulator base optional 1 Product outline structure is shown in...

Страница 13: ...d specifications in this manual Both the integrators and users should have adequate safety awareness and follow the Industrial robots safety regulations ISO 10218 Warning Symbols in this Manual The ta...

Страница 14: ...t consequences Safety Precautions General This manual includes safety precautions for protecting the user and preventing damage to the machine Users need to learn all the relevant descriptions and ful...

Страница 15: ...en the robot is installed a comprehensive risk assessment is necessary and the test results need to be recorded in a report 3 Set and modify the safety parameters by a qualified person Use password or...

Страница 16: ...increase the risk or lead to new dangers Make sure to perform a comprehensive risk assessment for entire installation Always choose the highest level performance when different safety and emergency s...

Страница 17: ...rogram separately It is recommended to test the robot program using temporary waypoints outside the workspace of other machines 2 AUBO Beijing Robotics Technology Co Ltd cannot be held responsible for...

Страница 18: ...it is possible that robot is waiting for the signal and in the upcoming action status Even in such state it should be considered as the robot is in action 4 A line should be drew to mark the range of...

Страница 19: ...ents Task based Risk Assessment Methodology ANSI B11 0 2010 Safety of Machinery General Requirements Risk Assessment AUBO robot integrators need to fulfill but not limited to the following responsibil...

Страница 20: ...2015 2019 AUBO All rights reserved 16 AUBO Beijing Robotics Technology Co Ltd seeks to ensure the accuracy and reliability of the contents in this manual but is not responsible for any errors or omiss...

Страница 21: ...to reducer the risk to acceptable level However Integrators should be aware that specific robotic equipment may have other dangers Combine the inherent safety design which applied by AUBO robot with...

Страница 22: ...assed the risk assessment On the premise that not using any security device and sensing device there will be no unacceptable risk when personnel or other objects in workplace like tool equipment surfa...

Страница 23: ...ith IEC 60947 5 5 Emergency stop button can be found on the teach pendant and the control box of AUBO i10 The button must be pressed when a dangerous situation or emergency occurs As shown in Figure1...

Страница 24: ...or in an emergency which can force the robot to move by follow method Forced back driving Force a joint to move by pulling hard at least 700 N on the robot arm Excessive force protection Manipulator h...

Страница 25: ...bot Power up the robot after fixing it Using hand guiding to adjust robot orientation to a suitable location Save the original packaging after transportation Store the packaging material in a dry plac...

Страница 26: ...V4 5 2015 2019 AUBO All rights reserved 22...

Страница 27: ...ally The purpose of maintenance and repair is to r to make sure that system runs normally or help it return to normal condition when system error occurs including faults diagnosis and actual maintenan...

Страница 28: ...deactivated safety measures immediately after the work is completed 3 Record all maintenance operations and save in technical documentation 4 There is no self serviceable part in control box If mainta...

Страница 29: ...pment Disclaimer 1 This Warranty will be invalid if the equipment defect is caused by improper handling or failure to follow the relevant information described in the user manual 2 Failures caused by...

Страница 30: ...ned by AUBO Beijing Robotics Technology Co Ltd According to the product warranty AUBO Beijing Robotics Technology Co Ltd only provides warranty to the flaws and defects in the products and components...

Страница 31: ...s a degree of freedom As shown in figure5 2 manipulator s joint includes a robot base A a shoulder B an elbow C a wrist1 D a wrist2 E and a wrist3 F The manipulator base is used for the robot body and...

Страница 32: ...s inside control box AUBO i10 provides multiple I O interfaces there are 4 channel digital I O and 2 channel analog inputs on end effector flange Control box communicates with manipulator by CAN Bus T...

Страница 33: ...tion No electromagnetic noise No radioactive materials Low humidity No flammable materials Ambient temperature 0 C 45 C Avoid direct sunlight avoid using outdoor Floor carrying capacity Install manipu...

Страница 34: ...reserved on each side of the control box to ensure smooth air circulation 3 The teach pendant can be hung from the control box Make sure you don t step on the cable 1 Make sure that the control box t...

Страница 35: ...he cylindrical space directly above and directly below the robot base When choosing the installation position be sure to consider the cylindrical space directly above and directly below the robot base...

Страница 36: ...Base AUBO robot manipulator base is shown in figure 6 3 The base has 4 anchor bolts for easy fixing When the user needs to fix the robot rotate the plum wheel to adjust the height of the anchor bolt a...

Страница 37: ...t front view Manipulator Installation The robot has a function of self adaption for Installation pose It can be installed in base hoisting mount on wall or any specific installation method as shown be...

Страница 38: ...l mounted etc after running the AUBOPE and click the ON OFF then the teach pendant will pop up following window Figure 6 7 Pop window of changing installation position Under this circumstance please c...

Страница 39: ...he robot can fall over and cause injury End effector Installation Mechanical structure size of end effector flange End effector flange has four M6 threaded holes and a 6 positioning hole to fix the fi...

Страница 40: ...control box There is a socket on the bottom of the robot body There is a socket on the lower right side of the teach pendant Insert the corresponding cable into the socket before use Table 3 Cable Co...

Страница 41: ...ontrol box One end of the teach pendant cable connected to the control box is a curved circular aviation plug First unscrew the dust cap on the control box interface from the socket and then insert th...

Страница 42: ...nsertion and tighten the locking ring after inserting it 5 Robot cable is connected to the robot body One end of the robot body cable connected to the robot body is a straight pipe aviation plug First...

Страница 43: ...connector should have at least the rated current of the highest current in the system 2 Make sure that all cables are properly connected before the control box is energized Always use the original po...

Страница 44: ...V4 5 2015 2019 AUBO All rights reserved 40...

Страница 45: ...ntrol box and the robot Therefore the connection between the robot and the teach pendant or the control box must be checked securely before use Control box is designed with hardware protection and sof...

Страница 46: ...e robot only Do not use the robot for applications where the cables will be subjected to bent Contact your supplier if longer or flexible cables are needed 3 All mentioned GND connections are only for...

Страница 47: ...state EMERGENCY The robot emergency stop button the robot is powered off after pressing STANDBY When the indicator light is on it indicates that the control panel interface board program is initialize...

Страница 48: ...manual mode the indicator light is always on In the linkage mode the indicator light is off to indicate that the teach pendant is not available Control box side panel The USB interface is provided on...

Страница 49: ...V4 5 2015 2019 AUBO All rights reserved 45 Figure 7 4 Control box side panel parts marking a Figure 7 5 Control box side panel parts marking b...

Страница 50: ...ndle 5 Leakage protector displayed after removing the 3 power on handle 6 Safety Relays 7 Teachee enable switch 8 AC contactor 9 Ground terminal 10 Sub terminal 11 48V DC power supply 12 Motherboard d...

Страница 51: ...ble 6 Description of the control panel back panel interface Number Interface Function 1 Ethernet interface Can be used for remote access and control 2 Modbus RTU interface Can be connected to a Modbus...

Страница 52: ...nd unplug the USB device while the robot is running Selection of working mode The robot system has two working modes manual and linkage which are selected by button switches When changing the working...

Страница 53: ...age mode the robot arm can communicate with one or more external devices mechanical arms etc through the linkage mode IO port This mode is generally suitable for coordinated motion between multiple ro...

Страница 54: ...he power to the control box is disconnected Follow the demonstration below connect the external devices with IO interface on the back of the control box Users can use the external singals to manipulat...

Страница 55: ...e use showcase Under linkage mode if the teach pendant is not needed after setup the default program successfully the user can switch off the teach pendant enable in the control box After TEACH PENDAN...

Страница 56: ...V4 5 2015 2019 AUBO All rights reserved 52...

Страница 57: ...For digital IO outputs the method to check the IO status is to measure the resistance between DO and 0V When the DO is set to Effective or High the resistance goes to approximately 0 otherwise the res...

Страница 58: ...UBO Robotic I Series standard control box provides a variety of electrical interfaces for connecting external devices that are easily accessible to the user Remove the back cover of the back panel of...

Страница 59: ...The control panel panel IO defaults to the internal power supply mode as shown in the following figure Figure 8 2 Internal power supply schematic External power supply If the user needs to use externa...

Страница 60: ...O are orange color in the external panel of the control box The safety functions are defined as following Input SI00 SI10 External Emergency Stop SI04 SI14 Enabling Device SI01 SI11 Safeguard Stop SI0...

Страница 61: ...is case the robot can be operated without any additional safety equipments Figure 8 4 Default safety configuration Safety Output Worst case responding time Safety Output Worst case responding time Rob...

Страница 62: ...All rights reserved 58 External Emergency Stop Input In the case that there is required to use one or more external emergency stop buttons users can connect those devices as below Figure 8 5 External...

Страница 63: ...t curtain to connect to the safeguard stop input interface See below Figure 8 6 Safeguard stop input Internal Power Supply After the operator enters the safety zone the robot stops moving and maintain...

Страница 64: ...the robot stops moving and maintains category 2 stop When the operator leaves the safety zone it needs to be reset from the outside of the safety zone by pressing reset button and then click on the AU...

Страница 65: ...8 8 Reduceed mode input connection When the operator enters the safety zone the robot enters the reduction mode and the motion parameters joint speed TCP speed of the manipulator are limited to the us...

Страница 66: ...nput terminal See the next figure Figure 8 9 Safeguard stop Resert Input connection Internal power supply After the operator enters the safety zone the robot stops moving and maintains at category 2 s...

Страница 67: ...ing device input connection In the verify mode the robot starts to move when the three position enable switch is in the enable position intermediate position when the user releases or presses the thre...

Страница 68: ...rmal mode and the user can use the robot normally When the user switches the selector switch to the B position the robot enters the verification mode In this mode only when the enabling device input i...

Страница 69: ...ator can use the emergency stop button of one machine to control the entire line of the machines into an emergency stop state The user can refer to the following example the two robots share the emerg...

Страница 70: ...following example to connect the external alarm light to the system emergency stop output interface See the next figure Figure 8 14 robot emergency stop output connection In this configuration when th...

Страница 71: ...xample to connect the external indicator to the robot moving output interface See the figure below Figure 8 15 Figure robot moving output connection In this configuration when the robot moves normally...

Страница 72: ...ple to connect the external indicator to the robot not stopping output interface See the figure below Figure 8 16 robot not stopping output connection In this configuration when the robot receives the...

Страница 73: ...er to the following example to connect the external indicator to the reduced mode output interface See the figure below Figure 8 17 reduced mode output connection In this configuration when the robot...

Страница 74: ...following example to connect the external indicator to the not reduced mode output interface See the figure below Figure 8 18 not reduced mode output connection In this configuration when the robot en...

Страница 75: ...fer to the following example to connect the external indicator to the system error output interface See the figure below Figure 8 19 System error output connection In this configuration when the robot...

Страница 76: ...of the interface is not open to the user The user can view the internal I O status through the teach pendant interface see10 3 1Controller I O Tab The internal IO status of the control box is describ...

Страница 77: ...is to measure the resistance between DO and 0V When the DO is set to Effective or High the resistance goes to approximately 0 otherwise the resistance is about 12K When connecting external devices all...

Страница 78: ...10 DO11 DO12 DO13 DO14 DO15 DO16 DO17 Electrical parameter specification DI Input form P lesend No voltage contact input NPN open collector transistor Input method Input signal current Electrical spec...

Страница 79: ...le Figure 8 21 DI end connection button switch schematic DI end connection two end sensor As shown in the figure below there is a sensor connected between the DI terminal and GND If the voltage differ...

Страница 80: ...ented by VO and CO respectively As shown below Figure 8 24 Analog I O interface diagram General purpose analog input and output available to users Input VI0 Analog voltage input VI2 Analog voltage inp...

Страница 81: ...g accuracy 10 BITS VO end electrical parameters Parameter term minimum value Maximum value Single VO terminal input voltage 0V 10 V Single CO terminal input current 0mA 20 mA Example Analog voltage ou...

Страница 82: ...panel of the control box is the clear alarm signal interface This signal is active low Remote switch control I O interface The remote power on off control I O interface is located on the back panel in...

Страница 83: ...ter the switch is closed Figure 8 28 schematic diagram of remote boot wiring Remote power off This example shows how to connect the remote shutdown interface ie the teach pendant and the robot are pow...

Страница 84: ...4 5 2015 2019 AUBO All rights reserved 80 The linkage control interface can be used to control the movement state of the robot body from the teach pendant For details on the usage see7 4 2Linkage mode...

Страница 85: ...ns see table below Pin Color Signal 1 White GND 2 Brown 12 24V 5 Gray DI O 0 7 Blue DI O 1 3 Green DI O 2 4 Yellow DI O 3 8 Red AI 0 6 Pink AI 1 Table 22 Electrical parameters of the analog end Parame...

Страница 86: ...inputting 1A current 0 35 0 4 0 85 A Input Current 0 35 0 4 0 5 A Current through GND 0 35 0 4 0 5 A Tool digital input The digital input is implemented as an NPN with a weak pull down resistor as sho...

Страница 87: ...V4 5 2015 2019 AUBO All rights reserved 83...

Страница 88: ...rface for menu operation programming and online operation The user can directly operate and control the robot body to perform related tasks through the AUBORPE software displayed on the teach pendant...

Страница 89: ...h pendant Please refer to 6 6 Cable connection for specific connection instructions and warning information 6 It is determined that the safety information in Chapter 6 ROBOT INSTALLATION has been obse...

Страница 90: ...as two working modes manual mode and linkage mode Please read chapter 8 4 4 for more instructions Wait for STANDBY lights steady and enters the standby state Press start up button on the upper left of...

Страница 91: ...em which may result in robot malfunction 2 Ensure to unplug the power cord after power off the whole robot system Start system quick Before starting the robot system please make sure that the robot bo...

Страница 92: ...stop button on the teach pendant can be used to stop the robot If you need to return to the normal mode you need to rotate the button in the direction shown on the button 4 Force control switch It is...

Страница 93: ...t user cannot choose actively The default password is 1 the user cannot modify Safty Settings 10 5 and update 10 6 6 are not available Username does not support customization After checking the automa...

Страница 94: ...nterface Robot Movement Control Robot Teaching User Interface The Robot Teaching panel is used for the robot teaching operation User can move the robot by clicking icon on the panel and get feedback i...

Страница 95: ...d initial pose button 15 Speed display 16 Date and time display 17 speed control 1 Currently logged in user The section of the software header bar displays the name of the currently logged in user You...

Страница 96: ...tating clockwise along Z axis zoom in and zoom out The function of the icons as follow Base plane click to hide the base reference plane in the simulation interface Actual waypoint model click to hide...

Страница 97: ...low the controlled variable change precisely in a stepwise manner Use step control mode by activating step mode Click the button on both sides of input box to adjust the robot s step length Position s...

Страница 98: ...user can control the motion state of the robot based on the base coordinate system the end coordinate system and the user defined coordinate system base Select the base coordinate system base to contr...

Страница 99: ...p down menu of the teach pendant interface 10 Robot real time status parameter display Figure 10 11 Pose and position information The X Y Z coordinates indicates the coordinate of tool flange center S...

Страница 100: ...V4 5 2015 2019 AUBO All rights reserved 96 Figure 10 3 Target selection 12 Orientation Control Figure 10 12 Orientation Control base Figure 10 13 Orientation Control end...

Страница 101: ...rface represents that a joint motor rotates counterclockwise and represents that a joint motor rotates clockwise as shown above Unit degree 14 Zero Pose Init Pose Figure 10 15 Buttons for Zero Pose an...

Страница 102: ...the 10 6 2 Date Time Settings section 17 Speed control Figure 10 5 Speed Control The user can adjust the speed of the robot arm teaching the percentage of the maximum speed by controlling the slider...

Страница 103: ...safety I O designed as dual channel redundant design to ensure the safety function should not lost in any case of single failure Internal I O only for internal function interface to provide status di...

Страница 104: ...There are four analog output signals VO0 VO1 CO0 and CO1 respectively VO0 VO1 output voltage CO0 CO1 output current output IO control select the IO and then enter the corresponding value in the text...

Страница 105: ...nd effect s setting status Users can configure 4 digital I O by pin 3 4 5 6 and pin 7 8 can be configured as an analog input Pin 2 can be configured to three kinds output voltages 0v 12V and 24V Users...

Страница 106: ...ab InitPose Figure 10 21 InitPose Click Set Init Pose to set the initial position by moving robot via the teach pendant or hand guiding which correspond to Init Pose on the interface and synchronize t...

Страница 107: ...ry and dynamics properties Constraints on the dynamics such as speed and acceleration of a manipulator with a load The tool calibration in the above figure is divided into three calibration interfaces...

Страница 108: ...entation and then add three waypoints while keeping the reference point the end tool relative to the coordinate system of the base unchanged At the final calibration of the 4 waypoints ideally the cen...

Страница 109: ...matics name and click the Add button to add a tool kinematic calibration The above figure also supports the manual write input of tool kinematics parameters After manually entering the parameters also...

Страница 110: ...ck Add to save the parameters When modifying the tool dynamics parameters first select the item to be modified and then enter the value to be modified and click the Modify button to complete the modif...

Страница 111: ...hen modify the tool calibration select the item to be modified you can modify the name kinematic parameters and dynamic parameters Click the Modify button to complete the modification When delete tool...

Страница 112: ...Oyz yOyx zOzx zOzy The different coordinate system types naming rules calibration points and requirements are listed as follows Figure 10 28 XOY The figure above is xOy type The first point requires f...

Страница 113: ...The first point requires for the calibration is the origin of the coordinate system The second point is any point on the positive of the Z axis and the third point is any point on the positive semi ax...

Страница 114: ...The first point requires for the calibration is the origin of the coordinate system The second point is any point on the positive of the Y axis and the third point is formed at any point within the f...

Страница 115: ...he coordinate system origin Use the same method to calibrate Point2 and Point3 Enter the name of the coordinate system and click the Add button to save the coordinate system parameters When modifying...

Страница 116: ...ection and the sixth level is the default level Motion limit initial value The initial value of the motion limit is the limit of the speed of the project After this configuration is completed the soft...

Страница 117: ...ce input signal is invalid When verification mode is selected the external enabling device input signal is valid System Setting tab The Robot Setting tab has nine units including Languages Date Time P...

Страница 118: ...V4 5 2015 2019 AUBO All rights reserved 114 Date Time tab Figure 10 39 Date Time tab Date Time tab can set date and time...

Страница 119: ...segment with the IP address of the robot Restart the AUBOPE system after saving the configuration Password Tab Figure 10 41 Password Tab The password setting unit can set the user password here the d...

Страница 120: ...ock Screen Check the display line number After switching to the online programming interface the line number of the program will be displayed in the program logic Enter the lock screen time and click...

Страница 121: ...reset from the USB memory stick The update interface can be modified only when the admin user logs in USB disk format supports FAT32 but does not support NTFS format Factory Reset Figure 10 43 Factory...

Страница 122: ...software firmware button in the interface as shown above click the scan software package scan firmware package and identify the software to be updated in the update package list Click on the software...

Страница 123: ...ration interface To fill in other basic information you need to refer to the parameter description of the added device b Configure the IO parameters of the device on the IO configuration page c After...

Страница 124: ...V4 5 2015 2019 AUBO All rights reserved 120 Figure 10 46 Modbus Add the PickIt 3D vision system to the teach pendant software Figure 10 47 PickIt Add Camera plugin to the teach pendant software...

Страница 125: ...V4 5 2015 2019 AUBO All rights reserved 121 Figure 10 48 Camera Added palletizing process package to the teach pendant software Figure 10 49 Stack...

Страница 126: ...nt status the operating state of the six joints voltages currents and temperatures Robot log display the log information Running time the robot operation time The format of Robot Log date time informa...

Страница 127: ...V4 5 2015 2019 AUBO All rights reserved 123...

Страница 128: ...ce Table 29 Online Programming Panel Number Name 1 Menu Bar 2 toolbar 3 Program list 4 sport control 5 Program operation 6 Program control 7 Property window The user s programming of the AUBO robot is...

Страница 129: ...commands Cutting can be used to cut the block Copying enables copying of blocks The paste command can be used to paste the block The delete command is a program edit control command and the program se...

Страница 130: ...ons such as user digital I O analog I O Variable condition when the variable is used the Arabic numeral indicates the value In the signal input and output 0 means invalid 1 means valid For text input...

Страница 131: ...the tab will change to Command automatically When a new project is created it will cover the current project Therefore remember to save the current project Click Add before to insert a new command be...

Страница 132: ...nd a target program and load The selected program will be loaded in program logic list Click Start button on the lower left corner to enter auto move tab Press and hold Auto button to move robot to in...

Страница 133: ...t enter a name and click save The project files will be saved as xml format If saved project need to be edited click Save Project again Saved project can be exported by clicking Robot Settings Update...

Страница 134: ...cording to the requirements Click auto load default project to load the default project automatically after opening the programming environment Click auto load and run default project to load and oper...

Страница 135: ...ally move Press Manual button to jump into the teaching interface which can move robot manually Manually move mode can be used when manipulator moves undesirably Manually move mode can be used when au...

Страница 136: ...ator can perform safely without hitting any working platform barriers Procedure Procedure is a process project You can edit the program section for multiplexing and it is easy to load into other proje...

Страница 137: ...ch can be edited for reuse are easily loaded into other project blocks New load and save engineering methods are consistent with the project management chapter The list of programs in the subproject s...

Страница 138: ...process block Select Procedure Undefined at the project list and the subproject file that can be called is displayed in the properties window Select the subproject file and click OK to invoke the subp...

Страница 139: ...three options for the motion properties of the arm move joint move line and move track A detailed description will be given later Click Remove to remove this Move command You must click Confirm to co...

Страница 140: ...itial velocity and final velocity are 0 The end moving path between these waypoints during the move can be observed on Track display If you want manipulator to move quickly between waypoints and witho...

Страница 141: ...e to ensure that start and end motions are smoother in a short time Maximum joint speed and maximum joint acceleration can be set as Figure 11 8 Move Line Figure 11 16 Move Line It makes the end effec...

Страница 142: ...ooth transition of linear trajectory B Spline B spline curve When writing a Move Track you need at least three waypoints for each Move condition there is no upper limit for theory and you need to inse...

Страница 143: ...celeration in the same linear motion MOVEP is a smooth transition of arcs between multiple linear trajectories The running characteristics of the blending radius are continuous motion and will not sto...

Страница 144: ...k the alias to the right of the input box to modify the command name Waypoint can only be added after the Move command Click Add before to add a new waypoint in front of the waypoint Click Add after t...

Страница 145: ...n as the pose variable Relative waypoint The user performs motion control of the robot arm or end tool coordinates by a position or attitude offset relative to the selected coordinate system Figure 11...

Страница 146: ...r the expression Click Confirm to confirm and save the configurations Figure 11 23 Loop Break Break command is used to jump out of a loop when Break condition is satisfied The gramma of Break should b...

Страница 147: ...put condition to input condition expression based on C language arithmetic rule as shown in Figure 11 18 b If the condition is evaluated to be true the program inside this If are executed If the expre...

Страница 148: ...e with the condition value of the following Case statement If they are equal execute the following program segment in the Case statement If there is no Case value that satisfies the condition then exe...

Страница 149: ...able Choose a variable on the below drop down list Input an expression to assign a value to the choose variable which should follow C language arithmetic rule Click Clear to clear expression Click Rem...

Страница 150: ...wait condition Click Remove to delete a wait command Figure 11 29 Wait Line Comment Line Comment is a command that explains the following program by line comment Clicking Alias to the right of the bla...

Страница 151: ...lected Block_Comment Click Confirm to confirm the configurations and save Figure 11 31 Block Comment Goto In some industrial scenarios the robot needs to be interrupted of whatever it s doing and turn...

Страница 152: ...ick Alias input box on the right to modify the command name Click the Message Type drop down menu to select the information types corresponding to Information Warning Critical and the corresponding wi...

Страница 153: ...p user can achieve the parallel control with the main program Note It is recommended to avoid the use of multi threaded If you must use multiple threads be aware of the parallel logic and timing of th...

Страница 154: ...ve to delete the selected Thread Click Confirm to confirm configuration and save Figure 11 35 Script Offline Record The Offline Record command can import the track file which was generated via offline...

Страница 155: ...l position of the track record and then click on the run to play the track Track pause Clicking Stop will pause the robot in playback Resume after the track is paused long press to move to the ready p...

Страница 156: ...Start to record the movement track of the robot click Finish to stop the recording enter the track name click Save to finish Track replay Click the Track to select click Load then press and hold Ready...

Страница 157: ...s is displayed in table including name type and value Choose a variable the information will display in the drop down list of variable type variable name input box and variable value selection input o...

Страница 158: ...used in existing project file it won t prompt that this variable name condition is undefined until reload the project After changing variable name users must reload the project before operation in cas...

Страница 159: ...program file Timer1 and Timer2 are the corresponding time displayed when a Timer command is selected The time interval is the time interval between the selected Timer and the last selected Timer Note...

Страница 160: ...XYZ and the rotate parameters RX RY RZ Users can check Show track and see the end of the track in the simulation window Users can also set the Track duration to specify the track display time Figure...

Страница 161: ...V4 5 2015 2019 AUBO All rights reserved 157 Figure 11 43 script file editor...

Страница 162: ...04 1 2006 Diagnostic coverage DC is a measure of the effectiveness of the diagnostics implemented to achieve the rated performance level For more information see EN ISO13849 1 2008 Integrator The inte...

Страница 163: ...onal leading level AUBO i5 passed the robot performance test of China National Robot Testing and Evaluation Center Headquarters The performance index has surpassed most domestic brands reaching the st...

Страница 164: ...certification It meets all the relevant requirements of the Korean certification standard AUBO i5 robot was test by the China National Robot Testing and Assessment Center headquarters robot performan...

Страница 165: ...horizontally Speed 100 the general speed of the robot is set to 100 and the movement is performed at a joint speed of 183 s Payload maximum payload when connecting to the TCP 10 kg The test on the jo...

Страница 166: ...ing to electromagnetic compatibility and repealing Directive 89 336 EEC EN ISO 13850 2008 Safety of machinery Emergency stop Principles for design EN ISO 13849 1 2008 Safety of machinery Safety relate...

Страница 167: ...tor DI 16 4 Configurable DO 16 4 Configurable AI 4 2 AO 4 I O power supply 24V 3A in the control box parameters are subject to actual data 0V 12V 24V 0 8A in tool Communication Ethernet Modbus RTU TCP...

Страница 168: ...t the center of gravity offset which is the distance between end effector flange focus and tool focus 1 The load conditions should within the range shown in the figure 2 The payload shown in figure re...

Страница 169: ...les Arm canbus error code 3 3 Joint 3 Robot arm module can communication error Check the CAN bus connection between modules Arm canbus error code 4 4 Joint 4 Robot arm module can communication error C...

Страница 170: ...dication etc The teach pendant software enters the simulation mode and cannot operate the real robot arm Check log file Call getIsLinkageModeInter face failed Get the arm failed online The teach penda...

Страница 171: ...ation parameter is wrong Prompt message Check if the SDK call parameters are correct code 10015 10015 ErrCode_CoordinateSyste mCalibrateError coordinate system calibration failed Prompt message Check...

Страница 172: ...inkage Slave Mode Come in linkage slave mode disable UI Enter linkage mode disable UI Normal operation no Mac Communication Error Mac communication error disable IO settings Mac communication error di...

Страница 173: ...nt Re planning the track Robot status exception Abnormal state unable to move Irregular movement Re planning the track Robot Controller Warning Please wait for robot to stop Please wait for the robot...

Страница 174: ...problem need to replace or repair the joint circuit board joint error encoder pollustion Encoder pollution The arm cannot be powered on and the joint module hardware is faulty Hardware problem need t...

Страница 175: ...e motion track configuration is reasonable joint error target speed out of range Target speed over range Prompt message Check if the motion track configuration is reasonable robot error type Robot arm...

Страница 176: ...n loop failed Enable position loop failure The arm cannot be powered on and the joint module hardware is faulty Hardware problem need to replace or repair the joint circuit board set max accelerate fa...

Страница 177: ...reduced mode Normal operation no Enter the safety mode Enter safe mode Normal operation no please manually release Please manually lift Normal operation no the external safety stop DI External safe st...

Страница 178: ...ergency stop signal Soft Emergency Collision Robot Error Info Notify Collision joint error collision collision Mechanical arm pause motion Check if the arm collides Toolio Error Toolio Error Tool side...

Страница 179: ......

Отзывы: