ASUS A88X-PRO
3-27
Chapter 3
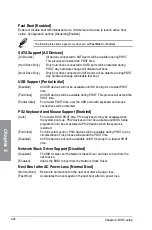
Boot Logo Display [Auto]
[Auto]
Adjust automatically for Windows® requrement.
[Full Screen]
Maximize the boot logo size.
[Disabled]
Hide the logo during POST.
POST Delay Time [3 sec]
This item appears only when you set
Boot Logo Display
to [Auto] or [Full Screen]. This item
allows you to select the desired additional POST waiting time to easily enter the BIOS setup.
You can only execute the POST delay time during Normal Boot. The values range from 0 to
10 seconds.
This feature will only work under normal boot.
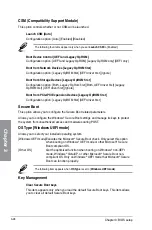
Bootup NumLock State [On]
[On]
Set the power-on state of the NumLock to
[On]
.
[Off]
Set the power-on state of the NumLock to
[Off]
.
Wait For ‘F1’ If Error [Enabled]
[Disabled]
Disables the function.
[Enabled]
The system waits for the <F1> key to be pressed when error occurs.
DirectKey Enable [Go to BIOS...]
[Disabled]
Disables the DirectKey function. The system will only power on or off
when you press the DirectKey button.
[Go to BIOS Setup] Allows the system to power on and go to BIOS Setup directly when
you press the DirectKey button.
Option ROM Messages [Force BIOS]
[Force BIOS]
The third-party ROM messages will be forced to display during the boot
sequence.
[Keep Current] The third-party ROM messages will be displayed only if the third-party
manufacturer had set the add-on device to do so.
Interrupt 19 Capture [Disabled]
[Enabled]
Allows the option ROMs to trap Interrupt 19.
[Disabled]
Disables this function.
Setup Mode [EZ Mode]
[Advanced Mode] Allows you to go to Advanced Mode of the BIOS after POST.
[EZ Mode]
Allows you to go to EZ Mode of the BIOS after POST.
Содержание A88X PRO
Страница 1: ...Motherboard A88X PRO ...
Страница 20: ...1 8 Chapter 1 Product Introduction Chapter 1 ...
Страница 60: ...2 40 Chapter 2 Hardware information Chapter 2 To uninstall the APU heatsink and fan assembly 5 3 1 4 2 ...
Страница 61: ...ASUS A88X PRO 2 41 Chapter 2 1 2 3 To remove a DIMM 2 3 4 DIMM installation B A A ...
Страница 63: ...ASUS A88X PRO 2 43 Chapter 2 DO NOT overtighten the screws Doing so can damage the motherboard A88X PRO 3 ...
Страница 64: ...2 44 Chapter 2 Hardware information Chapter 2 2 3 6 ATX Power connection 1 2 OR ...
Страница 65: ...ASUS A88X PRO 2 45 Chapter 2 2 3 7 SATA device connection OR 1 2 ...


