ASUS A88X-PRO
3-9
Chapter 3
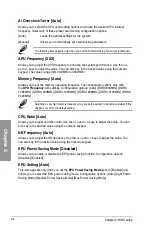
GPU Boost [Auto]
[Auto]
Automatic configuration.
[Turbo Mode] Set to [Trubo Mode] to achieve better 3D performance.
[Extreme Mode] Set to [Extreme Mode] for the excellent visual experience.
[Manual Mode] Set to [Manual Mode] if you want to manually select the desired GPU
Engine frequency.
OC Tuner
OC Tuner automatically overclocks the frequency and voltage of CPU and DRAM for
enhancing the system performance. Configuration options: [OK] [Cancel]
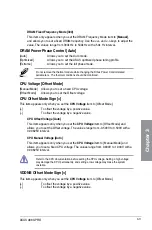
DRAM Timing Control
The sub-items in this menu allow you to set the DRAM timing control features. Use the <+>
and <-> keys to adjust the value. To restore the default setting, type [auto] using the keyboard
and press the <Enter> key.
Changing the values in this menu may cause the system to become unstable! If this
happens, revert to the default settings.
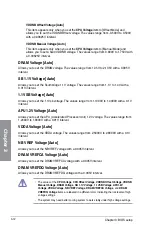
DIGI+ Power Control
CPU Load-Line Calibration [Auto]
Load-line is defined by AMD VRM spec and affects CPU voltage. The CPU working voltage
will decrease proportionally to CPU loading. Higher value gets a higher voltage and better
overclocking performance, but increases the CPU and VRM thermal. Configuration options:
[Auto] [Regular] [Medium] [High] [Extreme]
The actual performance boost may vary depending on your CPU specifications.
CPU/NB Load Line Calibration [Auto]
Allows you to select the CPU/NB Load Line Calibration mode. Configuration options: [Auto]
[Regular] [Medium] [High] [Extreme]
CPU Current Capability [100%]
This item provides wider total power range for overclocking. A higher value brings a
wider total power range and extends the overclocking frequency range simultaneously.
Configuration options: [100%] [110%] [120%] [130%] [140%]
CPU/NB Current Capability [100%]
This item provides wider total power range for overclocking. A higher value brings a
wider total power range and extends the overclocking frequency range simultaneously.
Configuration options: [100%] [110%] [120%] [130%]
Содержание A88X PRO
Страница 1: ...Motherboard A88X PRO ...
Страница 20: ...1 8 Chapter 1 Product Introduction Chapter 1 ...
Страница 60: ...2 40 Chapter 2 Hardware information Chapter 2 To uninstall the APU heatsink and fan assembly 5 3 1 4 2 ...
Страница 61: ...ASUS A88X PRO 2 41 Chapter 2 1 2 3 To remove a DIMM 2 3 4 DIMM installation B A A ...
Страница 63: ...ASUS A88X PRO 2 43 Chapter 2 DO NOT overtighten the screws Doing so can damage the motherboard A88X PRO 3 ...
Страница 64: ...2 44 Chapter 2 Hardware information Chapter 2 2 3 6 ATX Power connection 1 2 OR ...
Страница 65: ...ASUS A88X PRO 2 45 Chapter 2 2 3 7 SATA device connection OR 1 2 ...

