ASUS A88X-PRO
3-11
Chapter 3
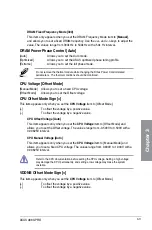
DRAM Fixed Frequency Mode [300]
This item only appears when you set the DRAM Frequency Mode item to
[Manual]
,
and allows you to set a fixed DRAM frequency. Use the <+> and <-> keys to adjust the
value. The values range from 300k Hz to 500k Hz with a 50k Hz interval.
DRAM Power Phase Control [Auto]
[Auto]
Allows you to set the Auto mode.
[Optimized]
Allows you to set the ASUS optimized phase tuning profile.
[Extreme]
Allows you to set the full phase mode.
Do not remove the thermal module while changing the DIGI+ Power Control related
parrameters . The thermal conditions should be monitored.
CPU Voltage [Offset Mode]
[Manual Mode] Allows you to set a fixed CPU voltage.
[Offset Mode]
Allows you to set the Offset voltage.
CPU Offset Mode Sign [+]
This item appears only when you set the
CPU Voltage
item to [Offset Mode].
[+]
To offset the voltage by a positive value.
[–]
To offset the voltage by a negative value.
CPU Offset Voltage [Auto]
This item appears only when you set the
CPU Voltage
item to [Offset Mode] and
allows you to set the Offset voltage. The values range from -0.500V to 0.500V with a
0.00625V interval.
CPU Manual Voltage [Auto]
This item appears only when you set the
CPU Voltage
item to [Manual Mode] and
allows you to set a fixed CPU voltage. The values range from 0.800V to 1.900V with a
0.00625V interval.
Refer to the CPU documentation before setting the CPU voltage. Setting a high voltage
may damage the CPU permanently, and setting a low voltage may make the system
unstable.
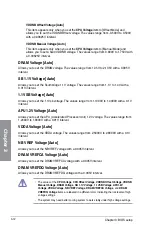
VDDNB Offset Mode Sign [+]
This item appears only when you set the
CPU Voltage
item to [Offset Mode].
[+]
To offset the voltage by a positive value.
[–]
To offset the voltage by a negative value.
Содержание A88X PRO
Страница 1: ...Motherboard A88X PRO ...
Страница 20: ...1 8 Chapter 1 Product Introduction Chapter 1 ...
Страница 60: ...2 40 Chapter 2 Hardware information Chapter 2 To uninstall the APU heatsink and fan assembly 5 3 1 4 2 ...
Страница 61: ...ASUS A88X PRO 2 41 Chapter 2 1 2 3 To remove a DIMM 2 3 4 DIMM installation B A A ...
Страница 63: ...ASUS A88X PRO 2 43 Chapter 2 DO NOT overtighten the screws Doing so can damage the motherboard A88X PRO 3 ...
Страница 64: ...2 44 Chapter 2 Hardware information Chapter 2 2 3 6 ATX Power connection 1 2 OR ...
Страница 65: ...ASUS A88X PRO 2 45 Chapter 2 2 3 7 SATA device connection OR 1 2 ...


