Flex 2JB-VRX Instruction Manual
June 2022 v1.0
Page 22 of 70
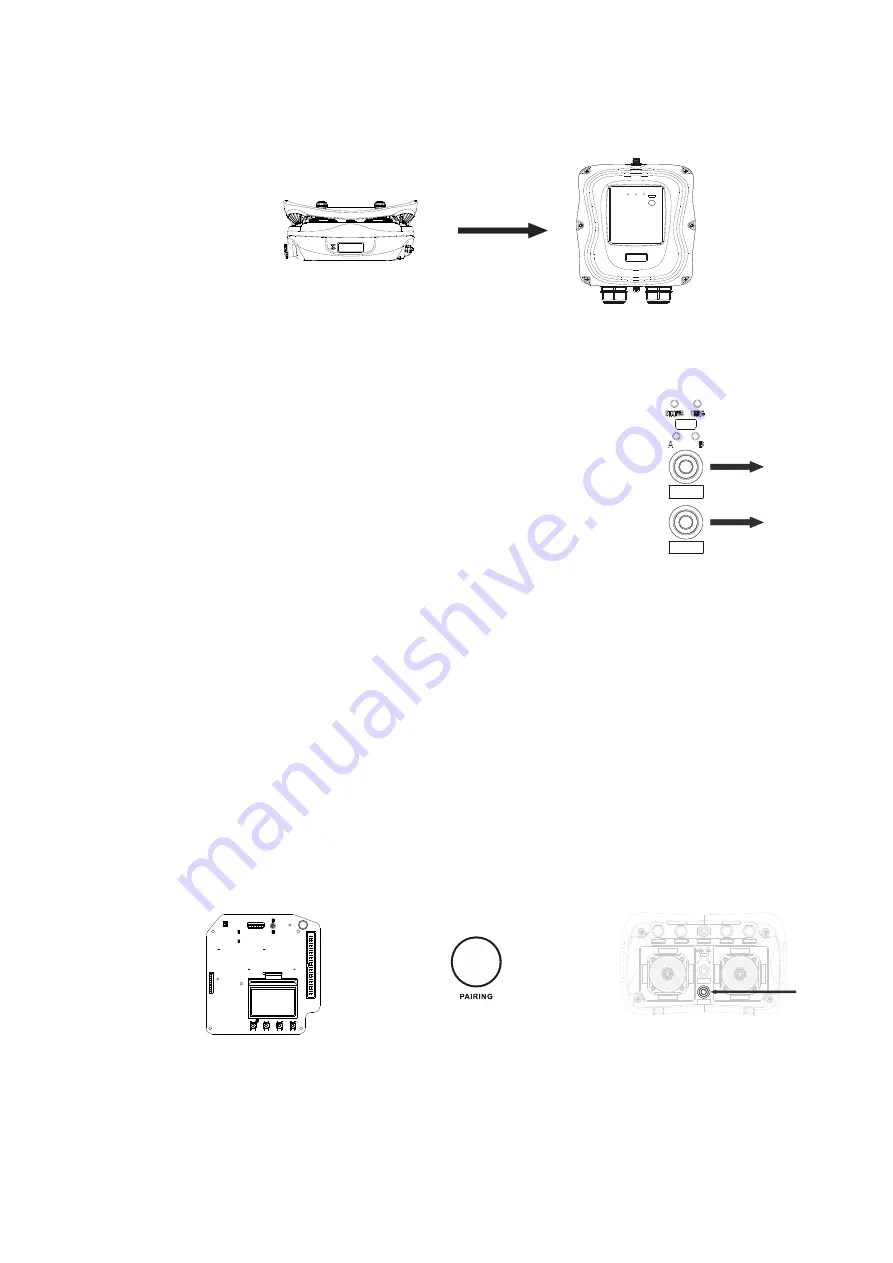
C. Transmitter-to-Receiver Pairing:
JP8 Open Method (require pressing the PAIRING button on receiver):
1) Reset the STOP button on both transmitters (Status LED turned green for up to 2.0
seconds, transmitter power on).
2) Press and hold both PB5 and PB6 at the same time for up to
3.0 seconds on both transmitters (Staus LED blinks orange).
Let go of both PB5 and PB6 when LED-A and LED-B turned
red.
3) Entered programming mode with Status LED displays 1x
orange blink for firmware version,
remote pairing
and IR
programming. 2x orange blinks for transmitter channel
programming, 3x orange blinks for PB1~PB7 function programming, 4x orange blinks
for frequency range indication, 5x orange blinks for TAC programming.
4) Press and hold both PB5 and PB6 at the same time for up to 3.0 seconds (LED-A and
LED-B turned red). Let go of both PB5 and PB6 when Status LED turned orange.
5) The Status LED now displays the transmitter firmware version with red, green and
orange blinks.
6) Receive data (receiver) by press and hold the PAIRING button on receiver cover.
7) Output data (transmitter) by press and hold PB6 (Status LED blinks green).
8) The pairing is completed when the Status LED on the transmitter turns to constant
green while PB6 on transmitter and PAIRING button on receiver are still pressed
down. Let go all buttons when done.
9) The receiver MAIN relays must be deactivated (relay open) during remote pairing.
10) Exit remote pairing mode by pressing down the STOP button (transmitter power off).
→ →
Set JP8 to “Open” Receive data – receiver
Output data – transmitter
(press and hold the PAIRING button)
(press and hold PB6)
PB5
PB6
Press
Содержание FLEX 2JB-VRX
Страница 1: ...FLEX2JB VRX Instruction Manual ...


