


Upgrading TPI/4 Firmware
50
NXP-TPI/4 NetLinx Touch Panel Interface
5.
Download the appropriate KIT file to your computer.
6.
Verify you have downloaded the latest TPI/4 firmware (KIT) file to a known location.
7.
Select
Tools
>
Firmware Transfers > Send to NetLinx Device
from the Main menu to open the
Send to NetLinx Device dialog (FIG. 35). Verify the TPI/4’s System and Device number
values
match those values listed within the System folder in the
OnLine Tree
tab of the Workspace
window.
8.
Select the TPI/4’s KIT file from the
Files
section (FIG. 35).
9.
Enter the
Device
value associated with the TPI/4 and the
System
number associated with the Master
(
listed
in the OnLine Tree tab of the Workspace window
).
The Port field is greyed-out.
10.
Click the
Reboot Device
checkbox. This causes the TPI/4 to reboot after the firmware update
process is complete.
The reboot of the unit can take up 30 seconds after the firmware process has
finished.
11.
Click
Send
to begin the transfer. The file transfer progress is indicated on the bottom-right of the
dialog (FIG. 35).
12.
Click
Close
(
after the unit reboots
) to return to the main program.
13.
Right-click the associated System number and select
Refresh System
. This causes a refresh of all
project systems, establishes a new connection to the Master, and populates the System list with
devices on your particular system.
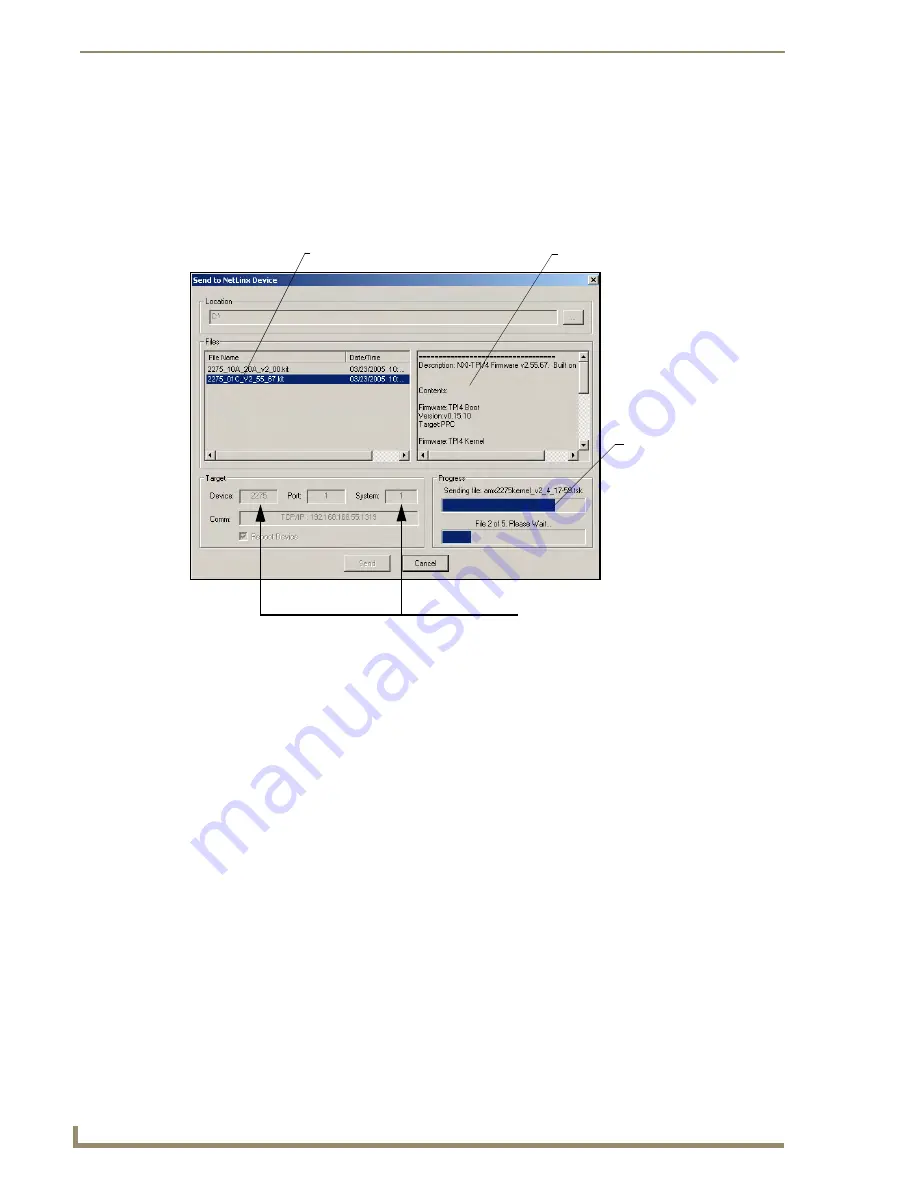
FIG. 35
Select to NetLinx Device dialog (showing TPI/4 firmware update via IP)
Selected Firmware file
Description field for selected KIT file
Device
value
and System
number
must match the values
listed in the Workspace window
Firmware download
status
Содержание NetLinx NXP-TPI/4
Страница 38: ...TPI 4 and Panel Interface Setup 32 NXP TPI 4 NetLinx Touch Panel Interface...
Страница 60: ...Upgrading TPI 4 Firmware 54 NXP TPI 4 NetLinx Touch Panel Interface...
Страница 138: ...Troubleshooting 132 NXP TPI 4 NetLinx Touch Panel Interface...
Страница 147: ...Appendix 141 NXP TPI 4 NetLinx Touch Panel Interface...


