Configuring the Communication
24
NXA-WAP200G Wireless Access Point
6.
Select the
AMX
SSID from the list of Available Networks.
AMX
is the default SSID used by
the WAP200G.
7.
Click the
Configure
button (from the right of the
Wireless Network Connection
page) to
open the
Wireless network properties
screen and setup the authentication of your wireless
card.
By default, Microsoft configures your wireless radio and WAP for unsecured (open
network) communication.
If the WAP200G were later configured to use WEP keys; the user would then have to
return to the Wireless network properties screen and enter the encryption information
being used by the WAP200G.
8.
Click
OK
to accept these values and return to the
Wireless Network Connection
page.
9.
Click
OK
. An on-screen popup (from the Wireless Network Connection icon in the taskbar)
then appears to notify you of the new changes and communication parameters.
10.
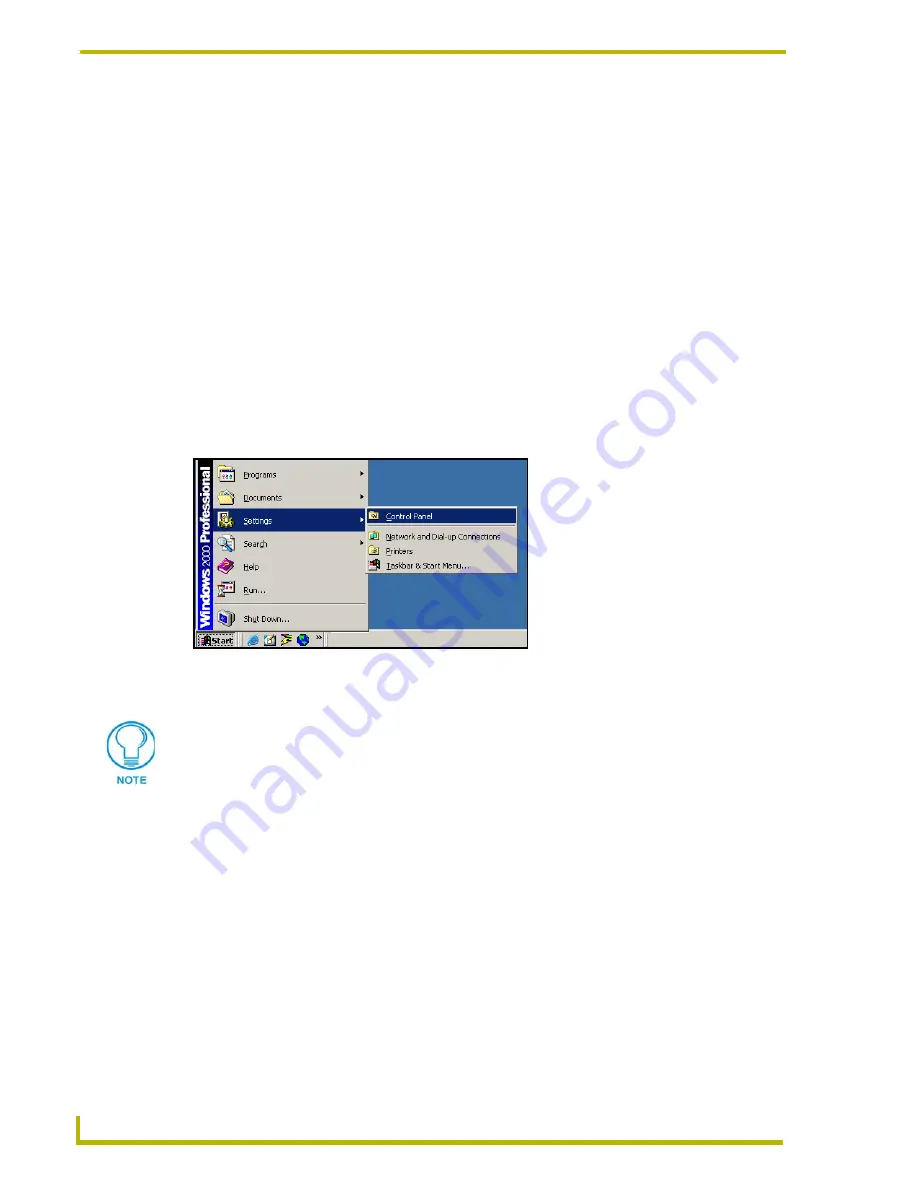
From the taskbar, click
Start
>
Settings
>
Control Panel
(FIG. 17).
11.
Double-click the
Network Connection
(
on XP
) or
Network and Dial-Up Connections
icon.
12.
Right click the
Wireless Network Connection
icon and select
Properties
from the popup
options list.
13.
Select
Internet Protocol (TCP/IP)
from the Wireless Network Connection Properties screen.
14.
Click
Properties
to open the Internet Protocol (TCP/IP) Properties screen (FIG. 20).
15.
Click the
Use the following IP address radio
button (FIG. 20).
16.
Enter any un-assigned IP Address into the
IP Address
field. The range must be from
192.168.1.1 ~ 192.168.1.XX (
where XX is a value from 2 - 254, excluding 192.168.1.240
which is being used by the WAP
) and enter the value of 255.255.255.0 in the Subnet Mask
field.
17.
Click
OK
to return to the
Wireless Network Connection Properties
screen.
18.
Click
OK
/
Close
to accept these changes and alter the IP Connection properties of the
computer.
FIG. 19
Control Panel Navigation
To avoid confusion, it is recommended that you disable the Local Area Connection
(wired/Ethernet) by using your right mouse button and selecting Disable from the
options list.
Содержание Modero NXA-WAP200G
Страница 4: ......
Страница 22: ...WAP200G Accessories 16 NXA WAP200G Wireless Access Point ...
Страница 26: ...Installation 20 NXA WAP200G Wireless Access Point ...
Страница 32: ...Configuring the Communication 26 NXA WAP200G Wireless Access Point ...
Страница 54: ...Wireless Device Communication Setup 48 NXA WAP200G Wireless Access Point ...
Страница 78: ...Bridge Mode Configuration Utility Pages 72 NXA WAP200G Wireless Access Point ...


