36
ACCU 14
2
0
Operations
Operator’s Manual
5.3.2.0-1
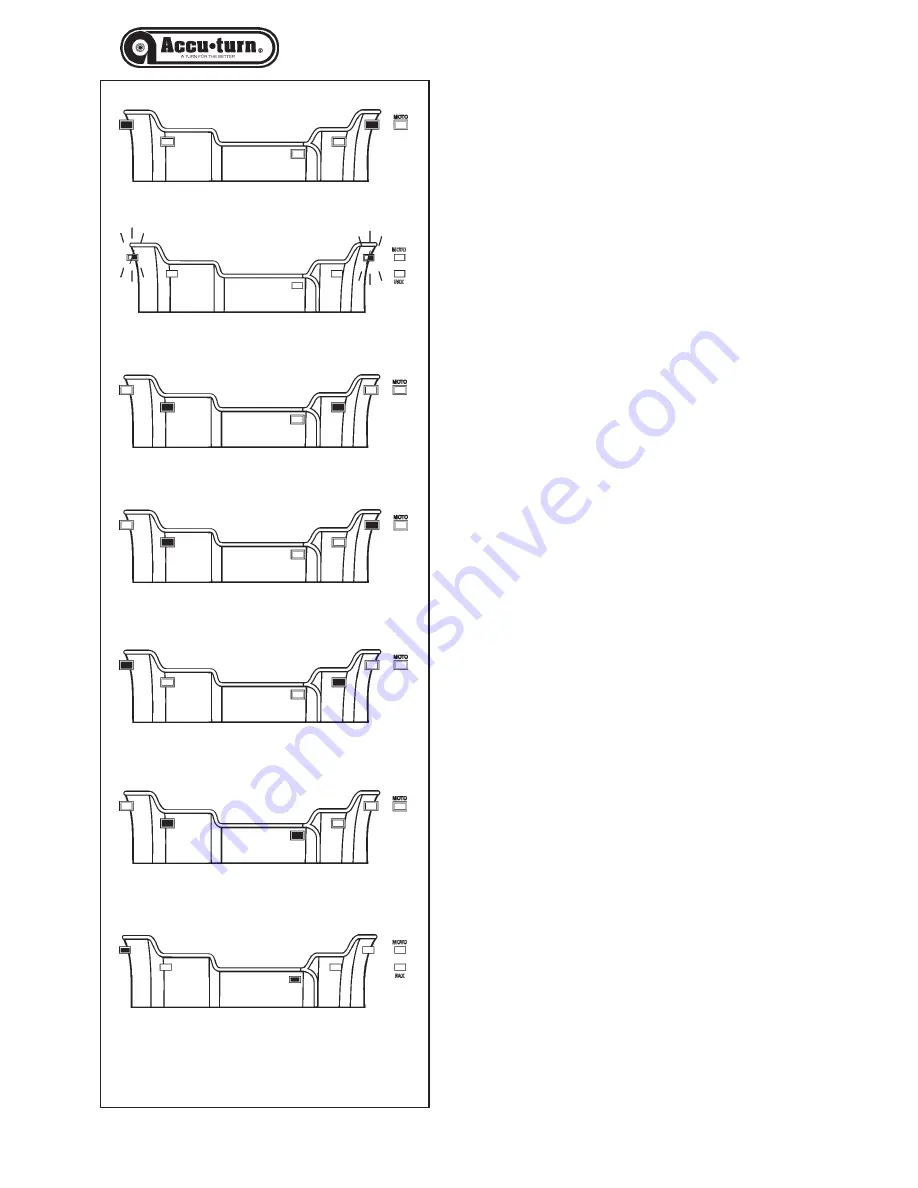
5.3.2.2-2
5.3.2.2-3
5.3.2.2-1
5.3.2.1-1
5.3.2.2-5
5.3.2.2-4
Data entry.
•
Obtain the rim data as described above.
•
On the control panel, select the required dimen-
sion to edit (diameter, offset or width). The value
entered last is shown.
•
To edit the value, select the appropriate keys (refer
to Chapter 4.2).
•
To enter the value: select the "F" key, select an-
other dimension (if required) to edit, or perform a
balancing run. Any of these three functions will au-
tomatically enter the parameter into memory.
5.3.2
Balancing a wheel type.
This chapter describes how to balance a wheel.
For help on:
rim data input refer to Chapter 5.3.1
spinning the wheel
refer to Chapter 5.3.3
weight application
refer to Chapter 5.3.4
the check spin
refer to Chapter 5.3.5
5.3.2.0
Normal balancing mode.
When selected, the display will appear as Figure 5.3.2.0-1.
•
Enter the dimensions (Chapter 5.3.1) and spin the wheel.
•
Apply the clip-on weights at the distance in positions
indicated by the illuminated weight application lights, apply
weights at the 12 o’clock position.
•
Perform a check spin when done.
5.3.2.1
TRUCK balancing mode.
When selected, the display appears as in Figure 5.3.2.1-1
and the two LED continually blink to differentiate this func-
tion from “Normal”. The programme will produce a reading
of the unbalances with increases of 10 in 10 if set in grams,
of 0,5 in 0,5 in set ounces.
•
Enter the dimensions (see chapter 5.3.1) and spin the
wheel.
•
Apply the clip weights to the indicated positions, at 12
o’clock.
•
When finished, perform a check spin.
5.3.2.2
ALU balancing mode.
Select an ALU wheel type if one or more stick-on weights
will be used.
When selected, the display will appear as:
ALU1: Refer to Figure 5.3.2.2-1.
ALU2: Refer to Figure 5.3.2.2-2.
ALU3: Refer to Figure 5.3.2.2-3.
ALU4: Refer to Figure 5.3.2.2-4.
ALU5: Refer to Figure 5.3.2.2-5.
Содержание 1400
Страница 67: ...68...
Страница 68: ...69 Appendix Installation Instructions Annexe Instructions pour l Installation Anexo Instrucciones Instalaci n...
Страница 77: ...78 ACCU 1400 114 0 July 02...
Страница 78: ...ACCU TURN 1400 SPARE PARTS EXPLODED VIEWS Digital Wheel Balancer...
Страница 80: ...81 ACCU 1400 114 0 July 02...
Страница 81: ......
Страница 82: ......
Страница 83: ...84 ACCU 1400 114 0 July 02...
Страница 84: ...85 ACCU 1400 114 0 July 02...
Страница 85: ...86 ACCU 1400 114 0 July 02...
Страница 86: ...87 ACCU 1400 114 0 July 02...
Страница 87: ...ACCU TURN 1400 Rev A 2 14 05 WDC...


