background image

Pretranslators

57

A typical Pretranslator function involves mapping incoming DDI/DID 
telephone calls to internal extension numbers.

Example: the DDI/DID telephone numbers range from 508-323-4200 to 
508-323-4299. The telephone company sends you the last 4 digits of the 
total telephone number. Internally, you want to use extensions from 2000 
to 2099. You can define a Pretranslator to:

1

Remove (stripLead) the first two digits of the incoming 4-digit sequence.

2

Add (prepend) the digits 20 in front of the remaining 2 digits.

See “Managing Dial Plan Pretranslators” on page 94 for detailed 
information and examples on creating and managing Dial Plan 
Pretranslators.

Viewing and

Assigning

Pretranslators

To view a list of devices and their associated Pretranslators, or to associate 
a Pretranslator with a specific device, follow these steps:

1

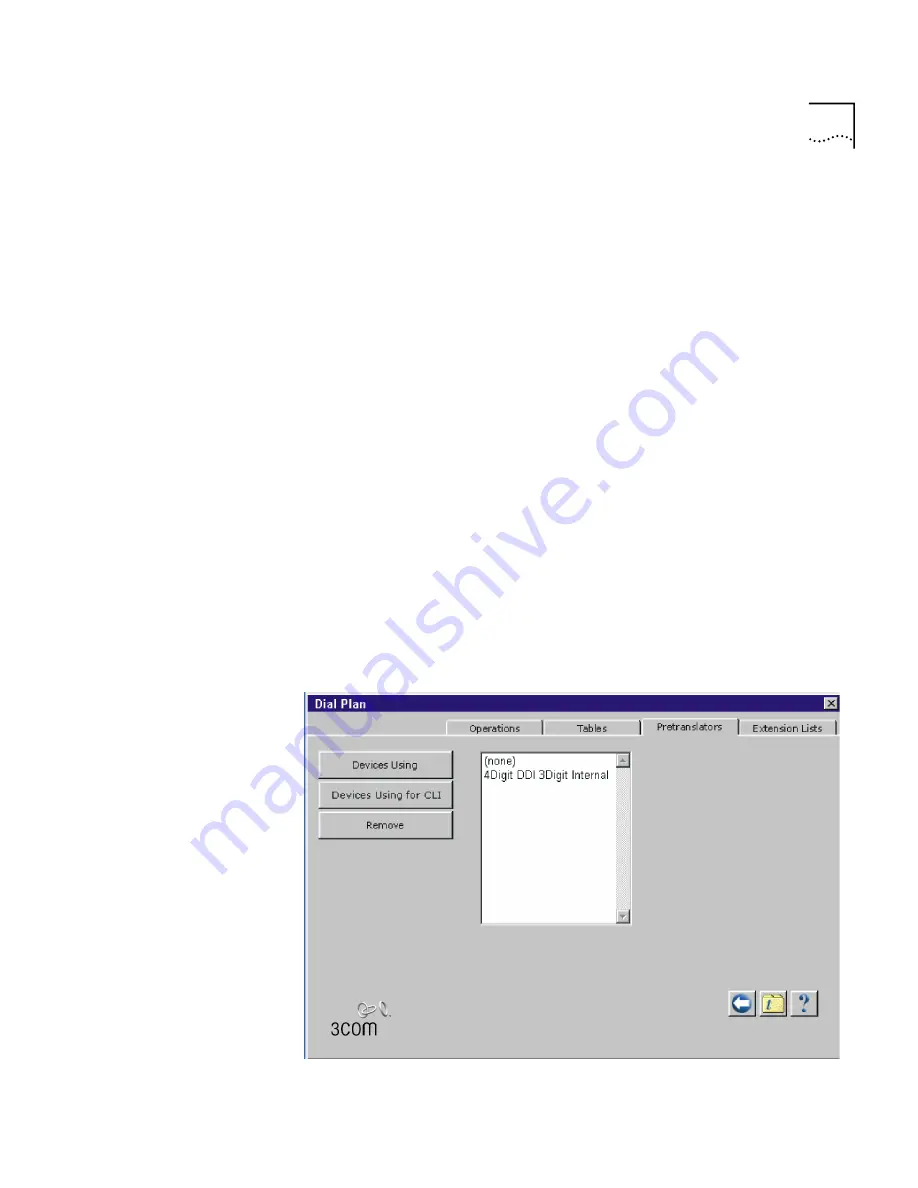
Click the 

Dial Plan

 icon in the NetSet main menu.

2

In the 

Pretranslators 

tab, highlight the Pretranslator of interest. For a list 

of devices that have no Pretranslator, select “none”.

Figure 11   

Pretranslator Window

Содержание NBX 100

Страница 1: ...http www 3com com NBX 100 Installation Guide Release 2 8 Part No 900 0026 01 November 2000 ...

Страница 2: ... GOVERNMENT LEGEND If you are a United States government agency then this documentation and the software described herein are provided to you subject to the following All technical data and computer software are commercial in nature and developed solely at private expense Software is delivered as Commercial Computer Software as defined in DFARS 252 227 7014 June 1995 or as a commercial item as def...

Страница 3: ...sis 19 Network Call Processor 20 4 Port Line Card 21 T1 Digital Line Card 22 E1 Digital Line Card 23 4 Port Analog Terminal Adapter Card 24 Single Port Analog Terminal Adapter 24 8 Port Hub Card 26 Business Telephone 26 DSS BLF Adjunct 26 Preparing for Installation 27 Completing a System Plan 27 Ordering Telephone Lines 36 Developing a Dial Plan 36 Installation Overview 36 International Feature Su...

Страница 4: ...t to an NBX 100 42 How Many Telephones or Devices Does the NBX 100 Support 42 What Impact Does an NBX 100 Have on a LAN 43 2 CONFIGURING THE DIAL PLAN Overview 45 Translation 45 Routing 46 Extension Settings 47 Telephones 48 External Extensions 48 Call Park 48 Auto Attendant 48 Hunt Groups 49 External Settings 49 Dial Plan Tables 50 Internal Dial Plan Table 51 Incoming Dial Plan Table 54 Least Cos...

Страница 5: ...erating a Dial Plan Report 73 Managing Extensions and Extension Lists 75 Adding an Extension 76 Settings 79 Changing Extensions 81 Managing Extension Lists 84 Managing External Settings 89 Managing Dial Plan Tables 90 Determining Which Devices Use Dial Plan Tables 91 Removing a Dial Plan Table 94 Managing Dial Plan Pretranslators 94 Determining Which Devices Use Pretranslators 96 Removing a Pretra...

Страница 6: ...k 144 Chassis and Slot Conventions 146 Installing NBX 100 NCP and Other Cards 148 Installing Cable Guides 149 Installing a Single Port Analog Terminal Adapter 149 Installing a Power Adapter 149 Installing an Ethernet Power Source 150 Connecting a Computer to the Network Call Processor Through a Serial Port 150 Setting Up IP Connectivity for NetSet 151 Default IP Settings 151 Installing LAN Connect...

Страница 7: ...182 Configuring Multicast Addresses 183 Configuring Speed Dial Numbers 185 Creating a System Speed Dial 186 Configuring Business Identity Information 187 Entering Business Information 187 Setting Business Hours 189 Setting the System Mode 190 Configuring System Security 191 Setting the Administrator Password 191 Setting the Auto Attendant Password 192 Setting the System Backup Password 193 Setting...

Страница 8: ...6 Setting Adjunct Feature Button Mappings 216 Adding External Hardware 218 Connecting a Music on Hold MOH Input Device 218 Connecting a Paging Amplifier 219 Configuring Routing Devices 219 6 SETTING UP USERS AND FEATURES Adding Users 221 Adding a User 222 Configuring a Telephone as the Attendant Console 224 Configuring the Auto Attendant Line Card Port 226 Adding the Attendant Console User 227 Set...

Страница 9: ...ompleting the T1 ISDN PRI Installation 251 Adding an E1 Digital Line Card 253 Preparation 253 Inserting the E1 Digital Line Card 253 Configuring the E1 Digital Line Card 254 Configuring for ISDN PRI Signaling 254 Configuring E1 Groups 257 Checking Group Membership 258 Completing the E1 Installation 259 Adding an ISDN BRI Digital Line Card 260 Preparation 260 Inserting the ISDN BRI Digital Line Car...

Страница 10: ... Provider 284 B T1 AND ISDN PRI SERVICES CIRCUIT PROVISIONING Requirements for T1 Configuration 287 DID Applications 288 CSU 288 ISDN PRI Prerequisites 288 Recommendations 289 C GUIDELINES FOR REMOTE AUDIO DEVICE CONNECTIONS Maximum Transfer Unit MTU 291 Communication Latency Requirements 291 Large Packet Latency 292 Small Packet Latency 292 Bandwidth Requirements 292 Layer 2 Mulaw G 711 Audio Nor...

Страница 11: ...nt Specifications 296 Installation Sequence 296 Finalize Installation 297 NBX 100 Call Detail Reports 298 Windows 2000 Environment Specifications 298 Installation Sequence 298 NBX pcXset 299 Windows 2000 Environment Specifications 299 Installation Sequence 299 INDEX ...

Страница 12: ......

Страница 13: ...Table 1 Overview of Chapters If you are looking for An overview of the installation process hardware components and installation prerequisites Chapter 1 Instructions on preparing and configuring the dial plan Chapter 2 Instructions on installing hardware components Chapter 3 Instructions for configuring system wide settings Chapter 4 Instructions for installing telephones and telephone lines Chapt...

Страница 14: ...l personal injury Table 3 Text Conventions Convention Description Screen displays This typeface represents information as it appears on the screen Commands The word command means that you must enter the command exactly as shown and then press Return or Enter Commands appear in bold The words enter and type When you see the word enter in this guide you must type something and then press Return or E...

Страница 15: ...ntains online versions of the paper documents and some 3Com applications as well as system software and Help files Paper Documents The 3Com NBX 100 documentation set includes the following documents NBX 100 Installation Guide this manual NBX 100 Administrator s Guide This guide describes how to change and manage the 3Com NBX 100 Communications System after initial installation and configuration It...

Страница 16: ... To order additional paper copies contact an authorized NBX 100 reseller Software and Documents on CD ROM The CD ROM that ships with the system contains System software Online versions of the paper guides that are shipped with the system and optional components Additional software applications for managing the NBX 100 Call Reports log and view information about the NBX 100 ConneXtions H 323 gatewa...

Страница 17: ...lp systems to NBX_Techpubs_comments 3com com Please include the following information with your comment Document title Document part number found on the front or back page of each document Page number Example NBX 100 Installation Guide Part Number 900 0026 01 Page 25 Year 2000 Compliance For information on Year 2000 compliance and 3Com products visit the 3Com Year 2000 Web page http www 3com com p...

Страница 18: ...18 ABOUT THIS GUIDE ...

Страница 19: ...he Direct Station Select Busy Line Flashing DSS BLF adjunct This section lists all cards that can be used with the NBX 100 system Not all cards may be available in every region Chassis The rack mountable or wall mountable chassis holds the system power supply disk drive cooling fans and removable cards All controls and connections are on the front of the chassis The chassis fits into a standard 19...

Страница 20: ...PX voice mail and the Automated Attendant It also supports the Telephony Application Programming Interface TAPI 2 X for computer telephony integration CTI applications It includes an Internet Message Access Protocol IMAP 4 message server for integration of voice mail and e mail and a web server to support web based administration You must have one call processor per system Figure 2 NBX 100 Network...

Страница 21: ...use with a VT100 compatible control terminal COM2 is reserved for future use See Testing the Installed Hardware in Chapter 3 for information about what the LEDs indicate during system startup and operation 4 Port Line Card The NBX 100 4 Port Line card connects up to four local analog telephone lines to the NBX 100 The system can support up to 25 line cards 100 CO telephone lines using multiple cha...

Страница 22: ...d bit signaling sometimes referred to as Standard T1 or ISDN Primary Rate Interface PRI signaling By default the NBX 100 auto discovers a T1 card as T1 E M and an E1 card as ISDN PRI When configured as standard T1 E M robbed bit signaling the card supports inband signaling of 24 DSO 64 Kbps voice channels and a variety of signaling types and protocols The T1 carries data at a rate of 1 544 Mbps Wh...

Страница 23: ...l Line Card The E1 Digital Line card used outside of North America provides E1 connectivity using the PRI protocol It carries data at a rate of 2 048 Mbps and can carry 32 channels each with 64 Kbps Thirty of these channels are available for calls Like the T1 ISDN PRI card the E1 PRI card supports PRI software features such as ANI ISDN PRI services require specific circuit provisioning which the c...

Страница 24: ...de Unlike normal voice transfers which drop packets when they encounter congestion reliable mode transmissions take as much time as needed to ensure that there are no lost packets Reliable mode also uses twice the bandwidth Figure 6 NBX 100 4 Port Analog Terminal Adapter Card Each ATA card has the following LEDs and connectors LEDs S1 and S2 These lights indicate the status of each port ANALOG CON...

Страница 25: ...Ethernet MDI port and the Ethernet MIDI X port indicate the status of the related port ANALOG PORT Provides a connection for an analog telephone or fax device ETHERNET MDI X PORT Connects to the same network as the NBX 100 ETHERNET MDI PORT Provides an extra connection to the same network as the NBX 100 See Testing the Installed Hardware in Chapter 3 for information about what the LEDs indicate du...

Страница 26: ...e status of power to the hub and the status of the 8 10BASE T ports BNC 1082 Coax Connector This connects the NBX 100 to external hubs switches Ethernet Hub Ports 8 These UTP RJ45 jacks connect devices to the LAN See Testing the Installed Hardware in Chapter 3 for information about what the LEDs indicate during system startup and operation Business Telephone The Business Telephone Figure 10 provid...

Страница 27: ...NBX Business Telephone and the DSS BLF adjunct Preparing for Installation Before you begin installing the NBX 100 perform these tasks Complete a system plan Order telephone lines Develop a dial plan if you choose not to use one of the provided NBX 100 system default dial plans Completing a System Plan Before you install the system work with the client to develop a system plan using the NBX 100 Com...

Страница 28: ...ry contact name and telephone number Installation address Designated system administrator System administrator s telephone number FAX number and e mail address Carrier Local Service Carrier name Point of contact name Contact s telephone number FAX number and e mail address Additional lines being added _ Yes _ No New PSTN connection installation date Carrier Long Distance Carrier name Point of cont...

Страница 29: ...k or wall Phone system mode Key or Hybrid PBX Range of extensions desired possible range is 100 400 for 3 digit dial plan 1000 4000 for 4 digit dial plan Extension to be assigned to the attendant console Power Failure Transfer PFT units to be installed Number of PFTs if any Location of PFTs if any Uninterruptible Power Supply available for chassis __ Yes __ No A list of frequently dialed telephone...

Страница 30: ...f pairs Length Fiber ____ Armored ____ No of strands Length Coax ____ Type Length Termination 110 ____ Patch ____ 66 ____ Other Demarcation for dial tone Feeder existing ____ new ____ Plenum ____ PVC ____ Number of pairs Termination block Yes ____ No ____ Modular jack ____ RJ21x 66 ____ 110 block ____ Location of MDF Location of IDFS Drop ceiling height Walls Number of floors Table 5 System Planni...

Страница 31: ...ors with terminators for additional chassis Yes ____ No____ Type of Ethernet LAN 10BASE T ___ 100BASE T ___ Do Hubs have 10BASE 2 connectors Yes ___ No ___ Does your network meet 5 4 3 Ethernet specifications today Yes ____ No _____ ISP name ISP telephone number Typical LAN bandwidth use if known Will more hub or switch ports be needed Yes ____ No ____ If Yes how many Note Attach current network d...

Страница 32: ... ____ No _____ E1 Yes ____ No _____ Caller ID Yes ____ No ____ Other Site Survey Electrical Sufficient power for all telephones and chassis Amperage Outlet fully grounded or switched Site Survey NBX 100 Hardware Required 4 Port Line cards Standard T1 Line cards ISDN PRI Line cards E1 Line cards 4 Port Analog Adapters Single Port Analog Adapter Hubs Chassis Table 5 System Planning Information conti...

Страница 33: ...distance Day ____ Night ____ External international Day ____ Night ____ External toll free Day ____ Night ____ External 900 976 Day ____ Night ____ CO code Day ____ Night ____ Trunk to Trunk Day ____ Night ____ Off Site Notification Enabled ____ Disabled ____ Class of Service Super User Intercom Calls Day ____ Night ____ External local Day ____ Night ____ External long distance Day ____ Night ____...

Страница 34: ...sday From To Wednesday From To Thursday From To Friday From To Saturday From To Sunday From To Dial Plan Defaults Digits Call classes for each digit string External local call External toll free call 911 emergency call External Toll 900 976 Voice Mail 4 ports x 30 min standard ____ 6 ports x 20 hrs upgrade ____ 12 ports x 80 hrs upgrade ____ Requires key code for activation Number of minutes per u...

Страница 35: ...ctor cable being supplied 1 8 telephone jack cable Yes ____ No ____ CO Lines Required for each line Line number Location or demarcation Telephone number Hunt Sequence Chassis Slot Port Extension Pool MAC Address Button Mapping Groups Required for Attendant Default user Super user Customer defined as required User Configuration Required for each user Last name first name Extension CoS group Button ...

Страница 36: ...ains a list of general installation tasks Many of the tasks include sub tasks that are not listed in detail One such task is hardware installation which includes installing the disk drive and cards into the chassis These tasks are described more fully in subsequent chapters General installation tasks Unpack and examine components Read and follow the installation prerequisites See Installation Requ...

Страница 37: ...e a telephone connector for use outside North America The part number is 3C10120 xx where xx is the country code Contact your supplier for more information on country specific requirements Power Line Kit E Brick The adapter 3C10125 xx on the power line kit is provided with the relevant pins for the country of use Language Support If your local language is not provided in the Voice Prompts you may ...

Страница 38: ...ce The label on the side of the chassis lists the electrical requirements of the system Each Business Telephone needs a 110 VAC power outlet CAUTION 3Com strongly recommends that you use UL listed surge protection devices for the telephones and the local telephone lines and an uninterruptible power supply for the chassis For electrical requirements outside of North America consult Setting Up the N...

Страница 39: ...ritical business services Protect them from tampering or accidental interference The mounting location must be able to support at least 13 5 kg 30 pounds per chassis To rack mount the system you need a standard 486 millimeter 19 inch equipment rack properly installed and grounded according to the manufacturer s instructions The NBX 100 chassis requires six rack units with 27 centimeters 10 5 inche...

Страница 40: ...00 A technician who understands Ethernet 10BASE T cabling requirements and telephony configuration should install and configure the system If you are using the optional IP capabilities of the NBX 100 you need to understand IP subnetworks and DHCP Dynamic Host Configuration Protocol After the initial installation the local administrator should be able to install additional telephones and manage the...

Страница 41: ...ace card directly to the telephone Is Any Additional Equipment Required You might need some of the following components If you are using standard or ISDN PRI Digital Line cards you must have a Channel Service Unit CSU To configure the NBX 100 you need a computer equipped with a browser such as Microsoft Internet Explorer Release 4 0 or higher or Netscape Navigator Release 4 0 or higher a 10BASE T ...

Страница 42: ...etwork router Frame Relay Access Device FRAD router Voice Over IP gateway You can access NBX 100 located at branch offices through a wide area network WAN Before using the NBX 100 for voice over the WAN you should make sure that the WAN offers adequate bandwidth and that the gateways can be configured to provide the correct routing information External paging amplifier The NBX 100 Network Call Pro...

Страница 43: ...es can support the toll quality audio provided by the NBX 100 even when all 200 devices are in use If you use an Ethernet switch verify that it supports the 802 1p Q specifications Silence Suppression Silence suppression enables you to reduce network traffic When silence suppression is enabled the NBX 100 device detects silence in the audio stream such as a pause in conversation and sends a small ...

Страница 44: ...ernet standards define how Ethernet packets can be prioritized At Layer 3 the NBX 100 supports IP Precedence also called IP Type Of Service ToS to specify the class of service for each packet The NBX 100 also supports and allows you to configure settings for the emerging Differentiated Services technology which defines prioritizing over the WAN Low bandwidth Connections You can configure a telepho...

Страница 45: ...hat the system can reach how to get to these destinations and the telephone numbers to dial to get to them A Dial Plan configuration file is an ASCII text file that implements the Dial Plan The configuration file specifies translation and routing The NBX 100 ships with several default Dial Plan configuration files typically a 3 digit and a 4 digit file for each country In addition the file samples...

Страница 46: ... Dial Inward numbers assigned to the company you could define a pretranslator that removed using the stripLead command the first 2 digits from the internal extension number and added using the prepend command the appropriate digit string to construct the full telephone number The NBX 100 can also perform translation on outgoing calls Example 3 If you use two different long distance carriers at dif...

Страница 47: ...dants and hunt groups The extension length either 3 or 4 applies to all extensions and indicates that all extensions contain that number of digits You should not mix 3 digit and 4 digit extensions within the same NBX 100 system The NBX 100 defines extension ranges for telephones call park extensions auto attendant lines hunt groups and external lines See Table 6 for typical extension ranges in a 3...

Страница 48: ... starts at 500 External Extensions The external extension range defines those extensions that connect the user to outside devices such as external telephone lines You can connect external lines to the NBX 100 using the 4 port line card loop start telephone lines or one of the Digital Line Cards T1 E1 ISDN PRI Call Park The extension range for call park defines the extensions you can use to park a ...

Страница 49: ...er to apply to auto discovered external telephone lines See Using Auto Discovery for Initial System Configuration on page 164 for information on the auto discovery process A typical extension range for external devices including telephone lines is 600 through 799 in a 3 digit system and 6000 through 7999 in a 4 digit system The first extension to apply when auto discovering external telephone line...

Страница 50: ...e if a single company had two sites but only one NBX 100 In order to properly route emergency 911 calls you would need a fourth table to define which extensions used each dedicated 911 telephone line Example Users at site A dial 911 and the NBX 100 uses the Internal table table ID 1 to make the emergency call on one external telephone line Users at site B dial 911 and the NBX 100 uses table ID 4 t...

Страница 51: ...ry for digit 0 zero to specify how the NBX 100 handles a telephone number which has zero as the first digit Example 2 If you want the NBX 100 to handle calls differently depending on whether they start with 90 or 91 you must have one entry in the table for each of these 2 digit sequences The minimum number of digits the NBX 100 collects before making a decision Example If you are using a 4 digit d...

Страница 52: ...COCode Other Wireless Toll AlternateLong Operator TrunktoTrunk Diagnostics and NotAllowed Each value corresponds to a similar setting in the NetSet interface In the NetSet interface you assign each user to a calling group and you can decide whether to give a calling group permissions for each combination of call classification and system mode Open Closed Lunch and Other Example 1 You can assign a ...

Страница 53: ...y in the Internal table If you have entries in both the Least Cost and Internal tables for the same purpose the behavior of the dial plan can be confusing Example If a new entry in the Internal table appears not to work it is possible that the NBX 100 is using an entry from the Least Cost table instead To avoid such conflicts you can accomplish least cost routing using only the Internal table 3Com...

Страница 54: ... a 4 digit dial plan and the telephone extensions start with 2 then the table entry with 2 in the Digits column typically has 4 in the Min column Before making a decision the NBX 100 would collect all 4 digits of the extension The maximum number of digits the NBX 100 must collect before making a decision Often this value and the Min value are identical as is the case for internal extensions A call...

Страница 55: ...e it does not attempt to find a corresponding entry in the Internal table If you have entries in both the Least Cost and Internal tables for the same purpose the behavior of the dial plan can be confusing Example If a new entry in the Internal table appears not to work it is possible that the NBX 100 is using an entry from the Least Cost table instead To avoid such conflicts you can accomplish lea...

Страница 56: ...ernal table You can add entries to the Internal Dial Plan table to match the NBX 100 to the telephone service you have Example the company is located in New York and has two long distance telephone carriers ABC which provides a low cost service to four Boston area codes 508 617 781 and 978 and DEF which provides service to the rest of the United States You want to use one 4 port line card connecte...

Страница 57: ...s of the incoming 4 digit sequence 2 Add prepend the digits 20 in front of the remaining 2 digits See Managing Dial Plan Pretranslators on page 94 for detailed information and examples on creating and managing Dial Plan Pretranslators Viewing and Assigning Pretranslators To view a list of devices and their associated Pretranslators or to associate a Pretranslator with a specific device follow thes...

Страница 58: ...ttons to move devices back and forth between the Devices Using Pretranslator list and the Devices Not Using Pretranslator list Table 8 Pretranslator Fields Field Purpose Pretranslator ID This is the ID of the pretranslator as specified in the dial plan Pretranslator ID This is the ID of the pretranslator as specified in the dial plan Pretranslator Name This is the name of the pretranslator as spec...

Страница 59: ...ample the DDI DID telephone numbers range from 508 323 4200 to 508 323 4299 Internally you dial extensions from 2000 to 2099 to reach another internal telephone When you place a call to an external telephone number the NBX 100 could use these Pretranslator steps to create the full 10 digit number 1 Remove stripLead the first two digits 40 from the internal extension number of the telephone making ...

Страница 60: ...ist of all channel devices See Table 8 on page 58 for details 4 Highlight a device and use the and buttons to move devices back and forth between the Devices Using Pretranslator list and the Devices Not Using Pretranslator list 5 Click Close when done See Managing Dial Plan Pretranslators on page 94 for detailed information and examples on creating and managing Dial Plan Pretranslators Removing a ...

Страница 61: ... if you purge the database Changes you make to any NBX 100 system settings including changes made by importing a modified dial plan configuration file are reflected in the most recent version of the database When you reboot the system it loads the most recent version of the database If you save back up the current database you can restore it later and you can restore any previously saved version i...

Страница 62: ...y In addition the file samples txt contains several examples illustrating how you can configure the Dial Plan configuration file to control how the NBX 100 manages incoming and outgoing calls The 3 digit Dial Plan configuration file supports systems using 3 digit extensions and the 4 digit file supports 4 digit extensions In other ways the two types of configuration files are very similar Decide w...

Страница 63: ...nges or you can edit the file with an ASCII text editor and import the file after you complete the changes You can create new entries in the configuration file by typing in new commands see Dial Plan Configuration File Commands on page 101 or by cutting pasting and editing existing lines in the file When you cut and paste new lines into Dial Plan tables be sure to change the Entry number in the pa...

Страница 64: ...in Specifies the minimum number of digits to collect before routing the call Max Specifies the maximum number of digits to collect before routing the call Class Specifies the class of the call The system uses this information when configuring Class of Service CoS Some of the acceptable values for Class include Internal Local Operator International Emergency and TollFree Priority Not Used This fiel...

Страница 65: ...ce To access a Dial Plan click the Dial Plan icon on the NetSet main menu The Dial Plan window appears Figure 15 Use this window to access user defined and default Dial Plans Command Table ID Number Leading Digits to Collect Table Entry ID Number Minimum and Maximum Number of Digits to Collect Call Classification Used with Class of Service Priority Not Used Number of the Route to Use from Routing ...

Страница 66: ...ile contains the current date and time and you can save it as a file with a name you choose You can reload that file later to restore the configuration If you import one of the sample configuration files supplied with the NBX 100 make changes to it using the NetSet interface and save the file using the same file name you will over write the sample file Sample files contain examples of such things ...

Страница 67: ...ick the Default File radio button 2 Select the name of the default file you want to use from the list next to the Default File button 3 Click Import 4 Reboot the NBX 100 Importing an International Dial Plan To change the default North American dial plan to a country specific dial plan 1 Click the Dial Plan icon in NetSet 2 Select the Operations tab 3 Select the file required from the Default File ...

Страница 68: ...ne extensions numbers within this range See Using Auto Discovery for Initial System Configuration on page 164 for information on the auto discovery process Dialing Outside Lines To obtain an outside line dial 9 or 0 as appropriate for your country WARNING You must first obtain an outside line before you can dial emergency numbers Importing a User Defined Dial Plan To import a user defined Dial Pla...

Страница 69: ...lt files contain examples of such things as Timed Routes and Pretranslators If you choose the same file name as one of the default files the NBX 100 overwrites the file destroying the examples To export a Dial Plan configuration file 1 On the Operations tab Figure 15 click Export The NBX 100 constructs a new configuration file from the current values in the database and displays it for you See Fig...

Страница 70: ...plan either one of the default plans shipped with NBX 100 or a plan from another NBX 100 modify it and save it as a renamed file Each time the NBX 100 imports a dial plan configuration file it checks the file for errors and displays the results You can use this information to correct errors To modify a Dial Plan configuration file 1 On the Operations tab of the Dial Plan window Figure 15 click Mod...

Страница 71: ...Example If you have an entry in the Dial Plan for digit sequences starting with 94 with MIN and MAX set to 5 and you test the sequence 9411 the Dial Plan test result will be insufficient digits However in actual operation the NBX 100 would time out waiting for the fifth digit and then attempt to place the call In the US this would most likely obtain an outside line 9 and then dial Information 411 ...

Страница 72: ...irm that you can make toll calls from that extension and during closed hours and weekends to confirm that the NBX 100 prevents such calls To create and run a test using the currently loaded Dial Plan 1 On the Dial Plan Operations tab Figure 15 click Test 2 The Dial Plan Test window appears Figure 18 Figure 18 Dial Plan Test Window 3 To set up the simulated call select the number from which you wan...

Страница 73: ...tain test results if you want to record them or send them to someone you can highlight the text in the results pane and use the browser s copy button typically found in the Edit menu to copy the test results to another application window such as an editor or e mail 8 Click Close Generating a Dial Plan Report This section tells you how to create a report containing all Dial Plan settings tables rou...

Страница 74: ...entries that overlap Devices that specify no normal Dial Plan Devices that point to non existent Normal tables Least Cost Routing tables or pre translators Pretranslator entries that have no operations When the NBX 100 detects an error in any line of an imported Dial Plan configuration file it ignores that line and continues to process all remaining lines in the file This minimizes the impact of e...

Страница 75: ... list contains extension numbers such as telephone extensions or the extensions assigned to Digital Line Card ports Each extension list ID is a 4 digit number preceded by an asterisk Example Extension lists are typically numbered upward starting at 0001 in either a 3 digit or 4 digit plan Although these numbers are similar to extensions the NBX 100 identifies an extension list by the asterisk and ...

Страница 76: ...the value you typed and the position of the extension in the list changes to reflect the new priority An extension assigned priority 1 Table 9 Extension Lists Extension List ID Description 0001 Contains extension numbers assigned to Line Card ports example TLIM ports Routes 1 and 2 use this list 0002 Contains extension numbers assigned to Digital Line Card ports Routes 1 and 2 use this list 0003 C...

Страница 77: ...ces you must have diagnostic privileges In addition you can not dial a prefix to obtain a Digital Line Card port Each Line Card port must have its own extension Telephones cannot have an extension unless you associate a user with that extension The auto discovery process initially assigns a default name new user to each new telephone and assigns an available extension number To assign a telephone ...

Страница 78: ... ports digital line card ports and ConneXtions ports Available 620 622 620 622 Must be manually changed to 6020 6022 after importing the 4 digit dial plan configuration file Paging 623 650 N A 6023 6050 included in the range for analog line card ports digital line card ports and ConneXtions ports Available 651 662 651 662 Do not need to be changed to 4 digit extensions Voice Mail ports 663 699 N A...

Страница 79: ...u configure or auto discover any devices To view and change extension settings 1 On the Operations tab Figure 15 click Settings The Settings window appears Figure 21 Figure 21 Settings Window 2 Make the desired changes to the extension settings Table 11 provides a description of each field 700 799 auto detection starts at 750 6000 7999 auto detection starts at 7500 Analog Line Card ports Digital L...

Страница 80: ...609 and for a 4 digit systems is 6001 6009 Note Park extensions must be a subset of external extensions External Extensions The range of extensions for External Extensions For both 3 digit and 4 digit systems this range includes Analog Line Card ports Digital Line Card ports and Call Park extensions For a 4 digit system this range also includes the page extensions The default range for a 3 digit s...

Страница 81: ...tension During the auto discovery of external lines analog lines and Digital Line Card channels the NBX 100 assigns the default extension 500 to all incoming lines After you import the Dial Plan configuration file and complete the auto discovery process you can manually configure the extension for each analog line and each Digital Line Card channel if you want In the current product release you ca...

Страница 82: ...URING THE DIAL PLAN To make changes to the extensions of any device in the system 1 On the Operations tab Figure 15 click Modify Extensions The Modify Extensions window appears Figure 22 Figure 22 Modify Extensions Window ...

Страница 83: ...he Change Extension command to only one extension at a time If you select multiple extensions the NBX 100 applies the change only to the first selected extension Prepend Prepends the digits in front of all selected extensions Append Appends the digits to the end of all selected extensions Strip Leading Digits Strips removes the specified number of digits from the beginning of all selected extensio...

Страница 84: ...An extension list contains extension numbers such as telephone extensions or those extensions assigned to Digital Line Card ports Each extension list ID is a 4 digit number preceded by an asterisk Example Extension lists are typically numbered upward from 0001 in either a 3 digit or 4 digit plan Although these numbers are similar to extensions the NBX 100 identifies an extension list by the asteri...

Страница 85: ...ts 85 To add a new extension list 1 From the Dial Plan window Figure 15 click the Extensions List tab The Extension Lists window appears Figure 24 Figure 24 Extension Lists Window 2 Click Add The Add Extension List window appears Figure 25 ...

Страница 86: ... and the NBX 100 prevents you from dialing an extension list The asterisk in front of the number is a convention that reminds you that the extension list number is not a normal extension 4 Type the name you want to assign to the new extension list in the Name text box Names can include upper and lower case alphanumeric characters spaces underscores and dashes 5 Initially there are no extensions in...

Страница 87: ...xtension list it attempts to use the highest priority extension first Example If the extension list contains extensions assigned to T1 channels you can assign unique priorities to each extension If you instruct the NBX 100 to place an outgoing call using the T1 line it attempts to use the highest priority extension channel first and tries the next highest priority extension channel if the first is...

Страница 88: ... List scroll list and click the button You can use Shift click to select a block of extensions and Control click to select several extensions at different locations in the list 5 To remove an extension from the extension list highlight it the Extensions in List scroll list and click the button The extension moves to the Extensions not in List scroll list The Priority function applies only to exten...

Страница 89: ...t are 8 9 or 0 zero First Auto Discover Extension The NBX 100 assigns this extension when discovering incoming telephone lines analog or digital The NBX 100 assigns extensions starting with this number and incrementing upward See Using Auto Discovery for Initial System Configuration on page 164 for information on the Auto Discovery process The default value for a 3 digit system is 750 and for a 4 ...

Страница 90: ... minimum number of digits the NBX 100 must collect before making a decision The maximum number of digits the NBX 100 must collect before making a decision The Class of Service Cos the NBX 100 must use to determine whether or not to permit the user to make the call The Priority of this table entry currently not used The route number described in the Routes section of the Dial Plan configuration fil...

Страница 91: ... also perform digit manipulation operations on the dialed digits that resulted in the selection of this route before those digits are dialed on the destination device Timed routes specify a time of day and day of week criteria which when met result in a particular destination route being selected CAUTION If you operate the NBX 100 in Keyset Mode routes are not applicable Determining Which Devices ...

Страница 92: ...Figure 27 Tables Window 2 Select a Dial Plan table from the list 3 Select the table for which you want to list devices To list devices not assigned to any table select none 4 Click Devices Using The Devices Using a Dial Plan window appears Figure 27 If you select none you see the Devices That Have No Dial Plan window Table 12 lists the field definitions for the Devices Using Tables window ...

Страница 93: ...ng Table scroll list and click Table 12 Fields in the Devices Using Table Window Field Purpose Dial Plan Table ID The identification number of the Dial Plan table as specified in the Dial Plan Configuration file Dial Plan Table Name The name of the Dial Plan table Show devices using table as The type of table either Normal or Least Cost To select a type click either Normal or Least Cost Devices Us...

Страница 94: ...on file Each entry in a Pretranslator table contains a string of one or more digits that are compared to incoming or outgoing digits When the digits match an entry in the table the NBX 100 performs any associated Pretranslator operations Each Pretranslator operation performs a digit manipulation operation on the dialed digits For incoming calls if the DID DDI range matches the internal extensions ...

Страница 95: ...n the right hand scroll list select each device and move it to the left hand Devices Using scroll list 5 When you are finished moving devices to the Devices Using list click Close Pretranslator Example 2 Assume the telephone company passes 10 digit numbers to the NBX 100 for each incoming telephone call for example numbers in the range 4567 89 3000 to 4567 89 3500 If the NBX 100 uses 4 digit exten...

Страница 96: ...can also use Pretranslators with tie lines to link together multiple NBX 100 systems Incoming calls within a defined numeric range arriving at the first NBX 100 could be modified through digit manipulation operations and routed to a tie line connected to a second NBX 100 Each example Dial Plan shipped with the NBX 100 includes a default Pretranslator Determining Which Devices Use Pretranslators Th...

Страница 97: ... Pretranslator click Devices Using The Devices Using Pretranslator window appears see Figure 30 Table 14 provides a description of each field in this window b For a list of devices using the selected Pretranslator to create Calling Line ID click Devices Using for CLI see Figure 31 Table 14 provides a description of each field in this window For a list of devices that use no Pretranslator select no...

Страница 98: ... it in the Devices Using Pretranslator list and click 7 Click Close when done Table 13 Fields in the Devices Using Pretranslator Window Field Purpose Pretranslator ID The ID of the pretranslator as specified in the Dial Plan Pretranslator Name The name of the pretranslator as specified in the Dial Plan Devices Using Pretranslator List containing devices currently using the pretranslator Devices No...

Страница 99: ...eld Purpose Pretranslator ID The ID of the pretranslator as specified in the Dial Plan Pretranslator Name The name of the pretranslator as specified in the Dial Plan Devices Using Pretranslator Scroll list containing devices currently using the pretranslator Devices Not Using Pretranslator Scroll list containing devices not currently using the pretranslator ...

Страница 100: ...o before placing an outside call the user presses a button to select an available Line Card port Even though you define the routing that is the selection of a destination device by pressing the button to select the Analog Line Card port or Digital Line Card port the NBX 100 controls the call using the Dial Plan The NBX 100 applies any Class of Service restrictions associated with the user s teleph...

Страница 101: ... starting with the digit 8 You define a route to the 4 port card for all of these entries so that whenever the NBX 100 acts on one of these entries it uses one of the 4 ports on that card to dial out and notify the user Dial Plan Configuration File Commands This section provides the syntax and description of each command used to create the information in the Dial Plan Configuration file Command sy...

Страница 102: ...st Cost Routes If the Dial Plan table already exists this command removes all entries from the table and fills the table with the new information Syntax DialPlanTable Create nDialPlanTableId szDescription Arguments nDialPlanTableId An integer in the range 1 through 32768 Note that the NBX 100 reserves three Id numbers 1 Internal Dial Plan table 2 Incoming Dial Plan table 3 Least Cost Routing table...

Страница 103: ...range 1through 32768 The NBX 100 reserves three ID numbers 1 Internal Dial Plan table 2 Incoming Dial Plan table 3 Least Cost Routing table nEntryId An integer in the range 1 through 32768 Each entry must have a unique ID If two entries have the same ID the system uses the entry closer to the bottom of the configuration file the one processed last szDigits A string of dialed digits in a Dial Plan ...

Страница 104: ...ternal extension there is no need for a defined route so the route number is zero TableEntry Create 1 1 3 4 4 Internal 0 0 DestinationRoute Create Description Creates a route that specifies the primary and alternative destination device of a call for example which CO Line or Digital Line Card port over which to route the call If the destination route already exists this command removes all of its ...

Страница 105: ...tryId An integer in the range 1 through 32768 The NBX 100 checks the list of destinations in ascending nEntryId order and uses the first available one szExtension The extension of the destination device or device list Note that the NBX 100 does not dial this extension that is it neither checks the extension against a Dial Plan nor subjects it to Class of Service restrictions digit translation or r...

Страница 106: ...h 32768 specifying the destination route entry to which this operation applies nOperId An integer in the range 1 through 32768 The NBX 100 processes the list of operations in ascending nOperId order szOperation The name of the digit manipulation operation to perform One of the following stripLead stripTrail replace prepend append szValue A value used by the operation either the string of digits to...

Страница 107: ...tion Arguments nRouteId An integer in the range 1 through 32768 which uniquely identifies this timed route nDefaultDestinationRouteId An integer in the range 1 through 32768 identifying the destination route the NBX 100 must use if none of the entries in this timed route match the current time of day szDescription A description or name of the timed route Example This example command creates timed ...

Страница 108: ...00 checks the list of timed routes in ascending order based on nEntryId szStartTime Start time in 24 hour format for example 13 30 for 1 30 pm You can use either 24 00 or 00 00 to specify midnight Instead of specifying times you can enter a system mode name open closed lunch or other For each system mode the NBX 100 knows the start and stop times If you use one of the system modes both szStartTime...

Страница 109: ...ith Sunday as the first character and ending with Saturday as the last character The NBX 100 excludes any day if a dot character appears in that day s position As a convention you place the first letter of each day in the appropriate character position to indicate that the day is included but you can use any letter you want the presence of a dot in a given position excludes the day of the week and...

Страница 110: ...nd time defined by the business closed hours and the letters SMTWTFS indicate that this entry applies to all seven days of the week Sunday through Saturday The number 1 designates destination route 1 defined in the NBX 100 routes table Because this route applies to the business closed hours route 1 could connect the incoming call to an auto attendant menu that tells the caller that the company is ...

Страница 111: ...ntryId nOperId szOperation szValue Arguments nRouteId An integer in the range 1 through 32768 nEntryId An integer in the range 1 through 32768 specifying the timed route entry to which this operation applies nOperId An integer in the range 1 through 32768 The NBX 100 processes the list of operations in ascending nOperId order nOperId 1 first szOperation The name of the digit manipulation operation...

Страница 112: ...ption with the new information Syntax PreTranslator Create nPreTranslatorId szDescription Arguments nPreTranslatorId An integer in the range 1 through 32768 szDescription The description or name of the pretranslator Example This command creates a pretranslator designates it as the first one number 1 and give it the title 4 to 3 digit DID DDI pretranslator PreTranslator Create 1 4 to 3 digit DID DD...

Страница 113: ...hrough 32768 nEntryId An integer in the range 1 through 32768 szDigits The digits to compare to the incoming digits Example These example commands create in pretranslator 1 entries 1 through 10 each of which looks for a different single digit 0 through 9 in the incoming digits PreTranslatorEntry Create 1 1 0 PreTranslatorEntry Create 1 2 1 PreTranslatorEntry Create 1 3 2 PreTranslatorEntry Create ...

Страница 114: ...orEntry Delete nPreTranslatorId nEntryId Arguments nPreTranslatorId An integer in the range 1 through 32768 nEntryId An integer in the range 1 through 32768 or for all entries Example This command deletes pretranslator entry 3 from pretranslator 2 PreTranslatorEntry Delete 2 3 This command deletes all pretranslator entries from pretranslator 2 PreTranslatorEntry Delete 2 ...

Страница 115: ...Id nEntryId nOperId szOperation szValue Arguments nPreTranslatorId An integer in the range 1 through 32768 nEntryId An integer in the range 1 through 32768 specifying the pretranslator entry to which this operation applies nOperId An integer in the range 1 through 32768 The NBX 100 processes the list of operations in ascending nOperId order nOperId 1 first szOperation The name of the digit manipul...

Страница 116: ...RING THE DIAL PLAN ExtensionLength Description Specifies the length of extension numbers for system devices The default is 3 Syntax ExtensionLength nExtensionLength Arguments nExtensionLength An integer in the range 3 to 4 ...

Страница 117: ...zHighestExtension Arguments szExtensionType One of the following Telephone Park AutoAttendant Hunt Group External szLowestExtension The lowest desired extension for this device type szHighestExtension The highest desired extension for this device type Example These commands define the extension range for telephones as 100 through 499 for call park extensions as 601 through 609 for the auto attenda...

Страница 118: ...ent Example In the default internal Dial Plan table the digit 9 instructs the NBX 100 to connect the call to an external line When a telephone has a button mapped to an external device and the user places a call using that external device the NBX 100 prepends the szExternalKeysetPrefix digit to the digits dialed by a user then the NBX 100 applies the Dial Plan tables to determine call classificati...

Страница 119: ...to 3XXX Translator PreTranslatorEntry Create 1 1 6111 Explanation Creates the first entry in PreTranslator 1 this entry looks for the specific sequence of digits 6111 PreTranslatorOperation Create 1 1 1 replace 5502 Explanation Creates the first operation associated with PreTranslator 1 PretranslatorEntry 1 Defines a replace operation that replaces all digits in the incoming sequence 6111 with 550...

Страница 120: ... to route 0 zero the default route for internal extensions Customer Requirement 2 Requirement The company is located in New York and has two long distance telephone carriers ABC which provides a low cost service to four Boston area codes 508 617 781 and 978 and DEF which provides service to the rest of the United States You want to use one 4 port line card connected to analog trunk lines owned by ...

Страница 121: ...ority value the NBX 100 leaves 0 zero as the value and assigns the call to route 1 the route that uses the 4 port card TableEntry Create 1 49 91617 12 12 LongDistance 0 1 Explanation Creates in table ID 1 the Internal table entry 48 which directs the NBX 100 to look for the digits 91617 at the beginning of any 12 digit sequence Min and Max are both 12 If the NBX 100 detects such a sequence it assi...

Страница 122: ...uteEntry Create 2 1 0001 Explanation Create in route 1 the first entry and define extension list 0001 internal extensions as the list to which this entry applies Then create in route 2 the first entry and define extension list 0001 internal extensions as the list to which this entry applies DestinationRouteOperation Create 1 1 1 stripLead 1 DestinationRouteOperation Create 2 1 1 stripLead 1 Explan...

Страница 123: ...asses 10 digit numbers to the NBX 100 for each incoming telephone call for example numbers in the range 4567 89 3000 to 4567 89 3500 If the NBX 100 uses 4 digit extensions in the range 2000 to 2500 you could pass an incoming 10 digit number such as 4567 89 3210 to extension 2210 by using two pretranslation operations The first would perform a stripLead operation to remove the initial 7 digits leav...

Страница 124: ...ns in the NBX 100 Customer Requirement 5 Requirement You want to transmit Calling Line ID Presentation CLIP information on outgoing calls You use internal telephone extension numbers from 3000 to 3099 There is no DDI DID so the T1 or E1 line has only a single number 555 555 1212 All incoming calls are routed by default to the auto attendant Action Add these lines to the Dial Plan configuration fil...

Страница 125: ...0 to look for the digits 91 at the beginning of any 12 digit sequence both Min and Max are set to 12 If the NBX 100 detects such a sequence it assigns LongDistance as the class of service Because NBX 100 software does not use the priority value the NBX 100 leaves 0 zero as the value and assigns the call to route 27 If Table 1 already contains an entry with 91 in the digits column delete it and sub...

Страница 126: ...it Carrier After 3pm and Closed DestinationRouteEntry Create 28 1 0002 Explanation For DestinationRoute 28 create entry 1 which uses extension list 0002 the extension list that contains all extensions associated with digital line cards DestinationRouteOperation Create 28 1 1 stripLead 2 Explanation For DestinationRoute 28 entry 1 create operation 1 which strips 2 digits 9 and 1 from the beginning ...

Страница 127: ...ll to select the first long distance carrier Example 2 If you make a long distance call at any time on any Saturday the NBX 100 uses these Timed Route definitions and Determines that the date is not a valid business date Selects Timed Route 28 Prepends 1010220 to the outgoing call to select the second long distance carrier ...

Страница 128: ...128 CHAPTER 2 CONFIGURING THE DIAL PLAN ...

Страница 129: ...g and Examining the Components Recording MAC Addresses Installing the NBX 100 Chassis Installing NBX 100 NCP and Other Cards Connecting a Computer to the Network Call Processor Through a Serial Port Setting Up IP Connectivity for NetSet Installing LAN Connections Testing the Installed Hardware Selecting Regional Software and Components Using Auto Discovery for Initial System Configuration Configur...

Страница 130: ...ere is not an existing 10BASE T LAN it must be installed or UTP unshielded twisted pair wires must be in place between the NBX 100 chassis location and each telephone location NBX 100 User Terminology For the purposes of installation NBX 100 administrators users and callers are defined as follows Required and Recommended Tools and Equipment Gather the following tools and equipment which are typica...

Страница 131: ...00 chassis to a prepared wall surface The screws must support a fully configured chassis Plywood 1 25 cm inch or greater mounted to the wall with toggle bolts or screwed into the wall studs Drill and drill bits For rack mounting the chassis Four rack screws appropriate to the rack ...

Страница 132: ...y and damage to the equipment please follow these important safety precautions when installing using or servicing the equipment Allow only qualified personnel to install and remove the unit You must always connect the unit to a protective earthed grounded outlet to comply with international safety and EMC standards Read and understand all instructions Always disconnect a device from its power sour...

Страница 133: ...ppliance coupling The appliance coupler that is the connector to the unit not the connector to the wall plug must have a configuration that mates with an EN60320 IEC320 appliance inlet The socket outlet must be near the unit and easily accessible You can remove power from the unit only by disconnecting the power cord from the outlet Table 16 Regulatory Requirements Country Power Cord Set Details E...

Страница 134: ...Safety The following information is important Please read it carefully WARNING There is a danger of explosion if the battery is incorrectly replaced Replace the battery only with the same or equivalent type as recommended by the manufacturer Dispose of used batteries according to the manufacturer s instructions Consignes Importantes de Sécurité Nous vous demandons de lire attentivement les consign...

Страница 135: ...permet un branchement sur une entrée d appareil EN60320 IEC 320 La prise secteur doit se trouver à proximité de l appareil et son accès doit être facile Vous ne pouvez mettre l appareil hors circuit qu en débranchant son cordon électrique au niveau de cette prise Table 17 Cordon électrique Pays Détails du Cordon Electrique Europe La prise secteur doit être conforme aux normes CEE 7 7 SCHUKO Le cor...

Страница 136: ...e à la terre ce groupe doit être alimenté par une tension de 230 V 2 P T par le biais d un transformateur d isolement à rapport 1 1 avec un point secondaire de connexion portant l appellation Neutre et avec raccordement direct à la terre masse Batterie au lithium Veuillez lire attentivement la note suivante AVERTISSEMENT Le remplacement incorrect de batterie au lithium présente un risque d explosi...

Страница 137: ...chutzerdung verfügt Das Gerät muß an eine Steckdose mit Schutzerdung angeschlossen werden die internationalen Sicherheitsvorschriften und den Vorschriften zur EMV entspricht Netzkabelsatz Für europäische Länder siehe Tabelle 3 und einen Netzkabelsatz verwenden für Europa wenn Ihr Land nicht einzeln aufgeführt ist Für nichteuropäische Länder müssen Sie einen Netzkabelsatz verwenden der die entsprec...

Страница 138: ...schlüsse verfügen muß die Einheit über einen geerdeten Trenner mit einem Übersetzungsverhältnis 1 1 mit 230 V 2P T betrieben werden dabei muß der zweite Anschlußpunkt die Bezeichnung Neutral tragen Impédance à la terre Lithiumbatterie Bitte lesen Sie den folgenden Hinweis sorgfältig durch WARNHINWEIS Wird die Lithiumbatterie falsch ersetzt besteht Explosionsgefahr Die Batterie nach den Empfehlunge...

Страница 139: ... addresses are printed on labels attached to each card These addresses enable you to identify a card when you configure it using the NetSet administration utility Table 19 Components Checklist Component Ordered Unpacked Chassis Hardware package s containing screws mounting brackets and cable guides Network Call Processor Disk drive with bracket mounting screws and data cable 4 Port Line card s 8 P...

Страница 140: ...code label on the top of the card The label shows the card s MAC address NBX 100 MAC addresses are hexadecimal numbers followed by a colon For example 00e0bb000198 The address listed on the label is the address for port 1 To determine the address for port 2 add 1 to the hexadecimal address of port 1 For example 00e0bb000199 1 00e0bb00019a The address of port 2 is 00e0bb00019a To determine the addr...

Страница 141: ... MAC address of the board For example If the board label lists the address 00 e0 bb 01 20 69 The address of channel 1 would be 00 e0 bb 01 20 69 1 00 e0 bb 01 20 6a The address of channel 6 would be 00 e0 bb 01 20 69 6 00 e0 bb 01 20 6f The address of channel 12 would be 00 e0 bb 01 20 69 12 00 e0 bb 01 20 75 The number of MAC addresses and channels per digital line card varies depending on the ty...

Страница 142: ... ground the strap do not ground it to the NBX 100 chassis because the chassis is not grounded until you install it in a properly grounded setting If you purchased an upgrade to the standard Advanced PowerMail eXchange APX voice mail capacity and you have more than one chassis you must install the disk drive in the correct chassis or you will not be able to enable the voice mail upgrade One of the ...

Страница 143: ... drive You can use any of the appropriate connectors on the power supply 4 Using the four 6 32 Phillips head screws provided attach the disk drive to the chassis above the power supply as shown in Figure 32 5 Route the data cable through the rectangular opening in the chassis inner wall Be sure to connect the disk drive data cable to J9 on the chassis backplane which is mounted on the back wall of...

Страница 144: ...ewdriver or wrench Drill and drill bit wall mount only Level wall mount only If you choose to rack mount the system be sure the equipment rack is properly installed and grounded and the installation area is properly ventilated Rack Mounting the NBX 100 Chassis To rack mount the chassis you must install the brackets on the front of the chassis as shown in Figure 33 Figure 33 Installing Chassis Moun...

Страница 145: ...efore you wall mount a chassis prepare an area by attaching a suitable mounting surface securely to the wall studs To maintain effective cooling air flow do not mount chassis side by side If you do one chassis draws in warm air from the other limiting the effectiveness of the cooling fans To wall mount the chassis you must install the brackets on the back of the chassis as shown in Figure 12 Figur...

Страница 146: ...rt the weight of the NBX 100 4 Lift the chassis and slide the two keyed mounting brackets over the screws in the wall 5 While holding the chassis in place install screws into the top holes of each mounting bracket and then tighten all four screws Chassis and Slot Conventions The following list summarizes the guidelines for arranging NBX 100 cards within one or more NBX 100 6 slot chassis The top s...

Страница 147: ...onnects cards to each other within a chassis If the system has more than one chassis each extra chassis must have an NBX 100 8 port Hub card to allow connections from one chassis to the next To connect the chassis with the NCP to additional chassis use one of the following methods Connect a 10BASE2 coax cable from the NBX 100 NCP to the NBX 100 8 port Hub card in the next chassis If you have a thi...

Страница 148: ...ards and 4 port ATA cards To install cards in the NBX 100 chassis 1 Leave the top faceplate cover in place and remove the other covers 2 Install line cards and hub cards starting at the bottom slot You must install the NCP in the top most slot The order in which you install other cards is not important 3 Be sure the edges of the card ride in the chassis guide slots and then slide the card in until...

Страница 149: ...BX 100 chassis or to any hub on the network Figure 36 Single Port ATA Connectors Rear View 3 You can optionally connect a local PC or other Ethernet device to the Ethernet MDI Port on the ATA This serves as a hub to connect the local PC to the LAN 4 Connect the AC Power Adapter to the AC Power Connector on the ATA then plug the adapter into a wall outlet The Single Port Analog Terminal Adapter may...

Страница 150: ... network over standard TIA EIA 568 Category 5 cable The DC operating power for the data terminal units is fed through the unused pairs 7 8 and 4 5 See the 3Com Ethernet Power Source documentation for installation and configuration information Connecting a Computer to the Network Call Processor Through a Serial Port You can connect a computer directly to the NCP and use a VT100 terminal emulation p...

Страница 151: ...The browser Netscape Navigator 4 or higher or Microsoft Internet Explorer 4 or higher allows you to access the configuration interface for the NBX 100 To enhance the appearance of NetSet online Help be sure the browser is set to allow JavaScript and style sheets CSS A network interface card the computer must be connected to the local area network Default IP Settings The NBX 100 is shipped with def...

Страница 152: ...te the Internet service provider will provide you with instructions on how to configure the IP settings of devices on the network You will need to change the IP settings of the NBX 100 at that time Private IP network no subnets You probably need to change the NBX 100 IP address to conform with the existing IP addressing scheme You must change the NBX 100 IP address 192 168 0 0 if that address is a...

Страница 153: ...r s IP address box 192 168 0 0 This is the default IP address of the NBX 100 If the connection attempt fails check the browser s Proxy Server setting and be sure it is configured for a direct connection Also check the Connection setting and be sure it is set for a direct LAN connection not a dial up connection After you connect you can log into NetSet using the default user name and password admin...

Страница 154: ...b card to an external hub or switch you must use a cable where the transmit and receive wire pairs have been crossed over to maintain correct signal polarity Connecting LAN Cables Multi Chassis Configuration If the system contains more than one NBX 100 chassis each additional chassis must have an NBX 100 Hub card to connect chassis to chassis Only one chassis has an NCP and disk drive If you are u...

Страница 155: ...ach other with cables the chassis backplane connects the cards 2 Connect the telephone wires to 10BASE T ports on the hub If you are using an NBX 100 Hub card you can connect telephones directly to the RJ45 ports on the hub card See Figure 37 for a typical two chassis installation Figure 37 LAN Connections for a Typical Two chassis Installation You can connect and disconnect telephone and LAN cabl...

Страница 156: ... observe the progress of the start routine by watching the terminal connected to the system s serial port See Chapter 8 Maintenance Diagnostics and Troubleshooting if you experience any problems The start routine verifies that the chassis hardware is functional Line card ports are not yet ready to receive calls During the power up process the NBX 100 tests system components through the chassis bac...

Страница 157: ...ystem Status Lights As shown in Figure 39 each card in the NBX 100 chassis contains status lights LEDs that indicate the card s status during system power up Figure 39 NBX 100 Status Lights The following tables briefly describe the status lights ...

Страница 158: ...Music on hold processor initialized S3 slow flash one second on one second off Music on hold processor initialized no music source available Table 24 4 Port Line Card Status Lights Condition Status All four lights flashing in unison Hardware initializing Each light flashes on twice then stays off for two seconds heartbeat Port has received its download from the call processor Status light on blink...

Страница 159: ...is installed by default and cannot be removed The default U S English is used as a fallback in case another Internationalization Pack fails to load properly The collection of regional software and components is called an Internationalization Pack Internationalization Packs include the following regional components Table 27 T1 and E1 Digital Line Card Status Lights Condition Status Nominal light on...

Страница 160: ...gurable voice messages These are messages which users or administrators are able to change by making a recording Some examples are Automated Attendant messages or Voice Mail messages Tones and cadences NetSet graphical interface screens and help Phone LCD display Documentation Installing Regional Software and Components The administrator can use NetSet to select and download the appropriate region...

Страница 161: ...l Software and Components 161 Figure 40 Regional Software Tab 4 Select Install and Browse to the appropriate Internationalization Pack and select the language of choice Figure 41 Selecting the Internationalization Pack ...

Страница 162: ...g Regional Software and Components The administrator can use NetSet to remove regional language software and components All versions and components of the region are removed 1 On the Operations Regional Software tab click the Remove button 2 From the drop down list select the software that you want to remove Figure 42 Removing a Region 3 Click Remove 4 Click Yes to confirm This step removes all cu...

Страница 163: ...a region are installed that region will be listed For each listed region you will see a status 2 For In Use regional software you will see an informational display comparable to this one Table 28 Regional Software Status Status Description In use All of the components associated with the language and country are installed and selected for use Available All of the components associated with the lan...

Страница 164: ...dding information about new devices to the configuration database Devices include telephones Line Card ports Digital Line cards DSS BLF adjuncts as well as virtual devices that exist on the network such as the pcXset PC Telephone Client and the ConneXtions H 323 Gateway At this point in the installation process Auto Discovery adds the Line Card ports and DIgital Line cards you ve installed After a...

Страница 165: ...nto the configuration database Note Auto Discovery assigns extension number 100 3 digit Dial Plan or 1000 4 digit Dial Plan as the first telephone extension You can use NetSet to specify a new extension starting number To simplify Automated Attendant configuration you should start a range at a base number 100 1000 200 2000 300 3000 or 400 4000 The default Automated Attendant uses extension 100 or ...

Страница 166: ... Settings window appears Figure 44 System Settings Window 4 Select the appropriate Auto Discover check boxes for Line Cards and Telephones Do not enable Auto Discover for DSS BLF adjuncts or T1 Devices Digital Line cards Auto Discover all the other devices first 5 Click Apply It takes a few moments for Auto Discovery and the software download process to complete If you have connected many new devi...

Страница 167: ...does not continue to search for added devices Perform the following steps to disable Auto Discovery 1 Open NetSet using the administrator username and password 2 On the main menu click the System Configuration icon and then click System wide 3 Clear the appropriate Auto Discover check boxes then click Apply Configuring 4 Port Line Cards Auto Discovery finds each port on each 4 port line card and a...

Страница 168: ...a multi chassis configuration the chassis with the next lowest serial number relative to Chassis 1 is Chassis 2 the chassis with the highest serial number is the last chassis Slots are numbered from top to bottom The top space is covered with a blank cover This space is reserved for future expansion of the call processor it is not a slot Slot 1 in Chassis 1 always holds the NCP Line card ports are...

Страница 169: ...ooled and arbitrated by the call processor The CO lines do not map to individual telephones All incoming calls go first to an Attendant Console or the Automated Attendant If the call goes to the Attendant Console the receptionist forwards the call to the user s extension or if the user is out of the office the call can be sent directly to the user s voice mailbox To call an outside number a user m...

Страница 170: ...lick the Device Configuration icon and then click the Line Card Ports tab 3 Use the list of port addresses you created when you installed the line card to determine the first port in chassis 1 4 Select the MAC address of the first port in chassis 1 then click Modify The Modify Line Card Port window Figure 46 appears Figure 46 Modify Line Card Port Window 5 Edit the line card port properties as nee...

Страница 171: ... this port operates under operate sunder the control of system wide Silence Suppression settings See Chapter 4 for more information Choose Enable or Disable to override the System wide setting Trunk to Trunk Trunk to trunk refers to an incoming call being transferred to an outside line Although Trunk to Trunk permission can be granted to individual users through a Class of Service setting setting ...

Страница 172: ... NBX 100 HARDWARE COMPONENTS Connecting Telephone Lines After you have installed and configured the system for initial startup connect the telephone company lines to the line card ports so you can start receiving outside calls ...

Страница 173: ... the following topics Configuring System Level Settings Configuring Speed Dial Numbers Configuring Business Identity Information Configuring System Security Configuring TAPI Settings Configuring System Level Settings After you successfully install the NBX 100 hardware and establish IP connectivity use NetSet to configure system level settings such as date and time and security ...

Страница 174: ...tings Field Purpose Software Version The call control software for the NBX 100 Back Plane Serial Identifies the code on the circuit board within the NBX 100 chassis that holds the Network Call Processor NCP card Host Name This is an IP setting It is a name you can give to the NBX 100 so you do not have to specify the IP address when accessing NetSet through a browser A host name works only if you ...

Страница 175: ... layer Standard IP IP communications are used for traffic between NBX 100 addresses Note Every device needs an IP address IP on the fly An implementation of IP communications in which devices on the same subnet as the call processor communicate using Ethernet frames They receive IP configuration settings only when necessary to communicate with an IP device on some other subnet Free Memory Availabl...

Страница 176: ...ame layer Standard IP IP communications are used for traffic between NBX 100 addresses Note Every device needs an IP address Note IP communications are optional features of the NBX 100 and require separate licensing IP on the fly An implementation of IP communications in which devices on the same subnet as the call processor communicate using Ethernet frames They receive IP configuration settings ...

Страница 177: ...Enables Auto Discover for various system devices Note After you use Auto Discover during initial system configuration 3Com recommends that you leave these settings disabled so that you can control how and when new devices are added Auto add telephones to Call Pickup group 0 When selected this adds telephones to the default Call Pickup Group 0 when telephones are added to the system Turn this ON be...

Страница 178: ...cribed in this section See Selecting Regional Software and Components on page 159 for information on installing regional Internationalization Packs To enable regional settings 1 On the System Settings tab Figure 48 click Regional Settings The Regional Settings window appears Figure 49 Figure 49 Enabling Regional Settings 2 From the pull down list select the country and language A Country and langu...

Страница 179: ...al Settings window Figure 49 follow these steps 1 Click the Advanced button to see this window Figure 50 Advanced Regional Settings 2 Select the Voice Prompts Documentation or Tones and Cadences pull down 3 Select the appropriate country and language 4 Click OK The selected language specific regional Voice Prompts Documentation or Tones and Cadences are now enabled ...

Страница 180: ... display Affect Business Hours behavior Affect Time Dependent Prompts in the Automated Attendant Affect the Time and Date stamp on voicemail To set the system date and time 1 On the System Settings tab Figure 48 click System Date and Time The System Date and Time window appears Figure 51 Figure 51 System Date and Time Window 2 Make changes as necessary 3 Click OK The System Configuration window di...

Страница 181: ...field 3 Click OK The System Configuration window displays the System Settings tab Table 33 System Timers Fields Field Purpose Forward Voice Mail On Timeout When a telephone s FWD VMAIL button is enabled sets the duration of ringing before a call is forwarded to voice mail Note If you set this time to under six seconds caller ID information is not captured in voicemail Forward Voice Mail Off Timeou...

Страница 182: ...48 click Ringing Patterns The Ringing Patterns window appears Figure 53 Figure 53 Ringing Pattern Window Line Port Hold Timeout For a call originating on an outside line the length of time that the call remains on hold before it rings at the extension that parked the call Call Park Timeout The length of time that a call can be parked before it rings at the extension that parked the call Conference...

Страница 183: ...Scope is limited by local routers 239 255 0 0 16 Organizational Local Scope is limited by boundary routers 239 192 0 0 14 Global Scope 224 2 0 0 224 2 127 253 IGMP may not be available in all systems or network topologies All of the routers between the various components must support IGMP and the necessary router protocols to establish a path for the IP Multicast packets Note that each event that ...

Страница 184: ...lect a starting address for all entries Change Bins which lets you change a single entry by selecting from a list of available bins Changing IP Multicast Addresses Changing IP multicast addresses is a quick way to confine the NBX 100 multicast addresses to a smaller range thereby avoiding conflicts with other equipment Current Bin Number MAC Address IP Multicast Address Function ...

Страница 185: ...ss list 2 Click Change Bins The Change Multicast Bin window appears 3 Select a bin number from the list of Available Bins 4 Click OK The system prompts you to continue 5 Click Yes to continue 6 Reboot the system to make the changes take effect After an upgrade from an earlier release of the NBX 100 to Release 2 6 you must enter a new starting IP multicast address enable the system to regenerate th...

Страница 186: ...r that is a toll call is available to users even if their CoS does not allow toll calls Personal Speed Dial numbers are subject to CoS Note that Speed Dial codes are not extensions You cannot use commas with Speed Dial numbers on T1 lines or H 323 lines Creating a System Speed Dial To create a system speed dial 1 On the System Settings Tab Figure 48 click the Speed Dials tab The Speed Dials window...

Страница 187: ...er window use the File Close command Configuring Business Identity Information You can configure information about the client s business such as business address and business hours including Time of Day Service modes You can also view the current system mode and force the system into a different mode Entering Business Information You can enter information specific to the business such as name and ...

Страница 188: ... 100 SYSTEM LEVEL SETTINGS window appears Figure 56 During installation this window contains only defaults Figure 56 Current Business Information Window 2 Click Business Information The Business Information window appears Figure 57 ...

Страница 189: ... Day Service Modes and can affect other settings in the system such as the Automated Attendant You can manually specify that the system operate in a given mode or set it to operate automatically See Setting the System Mode on page 190 If the system is left in an automatic state it constantly compares the current time of day and day of week with the business hour tables The system knows the current...

Страница 190: ...onfiguration window displays the Business Identity tab Setting the System Mode You can manually specify that the system operate in a given mode or set it to operate automatically If necessary you can force the system into a specific Time of Day Service mode without having to reconfigure other system settings such as Business Hours If the system is left in an automatic state it constantly compares ...

Страница 191: ...istrator password 1 On the System Configuration window click the Security tab The Security window Figure 59 appears Figure 59 Security Window 2 In the Change Administrator Password fields enter the default password and the new password Enter the new password again in the Re enter New Password field Make sure to record this password and store it appropriately There is no back door password to use i...

Страница 192: ...ctions To set the auto attendant password 1 On the Security tab Figure 59 click Auto Attendant Password The Change Auto Attendant Password window appears Figure 60 Figure 60 Change Auto Attendant Password Window 2 In the fields provided type the current password and the new password Type the new password again in the Re enter New Password field 3 Click OK The System Configuration window displays t...

Страница 193: ...sword 1 On the Security tab Figure 59 click System Backup Password The Change System Backup Password window opens Figure 61 Figure 61 Change System Backup Password Window 2 In the fields provided type the current password and the new password Type the new password again in the Re enter New Password field 3 Click OK The System Configuration window displays the Security tab ...

Страница 194: ...ndow appears Figure 62 Figure 62 Change Reporting Password Window 2 In the Change Reporting Password fields type the current password and the new password Type the new password again in the Re enter New Password field 3 Click OK The System Configuration window displays the Security tab Configuring TAPI Settings You can configure system wide Telephony Application Programming Interface TAPI settings...

Страница 195: ... window appears 2 Click the TAPI Settings tab The TAPI settings window appears Figure 63 Figure 63 TAPI Settings Window 3 Make changes as necessary to the Maximum TAPI Clients setting To disable TAPI set Maximum TAPI Clients to 0 4 Check Require Passwords for TAPI Clients if you want users to use a password 5 Click Apply to effect the changes ...

Страница 196: ...196 CHAPTER 4 CONFIGURING NBX 100 SYSTEM LEVEL SETTINGS ...

Страница 197: ...figuration on page 164 When you attach a new telephone to the network the Telephones Auto Discovery process finds it assigns an extension to it and adds the information to the configuration database The most efficient method of adding telephones is to connect the telephones one at a time in the order you want extensions assigned in the office See Configuring System Level Settings on page 173 for i...

Страница 198: ...l jack Figure 64 Underside of the Business Telephone Without Telephone Support Bracket After the telephone initializes the display panel shows the current system date and time and the telephone s extension Connecting the Telephone to a Computer Using a UTP cable with RJ45 connectors connect the computer s 10BASE T network interface card to the Ethernet port on the bottom of the Business telephone ...

Страница 199: ...one requires the following tools and materials Two 10 round head wood screws at least 1 inch 2 5 cm Screwdriver Drill and drill bit Make sure the telephone mounting location has an AC power outlet within 10 feet or use the Line Powered Adapter or Ethernet Power Source EPS 1 Mark the location of the pilot holes using the dimensions shown in Figure 66 ...

Страница 200: ...or the telephone connection 2 Drill two pilot holes Because of the repeated stress from pressing buttons and hanging up the telephone you must mount the telephone on a solid backing such as a wall stud 3 Install the mounting screws Tighten them until the heads are about inch from the wall 4 On the telephone s underside extend the handset support peg to the wall mount position by pulling it out sli...

Страница 201: ... screws Be sure that the telephone slides down about inch after you slip it over the heads of the mounting screws If you cannot slide it down remove the telephone and back out the mounting screws slightly 8 Make sure the telephone sits firmly against the wall If necessary remove the telephone and tighten the mounting screws slightly 9 Use the telephone s AC power converter to connect the telephone...

Страница 202: ...eate a group called Sales that includes access buttons mapped to a set of CO lines When you add a new salesperson to the group you simply specify the Sales group for the telephone you assign to that person All the button mappings are then available on that person s telephone Creating a New Telephone Group To create a new telephone group 1 On the NetSet main menu click the Device Configuration icon...

Страница 203: ... Groups 203 Figure 69 Telephone Groups Window 3 Click Add The Add Telephone Group window appears Figure 70 Figure 70 Add Telephone Group Window 4 Enter the name of the new group in the Group Name field 5 Click OK to add the new group ...

Страница 204: ... new user you assign the user to a group and the Button Mappings for that group become active for the user s telephone You can override group mappings and create mappings for individual telephones For example you can create a group called Sales and assign three shared direct lines to the group Then you can assign one unshared direct line to each of the telephones currently in use by people in the ...

Страница 205: ... Mappings 205 Figure 71 Telephone Groups Window 3 Select the group to which you want to apply mappings and then click Button Mappings The Group Button Mappings window appears Figure 72 Group Button Mappings Window ...

Страница 206: ...numbers to Access buttons The Type list lets you choose SSD system speed dial or PSD personal speed dial but only the first ten numbers Other lets you choose any higher speed dial number For example to map a button to Personal Speed Dial 11 set the Type to Other and the Number to 611 To map a button to System Speed Dial 11 set the Type to Other and the Number to 711 Personal Speed Dial numbers run...

Страница 207: ...rk extension to park the call You do not need to enter anything in the Number or the Prty fields You can also map a button to a specific Call Park extension by choosing Line as the Type and entering a Call Park extension in the Number field Then when you are on a call pressing that button parks the call to the Call Park extension mapped to the button MWI Assigns the Message Waiting Indicator to th...

Страница 208: ... to the button PSD 1 10 Assigns a Personal Speed Dial PSD number to the button The NBX 100 includes a list of Personal Speed Dial PSD extensions which can be programmed by either the administrator or the user You define the numbers for each extension in NetSet Personal Settings You do not need to specify a Number or a Prty SSD 0 10 The NBX 100 includes a list of System Speed Dial SSD numbers which...

Страница 209: ...ression for a line mapped to multiple telephones For example you can configure a call to ring immediately at telephone 1 begin ringing at telephone 2 after four rings and then begin ringing at telephone 3 after eight rings The call flashes on the LED associated with that line but does not audibly ring Any of the telephones can pick up the call at any time even if it has not yet started ringing at ...

Страница 210: ...erred to the Automated Attendant Telephones belonging to a Delayed Ringing Pattern do not need to belong to the same group As long as all the telephones have the same line mapped you can create the Delayed Ringing Pattern Installing an Adjunct You can install and associate an adjunct to a Business Telephone to provide additional Access buttons The NBX 100 adjunct has 50 access buttons A Shift butt...

Страница 211: ...o the LAN where you are using a Business Telephone and an adjunct you must provide an extra LAN connection The adjunct does not use IP communications It must be located on the same LAN segment subnet as its associated telephone Auto Discovering an Adjunct When you enable the Auto Discover Adjuncts option see Using Auto Discovery for Initial System Configuration on page 164 the Auto Discovery proce...

Страница 212: ...e adding an adjunct Connecting an Adjunct To connect an adjunct 1 Connect the AC power converter provided with the adjunct to the power connection on the bottom of the device and a wall outlet 2 Connect one end of the LAN cable provided to the LAN connection on the bottom of an Business Telephone or any available Ethernet port and then connect the other end of the cable to RJ45 connector on the bo...

Страница 213: ...Settings tab on the System Configuration window click System wide 4 Enable the Auto Discover Adjuncts check box and then click OK 5 After the Auto Discovery process finishes click System wide again disable the Auto Discover Adjuncts check box and then click OK This last step is not essential However leaving Auto Discovery disabled allows you to control how and when new devices are configured The a...

Страница 214: ...w appears Figure 75 Adjunct Window 3 In the device list click the Adjunct you want then click Modify 4 Click a new device in the Associated Telephone list then click OK Configuring the Adjunct Manually To manually configure the adjunct 1 When you connect the adjunct to the LAN make sure that Auto Discover Adjuncts is not enabled 2 On the NetSet main menu click the Device Configuration icon and the...

Страница 215: ...a telephone to associate with this adjunct 7 To have the system automatically map the adjunct s buttons enable the check box labeled Auto Assign Button Mappings This maps all existing extensions except for the associated telephone to the adjunct Access buttons The four Feature buttons along the bottom of the adjunct map to from left to right Transfer Transfer to Voice Mail Park and Hold To map but...

Страница 216: ...h the MAC address that appears in the list with the MAC address printed on the label on the underside of the device 5 Select the buttons you want to map by pressing the range and column buttons 6 Set the Type Number and Priority for each button Setting Adjunct Feature Button Mappings To set adjunct Feature Button mappings 1 Open NetSet using the administrator username and password 2 In the NetSet ...

Страница 217: ...l features such as Call Waiting You do not need to specify a Number or Prty Release Disconnects the current call and leaves the telephone idle on hook This feature can be useful when making calls using a headset You do not need to specify a Number or a Prty Line A Line button can be mapped to the extension of another telephone to create a Busy Lamp Speed Dial a line card port extension external li...

Страница 218: ...you to implement the System Closed Business Hours setting by pressing this button System Lunch Assigns the System Open feature to the button This allows you to implement the System Lunch Business Hours setting by pressing this button System Other Assigns the System Open feature to the button This allows you to implement the System Other Business Hours setting by pressing this button HG Login Logou...

Страница 219: ...dresses to implement some system features such as paging and conferencing and these multicast transmissions can overwhelm a low bandwidth link If you have Business Telephones connected to the network through a low bandwidth link you can configure them so that they do not generate multicast traffic For more information see Low bandwidth Telephony in the Administrator s Guide You must still filter m...

Страница 220: ...7 01 e0 bb 00 00 13 01 e0 bb 00 00 1d Slave command NBX 100 debug Slave status Download me request Download service System state 01 e0 bb 00 00 11 01 e0 bb 00 00 0e 01 e0 bb 00 00 0a 01 e0 bb 00 00 02 System paging control Paging audio Paging audio Paging audio Table 37 Layer 2 Multicast Addresses Multicast Address Description ...

Страница 221: ...ngs on the NBX 100 system It covers the following topics Adding Users Configuring Call Pickup Groups Configuring Hunt Groups Configuring Class of Service CoS Adding Users This section tells you how to Add users to the system Configure a telephone as the Attendant Console Configure user settings ...

Страница 222: ...RS AND FEATURES Adding a User To add a new user to the system 1 On the NetSet main menu click the User Configuration icon The Users window appears Figure 77 Figure 77 Users Window 2 Click Add The Add User window appears Figure 78 ...

Страница 223: ...or extension A telephone available for use is identified by an asterisk or three asterisks if it has no extension assigned First Name The user s first name Appears in lists Last Name The user s last name Appears in lists Title The user s title Class Of Service The calling permissions for this user Location The user s location for purposes of identification Department The user s department for purp...

Страница 224: ...iate destinations When the human attendant cannot handle the volume of calls Attendant Console calls go to the Automated Attendant Figure 79 shows typical Attendant Console button mappings Figure 79 Typical Attendant Console Button Mappings You can expand the number of Access buttons by adding an adjunct Fwd to Auto Attendant Redirects unanswered calls to the Auto Attendant instead of voice mail S...

Страница 225: ...te the Automated Attendant system First Name and Last Name You can make this profile a generic one such as receptionist or attendant console if many people share the job Title Location and Department can help you identify this profile Class of Service and a Telephone Group The NBX 100 includes an Attendant Console group which includes button mappings appropriate for the Attendant Console function ...

Страница 226: ...Access buttons on the Attendant Console telephone Auto Discovery uses 500 as the default setting for the Auto Extension 4 On the Device Configuration dialog box click the Telephone Groups tab 5 On the Current Groups list click the Attendant Console group and then click Button Mappings 6 Map the line card ports to the telephone s Access Buttons For each button For Type choose line from the list For...

Страница 227: ...ng the Attendant Console User To add the Attendant Console user 1 Choose an Extension Extension 100 is reserved for the Attendant Console 2 Click Apply The user is added and the window returns to its defaults so you can add another user 3 Repeat steps 1 and 2 to add more users 4 Click Close when you finish Setting a User s Ringer Tones To set a user s ringer tones 1 On the main menu click the User...

Страница 228: ... up a call for the group By default every telephone that is added to the system is a member of Call Pickup Group 0 You can add users to any of the 32 groups Users can remove themselves from Call Pickup Group 0 but not from any other Call Pickup groups You can create a Call Pickup group name and specify whether non members are allowed to pick up a call for the group You can also map Call Pickup gro...

Страница 229: ... 81 Call Pickup Window 3 Select the Call Pickup group you want to configure 4 Click Modify The Modify Call Pickup Group window appears Figure 82 Figure 82 Modify Call Pickup Group Window 5 Enter the group name you want in the Group Name field ...

Страница 230: ...Members list You can use Control Click and Shift Click to select multiple users in each list 6 Click OK Configuring Hunt Groups The NBX 100 provides hunt groups to help you manage inbound calls Hunt groups direct calls to specific users that you identify as members of the group You can configure which users are members of each hunt group The NBX 100 supports the following types of hunt groups Circ...

Страница 231: ... To add a hunt group to the system 1 On the NetSet main menu click the User Configuration icon 2 Click the Hunt Groups tab The Hunt Groups window appears Figure 83 Figure 83 Hunt Groups Window 3 Click Add The Add Hunt Group window appears Figure 84 ...

Страница 232: ...o the hunt group Users The users to include in the hunt group You can use Control click or Shift click to select members When you click OK all the highlighted users become part of the group The order of users within the list determines their priority The most recently added member has the lowest priority You can modify the order by removing and re adding members Type The type of hunt group Hunt Gr...

Страница 233: ...This is the password for logging into the hunt group Logout if no answer When selected automatically logs out any user who does not answer a hunt group call within the period specified by Per Device Time out Call Coverage The coverage path for a call that has been queued for more than the period specified by Total Timeout Voice Mail The call is directed to the hunt group s voice mailbox the extens...

Страница 234: ...nt Group Status Window 5 If desired highlight a user and log him or her in or out You can also lock or unlock the user from the group 6 Click Apply to effect the changes for this user You can change the status of more than one user 7 When you finish click OK ...

Страница 235: ...window appears Figure 83 3 Click Feature Mappings The Hunt Group Feature Codes window appears Figure 86 This screen shows the association of the Hunt group log in out feature codes and currently configured hunt groups Figure 86 Hunt Group Feature Codes Window 4 Select a hunt group from the list 5 Select a Feature Code from the list To remove a feature code select none 6 Click Apply The Feature Cod...

Страница 236: ...l users without regard to their CoS setting create a System Speed Dial for that number When you create a new profile the system assigns the default CoS unless you specify a different one If you edit the properties of the default CoS you should make sure that it contains a minimal set of permissions The administrator can enable or disable Offsite Notification system wide The system wide setting tak...

Страница 237: ... 237 Figure 87 Class of Service Window 3 Click Add The Add CoS window appears Figure 88 Figure 88 Add CoS Window 4 Enter the name of the new CoS in the Name field 5 Enable each CoS category as business hours Open Closed Lunch or Other ...

Страница 238: ...238 CHAPTER 6 SETTING UP USERS AND FEATURES 6 Click Apply to effect the changes 7 Click OK ...

Страница 239: ... or E1 cards in any combination provided that you connect them using MDI X ports one T1 or E1 card if you connect the card using the NBX 100 backplane three BRI cards regardless of the connection method Some people refer to a T1 or E1 Digital Line Card using the category name TEP T1 E1 ISDN PRI to include both The NBX 100 can accommodate T1 cards using E M robbed bit signaling sometimes referred t...

Страница 240: ...ou want from your telephone carrier and have them install the line 2 Login to NetSet as Administrator 3 In the NetSet Main Menu click the System Configuration icon 4 In the System Configuration screen click the System Settings tab Depending on how you access this screen the System Settings tab may be already selected 5 Click the Auto Discover Digital Line Cards check box It does not matter if any ...

Страница 241: ... begins an initialization sequence Also because you enabled the Auto Discover Digital Line Cards check box the NBX 100 recognizes the addition of the T1 card and begins to update its database Allow 3 minutes for both of these processes to complete You can now configure the T1 Digital Line Card for either E M signaling or ISDN PRI signaling Configuring the T1 Digital Line Card This section tells yo...

Страница 242: ...check that the NBX 100 lists all 24 channels Figure 89 shows the first few channels the channel numbers appear after the MAC address separated by a dash Example In the figure the fourth line appears as 1 00 e0 bb 01 22 7c 4 New Trunk The 4 after the dash indicates channel number 4 6 To change the name of the T1 board edit the contents of the Board Name field Activating the Span To connect the T1 l...

Страница 243: ...fy Span Window 1 To change the name of the span edit the Span Name field You can use alphanumeric characters dashes and underscores The maximum name length is 30 characters 2 To select the type of framing you want the NBX 100 to use select either D4 or ESF from the pull down list Check with your telephone carrier to determine which one is used on the E1 line they supplied 3 Choose either AMI or B8...

Страница 244: ...6 If you click the Flash Hook Transfer check box you enable call center applications connected to the NBX 100 by the T1 line to use the Flash Hook Transfer method to transfer calls 7 Click the On Line check box in the lower left corner of the window 8 Click OK Configuring a Group To configure a T1 Group perform these steps 1 Return to the Digital Line Cards tab 2 From the Select Device Type list s...

Страница 245: ...ard 245 The NBX 100 presets the parameter values Channel Protocol through Trunk to Trunk excluding Called Party Digits and Calling Party Digits 6 Click the On Line check box 7 Enter 500 in each of the four AutoExt text boxes 8 Click OK ...

Страница 246: ...igure 92 Digital Line Cards Manage Group Membership Window 5 Scroll through the list to make sure that all 24 channels are present Completing the T1 E M Installation To complete the T1 installation perform these steps 1 Return to the Digital Line Cards tab 2 From the Select Device Type list select T1 Channel List 3 Click Apply 4 Wait approximately 30 seconds for the status of each channel to chang...

Страница 247: ... the Digital Line Cards tab 3 Use the MAC address of the T1 card you recorded this address before inserting the card into the chassis to identify the card in the T1 ISDN Board List 4 Select the T1 card from the list and click Modify Figure 93 Digital Line Cards Modify Board Window 5 Scroll through the Channel List to check that the NBX 100 lists all 23 channels Figure 97 shows the first few channe...

Страница 248: ...select ISDN PRI from the pull down list 3 Click Apply To check that the Span status changes from Offline to Ready perform these steps 1 Return to the Digital Line Cards tab 2 Select ISDN PRI Span List from the Select Device Type list 3 Click Apply 4 Check that the word Ready appears in the ISDN PRI Span List line item that corresponds to this span Modifying the Span To modify the Span highlight it...

Страница 249: ...eck with your telephone carrier to determine which one is used on the T1 line they supplied Multiframe with CRC4 CAUTION Do not use the Multiframe framing type with T1 If you do NetSet warns you that combining this choice with T1 is illegal Double Frame Multiframe without CRC4 CAUTION Do not use the Double Frame framing type with T1 If you do NetSet warns you that combining this choice with T1 is ...

Страница 250: ...length that best corresponds to the distance from the T1 demarcation point the point at which the telephone carrier s wiring ends and your NBX 100 7 Click the On Line check box in the lower left corner of the window 8 Click OK Configuring the Groups To configure the T1 Groups perform these steps 1 Return to the Digital Line Cards tab 2 From the Select Device Type list select ISDN PRI Group List 3 ...

Страница 251: ... to the Digital Line Cards tab 2 From the Select Device Type list select T1 Group List 3 Click Apply 4 Select the group you want and click Membership Figure 96 Digital Line Cards Manage Group Membership Window Scroll through the list to make sure that all 23 channels are present Completing the T1 ISDN PRI Installation To complete the T1 ISDN PRI installation perform these steps 1 Return to the Dig...

Страница 252: ...GITAL LINE CARDS T1 E1 AND BRI CARDS 4 Wait approximately 30 seconds for the status of each channel to change from Ready to Idle While you are waiting you can click Apply to refresh the list of channels and see the updated status ...

Страница 253: ...ttings tab may be already selected 5 Click the Auto Discover Digital Line Cards check box It does not matter if any of the other check boxes are selected or not selected 6 Click OK Inserting the E1 Digital Line Card To insert the E1 Digital Line Card into the NBX 100 chassis you do not need to remove power from the NBX 100 Perform these steps 1 Write down the MAC address of the E1 card You can fin...

Страница 254: ...igure an E1 card you must configure the NBX 100 Dial Plan See Chapter 2 for detailed information on the dial plan Configuring for ISDN PRI Signaling This section describes how to configure an E1 Digital Line Card for ISDN PRI Primary Rate Interface signaling CAUTION Before you begin to configure the E1 card you must wait 3 minutes after inserting the E1 card into the chassis Perform these steps 1 ...

Страница 255: ...runk The 4 after the dash indicates channel number 4 6 To change the name of the E1 board edit the contents of the Board Name field To connect the E1 line and activate the span perform these steps 1 Plug the E1 line into the NBX 100 E1 board 2 The Card Type field should already contain ISDN PRI If it does not select ISDN PRI from the pull down list 3 Click Apply To check that the Span status chang...

Страница 256: ... span edit the Span Name field You can use alphanumeric characters dashes and underscores The maximum name length is 30 characters 7 From the Interface Type pull down list select E1 8 Choose one of the four entries from the Co Switch Protocol pull down list Check with your telephone carrier to determine which one is used on the E1 line they supplied ETSI CAUTION Do not use any of the next three ch...

Страница 257: ...Multiframe SLC96 10 Select one of the three entries from the Line Code pull down list Check with your telephone carrier to determine which one is used on the E1 line they supplied The HDB3 Line Code type is far more common than AMI for E1 lines AMI Alternate Mark Inversion HDB3 High Density Bipolar 3 CAUTION Do not use B8ZS with the E1 Interface Type If you do NetSet warns you that combining this ...

Страница 258: ...tricted from the Trunk to Trunk pull down list 7 Click the On Line check box 8 Enter 500 in each of the four AutoExt text boxes 9 Click OK Checking Group Membership To check that all channels are in the member list perform these steps 1 Return to the Digital Line Cards tab 2 From the Select Device Type list select T1 Group List 3 Click Apply 4 Select the group you want and click Membership ...

Страница 259: ...ng the E1 Installation To complete the E1 installation perform these steps 1 Return to the Digital Line Cards tab 2 From the Select Device Type list select ISDN PRI Channel List 3 Click Apply 4 Wait approximately 30 seconds for the status of each channel to change from Ready to Idle While you are waiting you can click Apply to refresh the list of channels and see the updated status ...

Страница 260: ...creen the System Settings tab may be already selected 5 Click the Auto Discover Digital Line Cards check box It does not matter if any of the other check boxes are selected or not selected 6 Click OK Inserting the ISDN BRI Digital Line Card To insert the BRI Digital Line Card into the NBX 100 chassis you do not need to remove power from the NBX 100 Perform these steps 1 Write down the MAC address ...

Страница 261: ...e the BRI card you must configure the NBX 100 Dial Plan See Chapter 2 for detailed information on the dial plan Configuring for ISDN BRI Signaling This section describes how to configure a BRI Digital Line Card for ISDN BRI Basic Rate Interface signaling CAUTION Before you begin to configure the BRI card you must wait 3 minutes after inserting the BRI card into the chassis Perform these steps 1 In...

Страница 262: ...sh indicates channel number 4 6 To change the name of the BRI board edit the contents of the Board Name field To connect the BRI line and activate the span perform these steps 1 Plug the BRI line into the BRI interface box 2 Connect the BRI interface box to the NBX 100 BRI board 3 The Card Type field should already contain ISDN BRI If it does not the NBX 100 has not properly auto discovered the bo...

Страница 263: ...an edit the Span Name field You can use alphanumeric characters dashes and underscores The maximum name length is 30 characters 7 In the Co Switch Protocol pull down list there is only one protocol ETSI 8 Choose either automatic or manual TEI assignment depending on the characteristics of the BRI line If your telephone carrier has supplied you with a specific Terminal Endpoint Identification numbe...

Страница 264: ...ect Bri Group 1 5 Click Modify Figure 103 Digital Line Cards Modify Group Window 6 Select Restricted from the Trunk to Trunk pull down list 7 Click the On Line check box 8 Enter 500 in each of the four AutoExt text boxes 9 Click OK Checking Group Membership To check that all channels are in the member list perform these steps 1 Return to the Digital Line Cards tab 2 From the Select Device Type lis...

Страница 265: ...e from Ready to Idle While you are waiting you can click Apply to refresh the list of channels and see the updated status DDI DID MSN Services When you order T1 services with DID or E1 or BRI with DDI or MSN the local telephone carrier assigns a block of telephone numbers to you Usually you can request a specific range of numbers but sometimes the carrier assigns numbers other than the ones you re...

Страница 266: ...igit sequences from 3500 through 3599 another set of entries to handle 3600 through 3699 and a set of entries to handle each of the other sequences in which the first two digits were unique 37XX through 44XX If the DDI DID numbers match your internal extension numbers the translator entries in your Dial Plan configuration file can be much simpler Example You plan to use internal extensions from 10...

Страница 267: ...O Yellow indicates a layer 1 connection is established but the channel is not yet ready to make or receive calls Green indicates that the channel is ready to make and receive calls B1 Off indicates the channel is not carrying a call Yellow indicates that a call build up is occurring Green indicates that a call is connected B2 Off indicates the channel is not carrying a call Yellow indicates that a...

Страница 268: ...268 CHAPTER 7 CONFIGURING DIGITAL LINE CARDS T1 E1 AND BRI CARDS ...

Страница 269: ... Port ATA and Single Port ATA Table 41 lists troubleshooting procedures CAUTION Always shut down the NBX 100 software and then turn off the power to the chassis by removing the chassis power cord before removing a component Table 41 Troubleshooting Procedures Symptom Possible Cause Suggested Action No power to the NBX 100 Circuit breaker Check the circuit breaker Ideally the NBX 100 should be on i...

Страница 270: ...ector of one of the affected telephones to a different hub card or external hub If dial tone is now present at the telephone replace the hub Coax connector between the Network Call Processor and the LAN Make sure that the call processor has a valid LAN connection If you use 10BASE 2 coax connections make sure that any T connectors are properly terminated Chassis backplane defective If none of the ...

Страница 271: ...have any cards in the chassis the fans do not operate Power connector from fan assembly to the chassis backplane is loose Remove the fan assembly from the left side of the chassis 2 Phillips head screws Make sure that the fan assembly power connector is attached CAUTION Shut down the NBX 100 software and disconnect power before removing the fan assembly Fan assembly is defective If the power conne...

Страница 272: ...ew IP address of the NBX 100 See Setting Up IP Connectivity for NetSet on page 151 for details Cannot open NetSet using the administrator username and password The CAPS LOCK key on the keyboard is activated NetSet username and passwords are case sensitive For example NetSet accepts administrator but it rejects Administrator and ADMINISTRATOR Callers on hold do not hear music No music source connec...

Страница 273: ...stion probably means that you need to upgrade the network However there are a few short term actions you can take to help limit the problem Enable Silence Suppression system wide and disable Music on Hold audio See Configuring System Level Settings on page 173 for details Lose date and time when rebooting the system Problem with the battery on the network call processor See Servicing the Network C...

Страница 274: ...used MuLaw compression With R1 1 0 APX audio that is any prompt message or greeting was recorded using ADPCM compression If you are running R1 1 0 or higher you must leave the compression format set to ADPCM The ability to select the format allows you to migrate existing data into an older database for backwards compatibility For instructions on how to change the voice mail compression format see ...

Страница 275: ...ness Telephone are shown in Figure 91 Figure 105 LUI Controls on the Business Telephone NBX Test Menu Scroll Options Display Panel Soft Buttons Move cursor left or right Program Button Start or exit the utility Button Pad Select menu items or enter numeric characters Scroll Buttons AB7 through AB18 AB1 through AB6 Select menu items or enter hex characters A through F ...

Страница 276: ...ddress of the call processor this telephone communicates with Press the PROGRAM button to return to the main menu 2 Test LEDs Turns on all LEDs for five seconds Lets you quickly check for inoperative lights 3 Test LCD Illuminates every pixel on the display for 5 seconds The display panel should look like the following image 4 Test Buttons Puts the telephone in the button test state Press any telep...

Страница 277: ...gits A through F Use the left and right soft keys to move the cursor left or right Press the key to commit the address change or press Program to exit without saving changes To change a telephone back to its default setting enter all Fs for the NCP MAC address AB2 EEProm Mem Lets you see the hex values in the telephone s EEPROM AB3 Loop Forever Performs Test 8 Audio Loopback Note The telephone sta...

Страница 278: ...f you are pinging a device on a subnet different from the one the telephone is on you will see a greater delay time Technical Support Your authorized 3Com Voice Solutions Partner can assist you with all of your support needs including systems and cable plant design installation configuration and project management A choice of maintenance services including remote diagnostics on site support teleph...

Страница 279: ...API Service Provider 6 Slot Chassis The chassis includes the metal box fan power supply disk drive backplane and mounting brackets Table 43 Table 43 NBX 100 6 Slot Chassis Specifications Weight Empty 22 lbs 9 9 kg Configured 30 lbs 13 5 kg Dimensions H 10 5 264 7 mm W 17 3 431 8 mm D 9 225 6 mm Electrical US and Canada 115 230 VAC 4 2 A 60 50Hz Environmental Ambient temperature 32 to 104 degrees F...

Страница 280: ...ternal hub connection RJ45 10BASE T DCE port for external hub connection Uplink RS232 DB9 DTE connector serial port RS232 DB9 DCE connector serial port 3 5 mm Audio input jack for line level audio RJ11 Ext Alert Night bell output dry contact closure only The alerting device must be externally powered The contact closure can support 2 amps at 30 VDC or 1 amp at 60 VDC RJ11 Paging Line out 600 ohm a...

Страница 281: ...overnment approvals FCC Part 68 FCC registration numbers SSAUSA 25639 PF TQ Fully Protected PBX SSAUSA 25639 MF T Fully Protected Multifunction Systems SSAUSA 25639 KF T Fully Protected Key Telephone System FCC Part 15 Class A REN 0 2A per line jack Environmental Ambient temperature 32 to 104 degrees F 0 to 40 degrees C Humidity 5 to 85 noncondensing T1 Digital Line Card Specifications Weight 14 o...

Страница 282: ...ws transmission of voice traffic over the Integrated Services Digital Network ISDN The BRI card is available in 2 port and 4 port options which is controlled by software licensing BRI Line Card Specifications Weight Connectors Environmental Ambient temperature 32 to XXX degrees F 0 to 50 degrees C Humidity 5 to 85 noncondensing ...

Страница 283: ...hone or fax device to an NBX 100 Table 48 Table 46 NBX 100 8 Port Hub Card Specifications Weight 14 oz 397 gm Connectors Eight RJ45 connectors for 10BASE T lines One BNC male connector for 10BASE 2 coax line Environmental Ambient temperature 32 to 104 degrees F 0 to 40 degrees C Humidity 5 to 85 noncondensing Table 47 NBX 100 4 Port ATA Card Specifications Weight 14 oz 397 gm Connectors Four RJ11 ...

Страница 284: ...DevCaps lineHold lineGetDevConfig lineUnhold lineGetLineDevStatus lineSetupTransfer lineSetDevConfig lineCompleteTransfer lineSetStatusMessages lineBlindTransfer lineGetStatusMessages lineSwapHold lineGetID lineSetupConference lineGetIcon linePrepareAddToConference lineConfigDialog lineAddToConference lineConfigDialogEdit lineGetAppPriority lineGetAddressCaps lineSetAppPriority lineGetAddressStatu...

Страница 285: ...GetNumRings lineSetCallQualityOfService lineSetCallPrivilege lineDrop lineDeallocateCall lineHandoff lineGetNewCalls lineGetConfRelatedCalls lineTranslateDialog lineGetCountry lineRegisterRequestRecipient lineGetRequest Table 49 Supported TAPI Functions continued Basic Telephony Services Supplementary Telephony Services ...

Страница 286: ...286 APPENDIX A NBX 100 SYSTEM SPECIFICATIONS ...

Страница 287: ... account representative contact information from the client s carrier If the client is using standard E M T1 lines 3Com recommends that the circuits from the T1 provider meet the following criteria Framing Type D4 is required Zero Code Suppression AMI is required Signaling E M Wink is required Start Type Wink Start is required Some COs that use a DMS 100 switch may configure T1 circuits with an op...

Страница 288: ...d ANI The client will need to inquire as to the availability of this support as part of the order process CSU An external CSU is required with each T1 installation Many CSUs support conversion of ESF B8ZS services into D4 AMI In some locations it may be easier to order the T1 as ESF B8ZS and perform the conversion in the CSU If the client chooses this method BE SURE that the CSU supports this conv...

Страница 289: ... DID DNIS codes which allow for simple dial plan implementation Recommended With 3 digit extensions 100 499 the last three digits of the DID DNIS codes should be 100 499 With 4 digit extensions 1000 4999 the last four digits of the DID DNIS codes should be 1000 4999 Line Hunting Sequence 3Com recommends that indicating the channel hunting sequence for incoming calls Typically incoming calls are re...

Страница 290: ...290 APPENDIX B T1 AND ISDN PRI SERVICES CIRCUIT PROVISIONING ...

Страница 291: ...at the interconnection mechanism provide an apparent MTU of a full size IEEE 802 1 packet 1514 bytes of information plus 4 byte CRC The interconnection can fragment packets into smaller frames but must reassemble the packets prior to delivery to any NBX 100 device The NBX 100 devices do not presently support IP or other packet fragmentation and reassembly Communication Latency Requirements The int...

Страница 292: ...dwidth Requirements The interconnect bandwidth requirements depend on the selected audio compression and system configuration Layer 2 or Layer 3 IP topology Layer 2 Mulaw G 711 Audio Normal Setting The interconnection bandwidth requirements for a device configured as a Layer 2 device running G 711 audio for each party in a conversation requires a maximum of 73 Kbps Thus a point to point call requi...

Страница 293: ...ection correction etc which may be added by the customer s specific interconnection device This overhead must be added based upon the device specification and is not under the control of the NBX 100 Installing Fax Devices with ATAs When installing a fax device with a Single Port Analog Terminal Adapter note the following A fax device requires twice the bandwidth 150 Kbps of a voice device A fax de...

Страница 294: ...294 APPENDIX C GUIDELINES FOR REMOTE AUDIO DEVICE CONNECTIONS ...

Страница 295: ...ions is an H 323 gateway adjunct It enables the NBX 100 to connect to other disparate H 323 gateways linked into a remote location s business telephone system and provide a calling path over IP networks The H 323 gateway solution provides similar behavior to traditional Regional Bell Operating Companies RBOC tie lines and Off Premise Extension OPX circuits at far lower prices NBX ConneXtions diffe...

Страница 296: ...ateways and the number of licensed H 323 ports Follow these steps 1 Insert the NBX 100 Resource Pack CD into the CD ROM drive of the client computer a Click NBX 100 Applications b Click NBX ConneXtions c Click OK 2 Respond to these initial InstallShield dialog boxes a Welcome dialog click Next b License Agreement dialog click Next c Default Destination Location click Next or browse to enter an alt...

Страница 297: ...eeds a distinguishing Gateway Number Assign the first installed gateway to number 0 the second to number 1 and so on 9 Enter the NBX 100 NCP MAC Address obtained from NetSet 10 Specify the UDP and TCP port ranges for use with a firewall If these ranges are not important in the system use the default settings 11 Setup Complete Click Finish Finalize Installation 1 Verify the H 323 software port inst...

Страница 298: ...ystem Windows NT 4 0 Windows 95 Windows 98 or Windows 2000 RAM 32 MB Windows 95 98 64 MB Windows NT Windows 2000 Network Network connectivity to the NBX 100 Call Processor is required Disk Space 40 MB of free disk space is required Installation Sequence To install NBX 100 Call Detail Reports 1 Insert the NBX 100 Resource Pack CD into the CD ROM drive of the client computer 2 When the NBX 100 Resou...

Страница 299: ...rates as either Layer 2 MAC or Layer 3 IP mode Audio A properly configured audio adapter and audio drivers that fully support full duplex audio that is simultaneous microphone and speaker audio Disk Space 40 MB of free disk space is required Because pcXset is a software application and does not have a handset like a physical telephone a headset with microphone is required The use of speakers and a...

Страница 300: ...der The default is C Program Files 3Com NBX 100 NBX pcXset 7 Click Next 8 Select a program folder for the Windows Start menu or accept the default by clicking Next 9 Click Next again 10 Click Finish You must restart the computer for the installation to take effect ...

Страница 301: ...t button mappings 213 Auto Discovery of telephones 68 Auto Extension and the Attendant Console 226 B bandwidth fax 293 bare wire end cables 24 baud rate VT100 terminal configuration 151 BNC connectors terminating 155 BOOTP 152 bracket attaching to the telephone 198 brackets 145 BRI digital line card adding 260 configuring 261 BRI ISDN 44 Business Hours and CoS 236 Business Telephone 26 diagnostics...

Страница 302: ...tension settings 47 external settings 89 hybrid mode 100 importing 67 68 keyset mode 100 modifying 70 offsite notification 100 removing 94 sample solutions 119 testing 71 Dial Plan commands 101 Dial Plan report 73 Dial Plan tables 50 90 Digital Line Card 40 281 Digital Line Cards installing 141 148 digital line cards configuring 239 display panel testing 276 DSS BLF Adjunct 26 and IP 211 buttons m...

Страница 303: ...are address on NBX 4 Port Line Cards 140 Hold connecting an audio source 218 how to use this guide 13 hub card status lights 157 Hunt Group Call Coverage 233 Extension 232 extension ranges 80 extensions 49 Logout if no answer 233 Name 232 Password 233 Type 232 hybrid mode Dial Plan 100 I IGMP 183 IMAP4 20 importing a Dial Plan 67 importing International Dial Plan 67 importing user defined Dial Pla...

Страница 304: ...support 288 295 NBX pcXset Windows 2000 support 299 NBX system database 61 hardware components 19 installing 40 system capacity 42 unpacking 139 NCP installing 148 NCP IP Address 276 NCP MAC Address 276 NetSet connectivity requirements 151 network minimizing network congestion 273 Network Call Processor 20 O offsite notification Dial Plan 100 outbound call processing 56 outdoor use 38 P paging int...

Страница 305: ...ring 239 T1 Digital Line Card 284 T1 digital line card adding 240 configuring 241 PRI signaling 247 T1 E1 ISDN PRI Digital Line cards 23 TAPI 20 41 284 telephone analog 24 bracket 199 diagnostics 274 using the telephone to view the MAC address 276 wall mount 200 telephone extension length 80 telephone extension ranges 80 telephone extensions 48 terminal emulation 150 terminating resistance 155 tes...

Страница 306: ...306 INDEX ...

Отзывы: