Configuring the E1 Digital Line Card
255
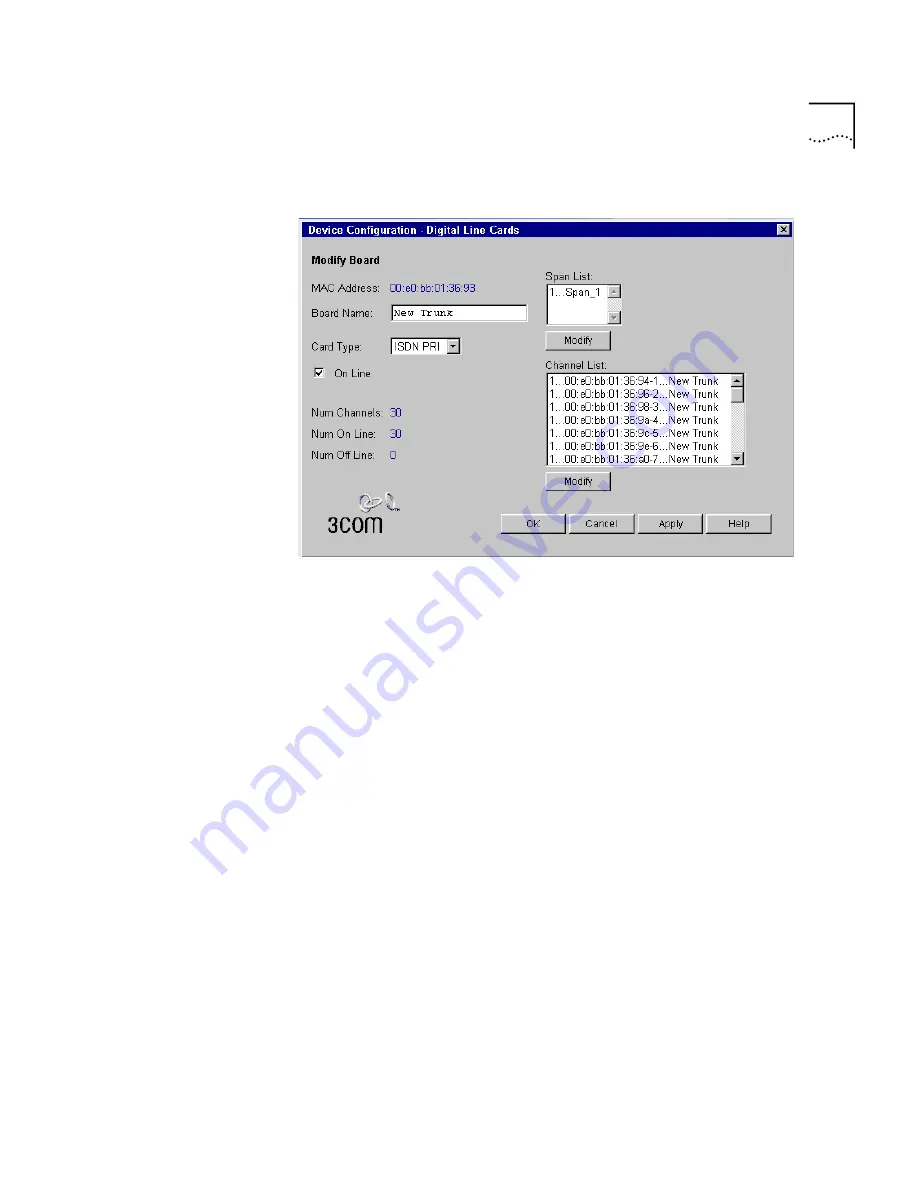
Figure 97
Digital Line Cards, Modify Board Window
5
Scroll through the Channel List to check that the NBX 100 lists all 30
channels. Figure 97 shows the first few channels; the channel numbers
appear after the MAC address, separated by a dash.
Example: In the figure, the fourth line appears as:
1...00:e0:bb:01:36:9a-4...New Trunk
The 4 after the dash indicates channel number 4.
6
To change the name of the E1 board, edit the contents of the
Board
Name
field.
To connect the E1 line and activate the span perform these steps.
1
Plug the E1 line into the NBX 100 E1 board.
2
The
Card Type
field should already contain ISDN PRI. If it does not, select
ISDN PRI from the pull-down list.
3
Click Apply.
To check that the Span status changes from Offline to Ready, perform
these steps.
1
Return to the
Digital Line Cards
tab.
2
Select
ISDN PRI Span List
from the
Select Device Type
list.
3
Click
Apply
.
Содержание NBX 100
Страница 1: ...http www 3com com NBX 100 Installation Guide Release 2 8 Part No 900 0026 01 November 2000 ...
Страница 12: ......
Страница 18: ...18 ABOUT THIS GUIDE ...
Страница 128: ...128 CHAPTER 2 CONFIGURING THE DIAL PLAN ...
Страница 196: ...196 CHAPTER 4 CONFIGURING NBX 100 SYSTEM LEVEL SETTINGS ...
Страница 238: ...238 CHAPTER 6 SETTING UP USERS AND FEATURES 6 Click Apply to effect the changes 7 Click OK ...
Страница 268: ...268 CHAPTER 7 CONFIGURING DIGITAL LINE CARDS T1 E1 AND BRI CARDS ...
Страница 286: ...286 APPENDIX A NBX 100 SYSTEM SPECIFICATIONS ...
Страница 290: ...290 APPENDIX B T1 AND ISDN PRI SERVICES CIRCUIT PROVISIONING ...
Страница 294: ...294 APPENDIX C GUIDELINES FOR REMOTE AUDIO DEVICE CONNECTIONS ...
Страница 306: ...306 INDEX ...


