212
C
HAPTER
5: I
NSTALLING
T
ELEPHONES
AND
T
ELEPHONE
L
INES
If you are installing more than one adjunct and using Auto Discovery to
configure them, you should install the devices one at a time. This method
makes it easier to keep track of which device you are configuring. Also,
you should ensure that all telephones are already installed and discovered
before adding an adjunct.
Connecting an
Adjunct
To connect an adjunct:
1
Connect the AC power converter provided with the adjunct to the power
connection on the bottom of the device and a wall outlet.
2
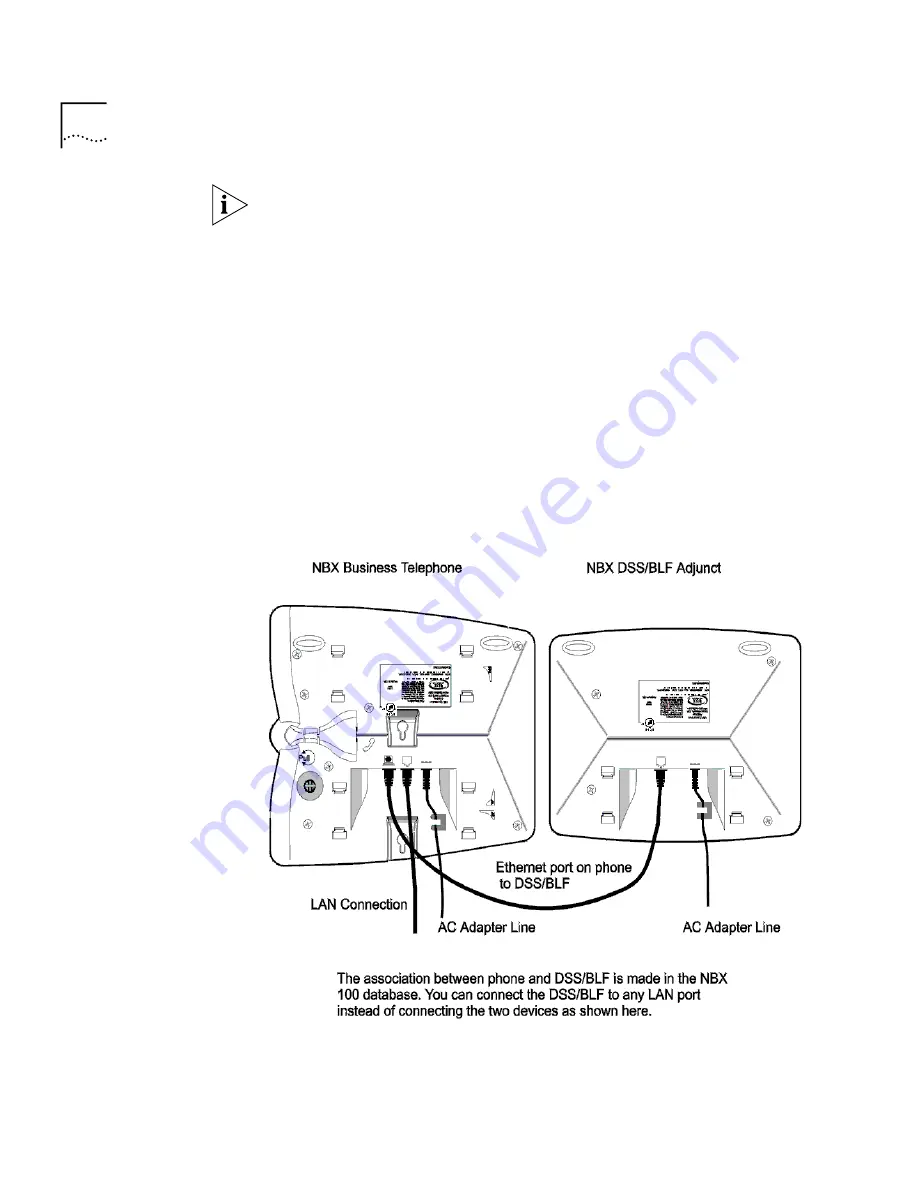
Connect one end of the LAN cable (provided) to the LAN connection on
the bottom of an Business Telephone or any available Ethernet port, and
then connect the other end of the cable to RJ45 connector on the bottom
of the adjunct.
Figure 73
A Typical Connection Between an Adjunct and a Business Telephone
3
Attach the support bracket to the bottom of the adjunct.
Содержание NBX 100
Страница 1: ...http www 3com com NBX 100 Installation Guide Release 2 8 Part No 900 0026 01 November 2000 ...
Страница 12: ......
Страница 18: ...18 ABOUT THIS GUIDE ...
Страница 128: ...128 CHAPTER 2 CONFIGURING THE DIAL PLAN ...
Страница 196: ...196 CHAPTER 4 CONFIGURING NBX 100 SYSTEM LEVEL SETTINGS ...
Страница 238: ...238 CHAPTER 6 SETTING UP USERS AND FEATURES 6 Click Apply to effect the changes 7 Click OK ...
Страница 268: ...268 CHAPTER 7 CONFIGURING DIGITAL LINE CARDS T1 E1 AND BRI CARDS ...
Страница 286: ...286 APPENDIX A NBX 100 SYSTEM SPECIFICATIONS ...
Страница 290: ...290 APPENDIX B T1 AND ISDN PRI SERVICES CIRCUIT PROVISIONING ...
Страница 294: ...294 APPENDIX C GUIDELINES FOR REMOTE AUDIO DEVICE CONNECTIONS ...
Страница 306: ...306 INDEX ...


