Chapter 7 Advanced Settings
NXC-8160 User’s Guide
90
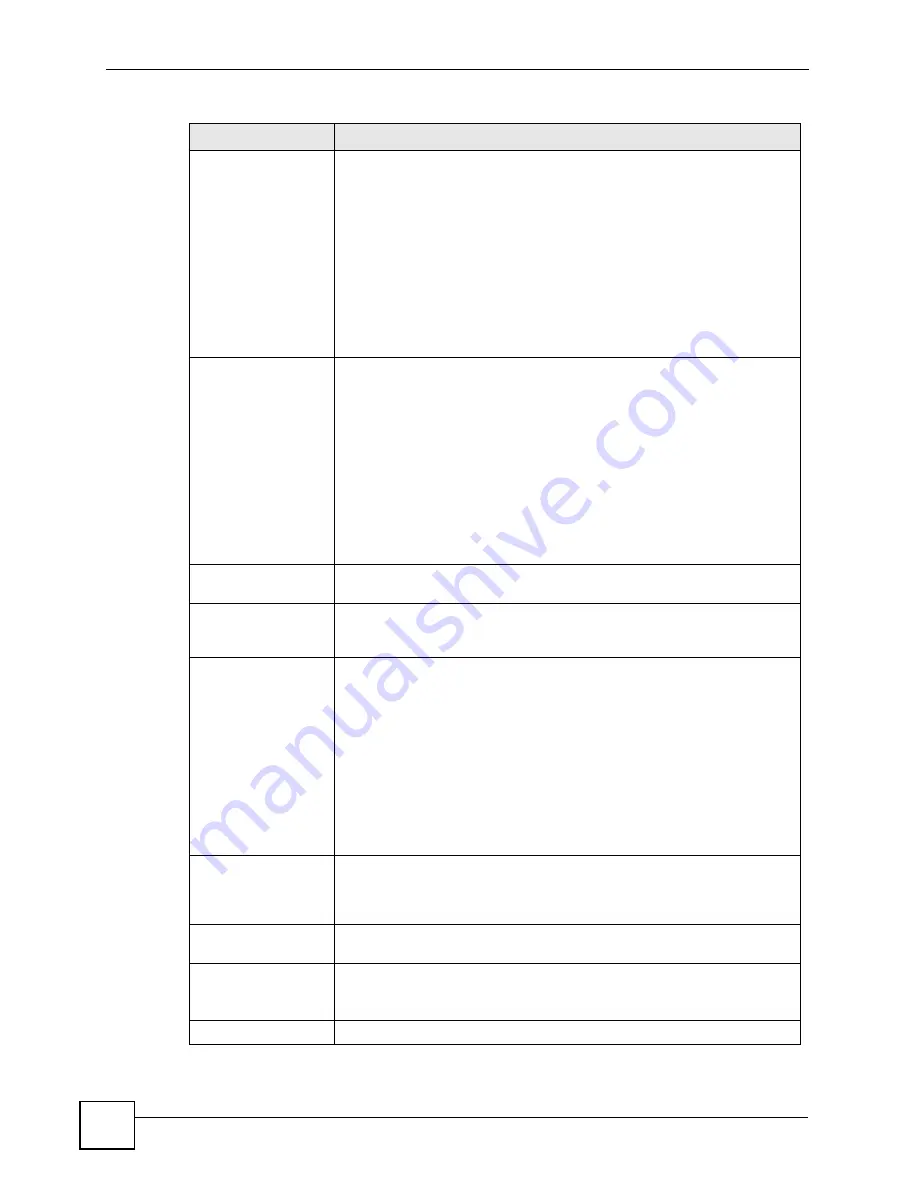
Frame Color
Select this option to set a custom background color for the web page’s
frame. By default, it is left unchecked and the color is set to white.
Use the mini-color palette to choose a color on the fly, or enter an HTML 4.0-
compliant hexadecimal color designation in the provided field.
Note: If you are unsure of a color’s HTML 4.0-compliant
hexidecimal color designation, you can use any one of a
number of popular image editing programs to figure it
out. Simply use the image editor’s color picker tool or its
built-in color palette. Both methods should provide you
with a means to determine hexidecimal color values.
Frame Border Color
Select this option to set a custom background color for the web page’s frame
border color. By default, it is left unchecked and the color is set to white.
Use the mini-color palette to choose a color on the fly, or enter an HTML 4.0-
compliant hexadecimal color designation in the provided field.
Note: If you are unsure of a color’s HTML 4.0-compliant
hexidecimal color designation, you can use any one of a
number of popular image editing programs to figure it
out. Simply use the image editor’s color picker tool or its
built-in color palette. Both methods should provide you
with a means to determine hexidecimal color values.
Upload & Apply
Click this button to upload any changes to the NXC-8160’s built-in captive
portal web page.
Preview
Click this button to preview a temporary copy of the changes you have made
to the NXC-8160’s captive portal web page. This page opens in either
another window or another tab, depending on your web browser.
Upload Your Own
Customized Page
Select this option to upload a customized captive portal web page.
Note: Once you choose this option, the upload custom page
parameters dynamically appear. If left unchecked, they
remain hidden.
Note: You
must
upload each individual component of your
custom web page one at a time using the parameters
described below. This includes all image files, CSS files,
JavaScript files, and so on.
Upload Page or
Image
Enter the path of a web page file or image file that you want to upload. If you
do not know the path, click the
Browse
button to locate it on your local
computer. Once you have entered the path, click the
Upload
button to copy
it to the NXC-8160.
Delete All Files
Click the
Delete
button to delete all files that you have uploaded to the NXC-
8160 that were to be used as a custom captive portal web page.
See more:
Instructions
Click this link to open a popup window that contains a list of limitations and
requirements for your custom uploaded captive portal web page.
For details on this, see
, below.
Apply
Click
Apply
to save the changes you have made in this section.
Table 37
Advanced > Portal (continued)
LABEL
DESCRIPTION
Summary of Contents for NXC-8160
Page 1: ...www zyxel com NXC 8160 Business WLAN Controller User s Guide Version 1 0 12 2008 Edition 2...
Page 2: ......
Page 8: ...Safety Warnings NXC 8160 User s Guide 8...
Page 10: ...Contents Overview NXC 8160 User s Guide 10...
Page 21: ...21 PART I Introduction Getting to Know Your NXC 8160 23 Introducing the Web Configurator 27...
Page 22: ...22...
Page 32: ...Chapter 2 Introducing the Web Configurator NXC 8160 User s Guide 32...
Page 34: ...34...
Page 64: ...64...
Page 74: ...74...
Page 100: ...Chapter 8 Events Reports NXC 8160 User s Guide 100...
Page 101: ...101 PART V Troubleshooting and Specifications Troubleshooting 103 Product Specifications 107...
Page 102: ...102...
Page 110: ...Chapter 10 Product Specifications NXC 8160 User s Guide 110...
Page 112: ...112...
Page 136: ...Appendix A Setting Up Your Computer s IP Address NWD271N User s Guide 136...
Page 160: ...Appendix B Importing Certificates Document Title 160...
Page 178: ...Appendix D Pop up Windows JavaScripts and Java Permissions NXC 8160 User s Guide 178...
Page 196: ...Appendix F Legal Information NXC 8160 User s Guide 196...
Page 202: ...Appendix G Customer Support NXC 8160 User s Guide 202...


