6.3 Communication with Touch Panel
6.3.1 When MP2300S Acts as Slave
6-69
6
Ethernet Communications
5.
Click
Yes
in the parameter setting confirmation dialog box.
Caution
Note that when a parameter with the same connection number is already set and you click
Yes
in the parameter setting confirma-
tion dialog, the setting will be overwritten by the parameter configured in the
Message Communication Easy Setting
Window.
6.
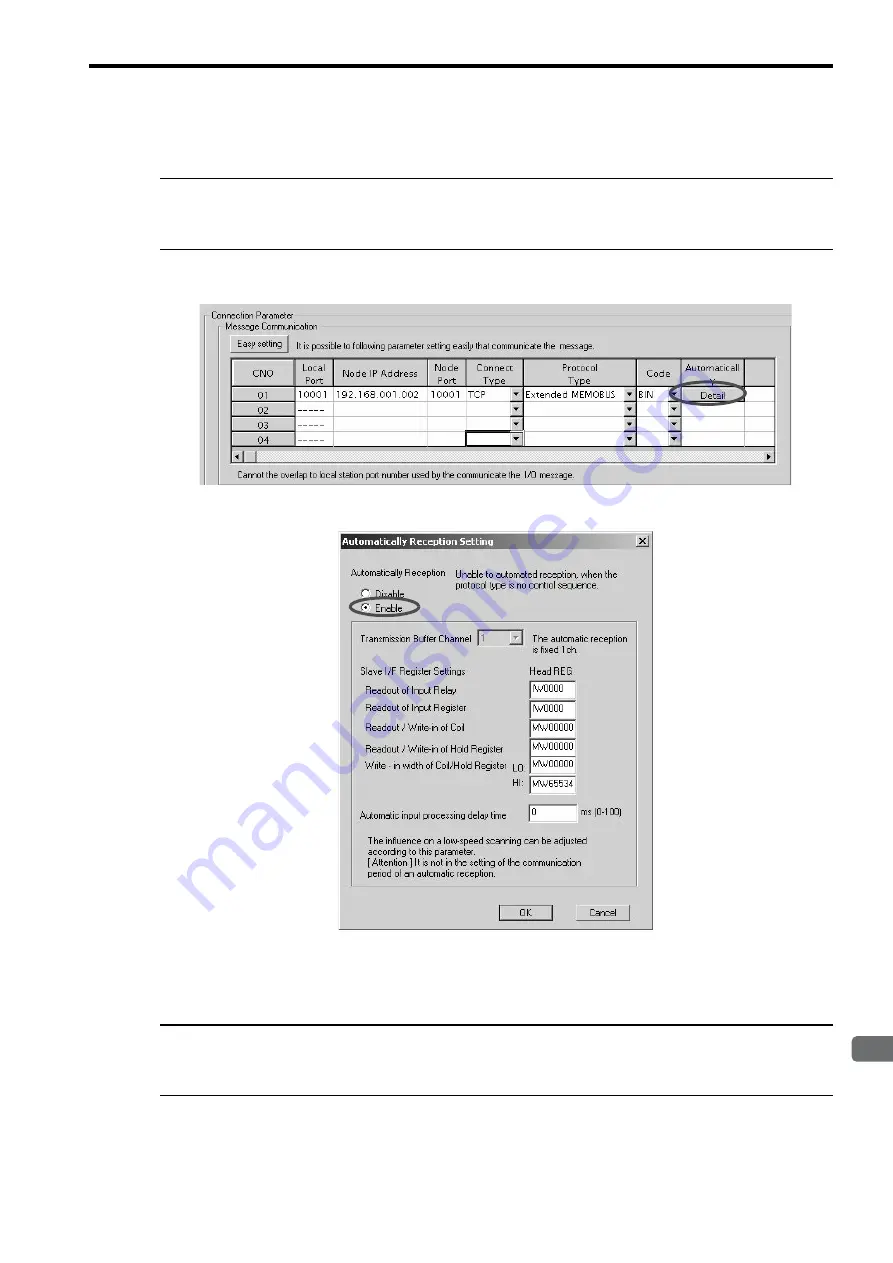
Check the setting value and click the
Detail
Button in the
Automatically
column.
7.
Check
Enable
in the
Automatically Reception Setting
Window and then click the
OK
Button.
Note: For more information on Slave Side I/F Register Setting and Automatic Receive Process Delay Time,
refer to
2.2.4 ( 4 ) (b)
Automatic Receive Setting Screen for Message Communication
on page 2-22.
The automatic receive function for connecting the MP2300S to the touch panel is now set up.
Caution
When any transmission or connection parameter is changed, the change will be reflected after FLASH has been saved and the
power supply is turned ON again.
Summary of Contents for JEPMC-MP2300S-E
Page 14: ...MEMO ...
Page 24: ...MEMO ...
Page 114: ...MEMO ...
Page 132: ...MEMO ...
Page 154: ...5 2 User Programs 5 2 2 Motion Programs 5 22 2 Example using a ladder program ...
Page 156: ...5 2 User Programs 5 2 2 Motion Programs 5 24 2 Example using a ladder program ...
Page 190: ...MEMO ...
Page 280: ...MEMO ...
Page 300: ...7 3 Operation 7 3 5 How to Determine Input Error 7 20 Continued from the previous page ...
Page 310: ...MEMO ...


