87
11
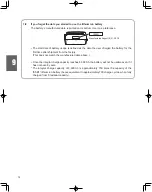
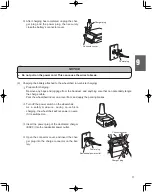
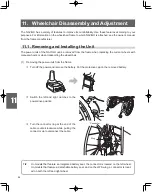
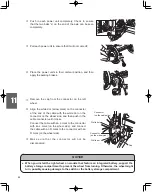
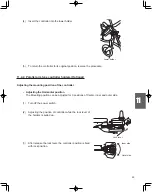
Attach the cap to prevent dirt or water from
entering the connector.
Cap
Connector
a
a
b
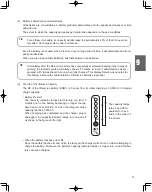
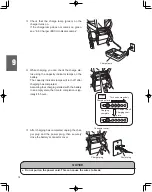
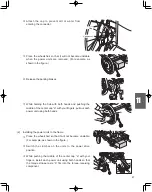
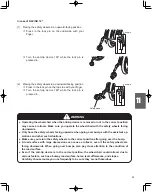
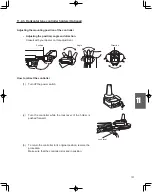
Place the wheelchair so that it will not become unstable
when the power units are removed. (For example, as
shown in the figure.)
Release the parking brakes.
While holding the hub with both hands and pushing the
middle of the center cap “a” with your fingers, pull out each
power unit using both hands.
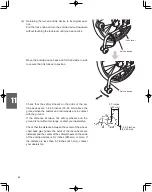
(2) Installing the power units to the frame
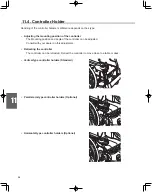
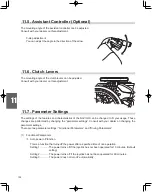
Place the wheelchair so that it will not become unstable.
(For example, as shown in the figure.)
Switch the clutches on the units to the power drive
position.
While pushing the middle of the center cap “a” with your
fingers, install each power unit using both hands so that
the torque stopper axle “b” fits into the torque-receiving
component.
Summary of Contents for NAVIGO
Page 28: ...1 22 1 6 Warning Label Location Diagram Power Unit and Controller NAVIGO 16 FRONT BACK ...
Page 29: ...1 23 NAVIGO 24 FRONT BACK ...
Page 30: ...1 24 Lithium Ion Battery Nickel Metal Hydride Battery Back side ...
Page 31: ...1 25 Charger for Lithium Ion and Nickel Metal Hydride Battery ESC3 ...

