CS1D Operating Manual (Basic Operation)
140
3. In the MIDI PORT section of the screen, press the
button for the port at which program changes will
be transmitted and received.
In the MIDI PORT section you can select from the
following ports to transmit (TX) and receive (RX)
MIDI program change messages.
•
CONSOLE
..........MIDI IN/OUT connectors on
the rear panel of the console
•
ENGINE A
..........MIDI IN/OUT connectors of
engine A
•
ENGINE B
..........MIDI IN/OUT connectors of
engine B
•
OFF
.....................MIDI messages will not be trans-
mitted or received
Hint
The ENGINE B button is valid only when the PM1D
system is being used in Mirror mode.
4. In the MIDI MODE section, use the MULTI or SIN-
GLE button to select the program change transmis-
sion/reception mode.
You can select one of the following two modes.
•
Single mode (when the SINGLE button is on)
This mode uses a single MIDI channel to transmit
and receive programs. In this mode, incoming pro-
gram changes 1–128 received on the MIDI channel
specified by the RX CH knob (RX CH) will execute
the event assigned to each program number. When
the corresponding events are executed on the CS1D,
a program change 1–128 will be transmitted to the
external device on the MIDI channel specified by the
TX CH knob (TX CH).
•
Multi mode (when the MULTI button is on)
This mode uses multiple MIDI channels to transmit
and receive program changes. In this mode, incom-
ing program changes 1–128 on MIDI channels 1–16
will execute the event assigned to each program
MIDI channel/program number. When the corre-
sponding events are executed on the CS1D, a pro-
gram change 1–128 will be transmitted to the
external device on a MIDI channel 1–16.
5. If you selected single mode in step 4, use the TX
CH/RX CH knobs to select the MIDI channels on
which program changes will be transmitted or
received. If desired, turn on the OMNI button or
the BANK button.
When Single mode is selected, turning the OMNI
button on will allow program change messages of all
MIDI channels to be received.
When Single mode is selected, turning the BANK
button on will allow events to be specified by the
combination of bank select messages (bank numbers
1–16) + program change messages.
Please do not confuse “Single mode/OMNI button
on” with “Multi mode.” When the OMNI button is
on, program changes will be received on all MIDI
channels, but the only events that can be executed
are those that have been assigned to program
changes 1–128 of the RX CH. Also, the TX CH is
the only MIDI channel that can be transmitted.
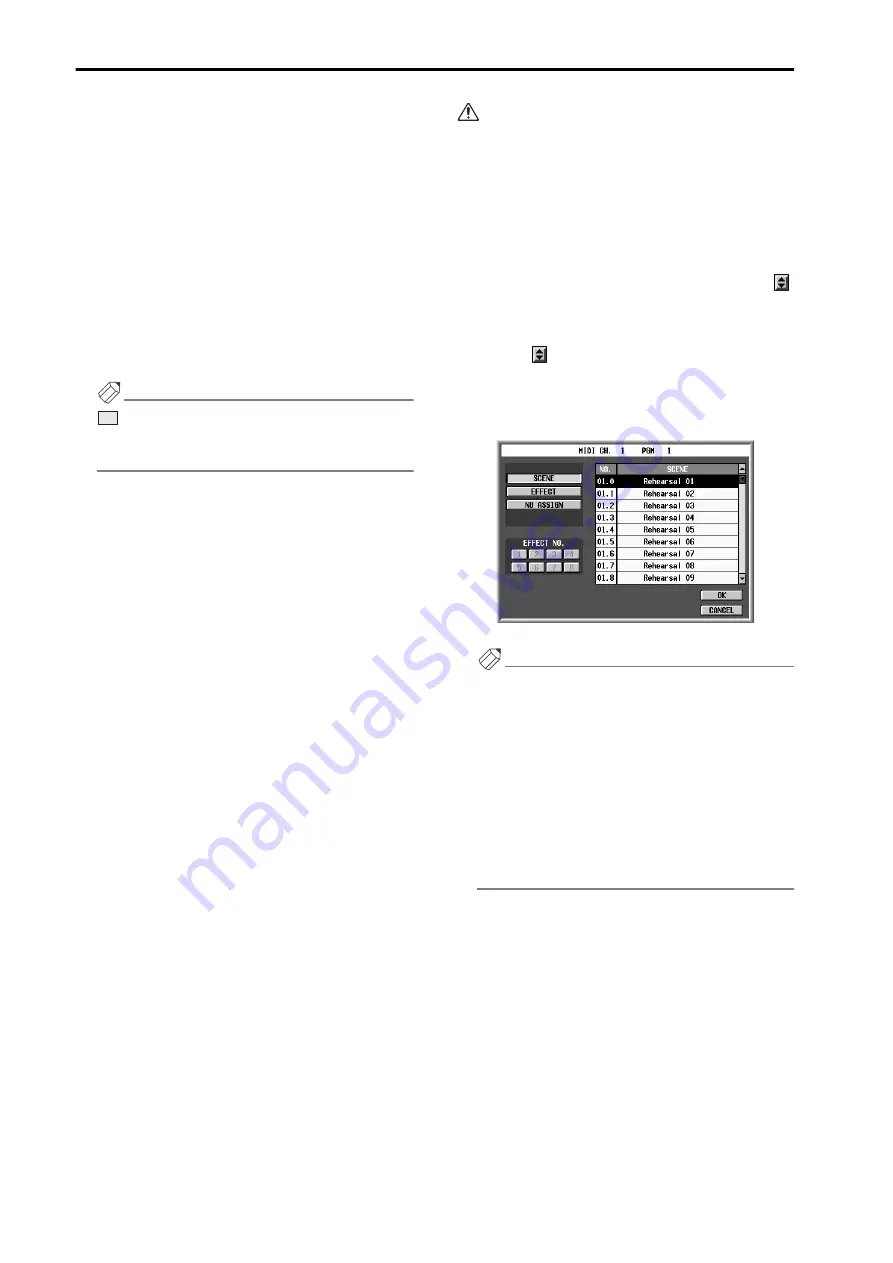
6. From the PROGRAM CHANGE EVENT list in the
right of the screen, select the program number to
which you wish to assign an event, and click the
button of that line.
The PROGRAM CHANGE EVENT list allows you to
assign an event to each program number. When you
click the
button of the desired line, a popup win-
dow will appear, where you can select an event to
assign.
•
Event selection popup window
Hint
In Multi mode, MIDI channels 1–16 and program
changes 1–128 can be used.
In Single mode, only program changes 1–128 of the
MIDI channel selected by the RX CH knob can be
used.
If the BANK button is turned on in Single mode,
bank select 1–16 and program change 1–128 of the
MIDI channel selected by the RX CH knob can be
used. In this case, the number displayed in the CH
column of the PROGRAM CHANGE EVENT list
will be the bank number.
7. Click one of the buttons in the upper left of the
window to select the type of event.
The following events can be selected.
•
SCENE
................ Scene memory recall operations
•
EFFECT
.............. Effect recall operations
•
NO ASSIGN
....... No event assigned
8. If you selected Scene memory recall in step 7, select
the number of the desired scene from the list in the
right side of the popup window, and click the OK
button.
DSP
x2
x2
Summary of Contents for CS1D
Page 1: ...Owner s Manual ...
Page 5: ...Operating Manual ...
Page 6: ...Operating Manual Start up ...
Page 55: ...Operating Manual Basic Operation ...
Page 214: ...Reference Manual ...
Page 215: ...Reference Manual Hardware ...
Page 332: ...Reference Manual Software ...
Page 530: ...Reference Manual Appendices ...


