Replacing the Fuser Assembly
WorkCentre 7425/7428/7435
User Guide
169
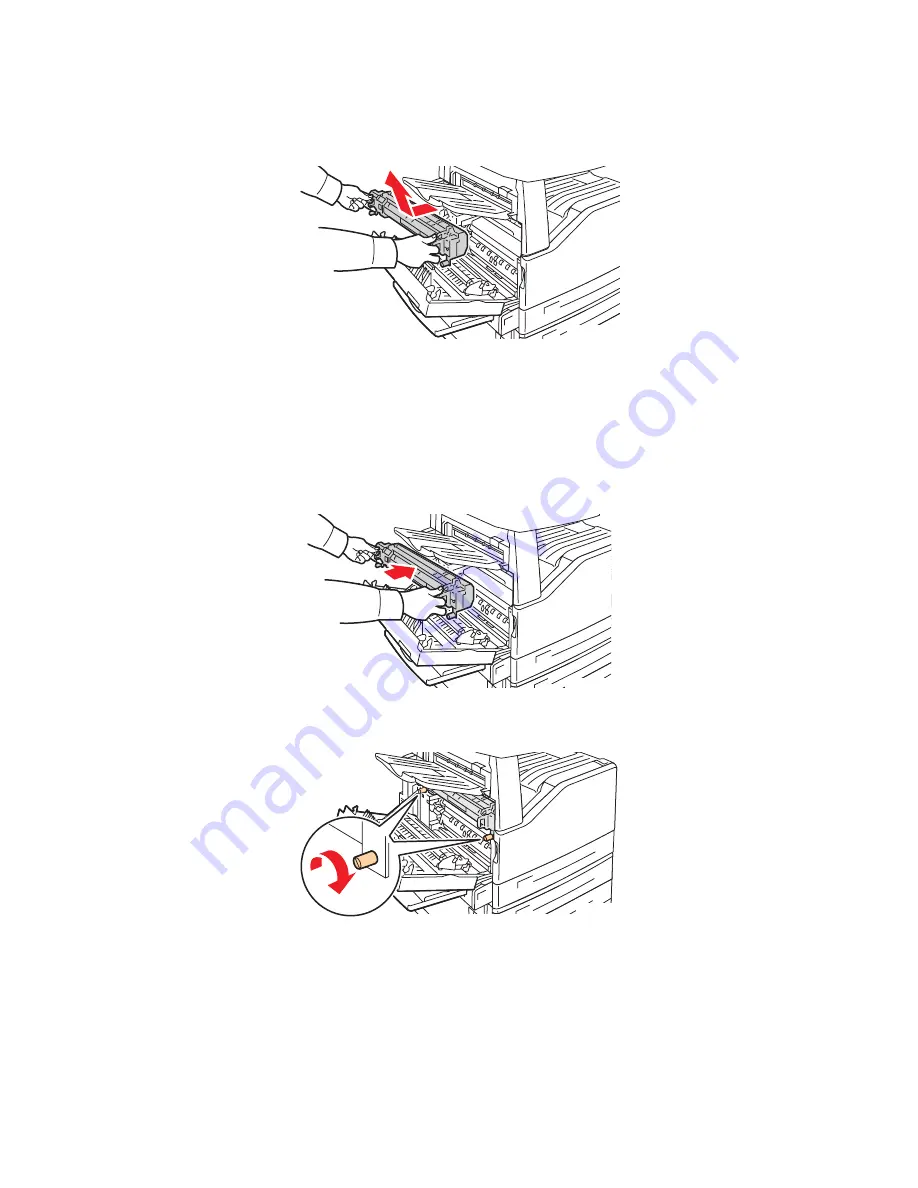
4. Using the black grip handles on either side of the fuser assembly, pull the fuser assembly straight
out of the printer.
Note:
To return the used fuser assembly for recycling, use the prepaid return label included with the
new fuser assembly. Use the box from the new fuser assembly for the return. For more information
on returning a used fuser assembly, visit
www.xerox.com/gwa
.
5. Remove the new fuser assembly from the packaging. Retain the packaging to return the used fuser
assembly.
6. Position the new fuser assembly in the opening, then push it straight into the printer until it stops.
7. Turn both orange screws clockwise until snug.
8. Close the side cover.
9. Turn the power switch ON. The printer will reboot.
wc74xx-173
wc74xx-175
wc74xx-176
Summary of Contents for WORKCENTRE 7425
Page 1: ......
Page 10: ...WorkCentre 7425 7428 7435 User Guide 10...
Page 18: ...Safety WorkCentre 7425 7428 7435 User Guide 18...
Page 86: ...Printing WorkCentre 7425 7428 7435 User Guide 86...
Page 87: ...87 Copying This chapter includes Basic Copying on page 88 Adjusting Copy Options on page 90 5...
Page 110: ...Copying WorkCentre 7425 7428 7435 User Guide 110...
Page 124: ...Faxing WorkCentre 7425 7428 7435 User Guide 124...
Page 150: ...Scanning WorkCentre 7425 7428 7435 User Guide 150...
Page 246: ...Product Specifications WorkCentre 7425 7428 7435 User Guide 246...
Page 258: ...Regulatory Information WorkCentre 7425 7428 7435 User Guide 258...


