


ActiveScale™ P100 Support Guide
34
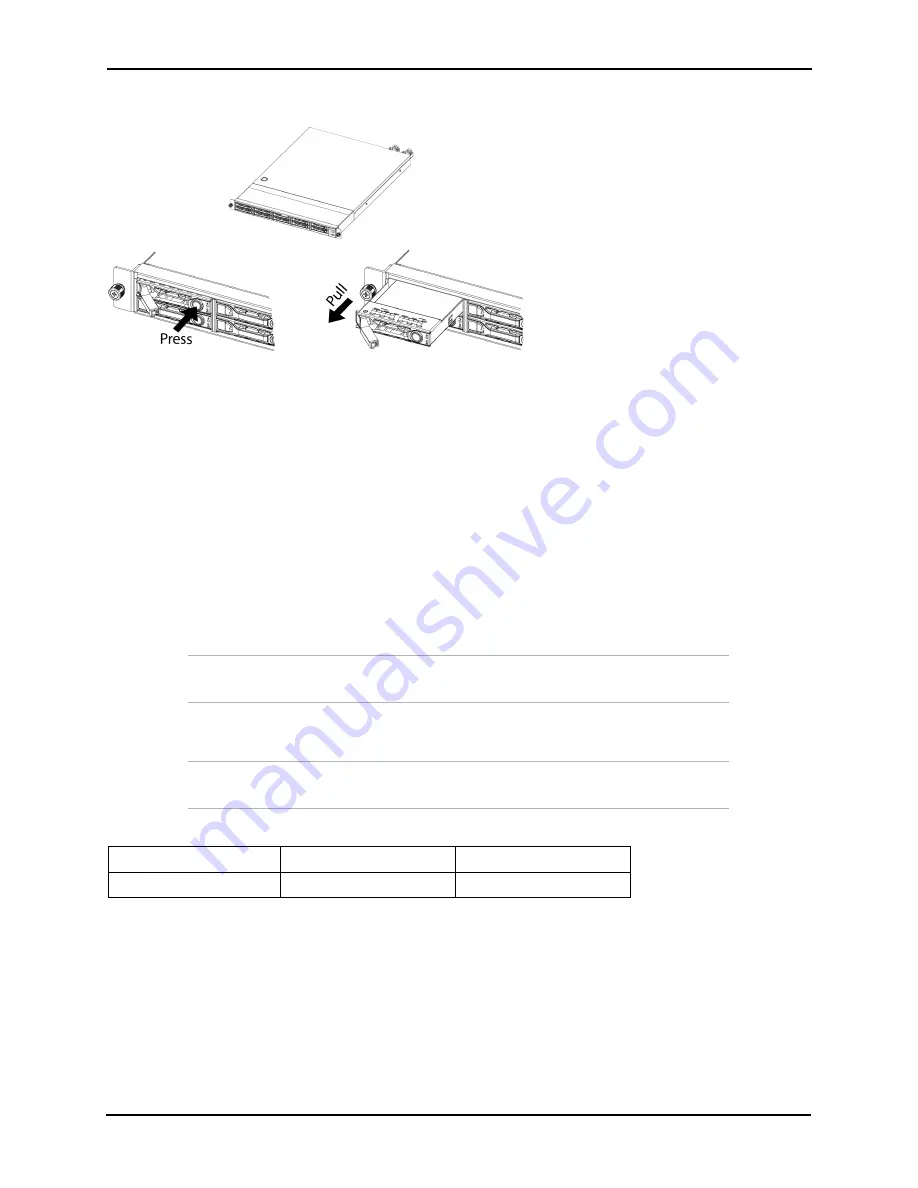
Figure 3-19. Removing a drive
4. Record the serial number of the failed device for return purposes.
3.1.1.2 Installing a System Node drive
To install a replacement System Node drive:
1. Insert the replacement drive into the empty slot left by the faulty drive.
2. Place one finger on each side of the drive and press with even pressure until the drive stops.
3. Swing the release handle back into the carrier to fully seat the drive into the slot. When the drive is
inserted, the LEDs on the drive carrier will light up as the drive is being integrated into the system.
4. Wait for the activity LED to start begin flashing to be sure the drive is integrated successfully.
5. Check to make sure that the drive has been reintegrated and the status is
Online
. If the status is
Degraded
,
Decommissioning
, or
Decommissioned
, wait for approximately 15 minutes and check
again.
Important:
If the status does not change to
Online
, retry the replacement
process or contact Western Digital Corporation Support.
3.1.2 Replacing System Node PSUs
Caution:
Be careful not to accidentally remove the power cord of the second
PSU. This will power down the System Node and can cause data loss.
3.1.2.1 Removing a System Node PSU
To remove a System Node PSU:
1. Unplug the AC power cord from the faulty PSU.
Table 3-9. System Node PSU replacement overview
Required tools
Personnel required
Replacement time
None
1
15 to 25 minutes
Summary of Contents for ActiveScale P100
Page 103: ...ActiveScale P100 Support Guide 101...
Page 104: ...ActiveScale P100 Support Guide 102...
Page 120: ...ActiveScale P100 Support Guide 118...
Page 124: ...ActiveScale P100 Support Guide 122...
Page 131: ...ActiveScale P100 Support Guide 129...
Page 132: ...ActiveScale P100 Support Guide 130...


