Installation and Configuration Guide
Chapter 6. Attaching Cable Extrusions (Tube Frame Cabinets Only)
6.2
1.
Attach the fabric panels to the extrusions with the Velcro strips affixed to the fabric panels.
Use the monitor as a horizontal reference.
2.
Remove the paper backing from the Velcro strips.
3.
Hold the color panel up to the system and insert each end into the groove on the outer extrusions,
carefully aligning the edges of the panel to the edges of the system.
4.
Press it firmly against the Velcro backing.
Have someone hold the system in place as you press down to keep
it from rolling.
Dual Monitor System
Front Extrusions
In Chapter 2, you removed some extrusions from the primary cabinet. You will reattach them in this section.
1.
Move to the front, right side (inner leg) of the primary cabinet. Select an H-shaped extrusion and place
the bottom end between the metal bars.
The rounded side of the extrusion should be against the rear bar and the longer end should be at the
bottom.
2.
Angle the piece toward the top and snap into place.
3.
Locate a short C-shaped extrusion and place it behind the rear bar and snap it into the H-shaped
extrusion (Figure 6-3).
Use the secondary cabinet as a guide, since those extrusions are
already attached.
Center Extrusions
1.
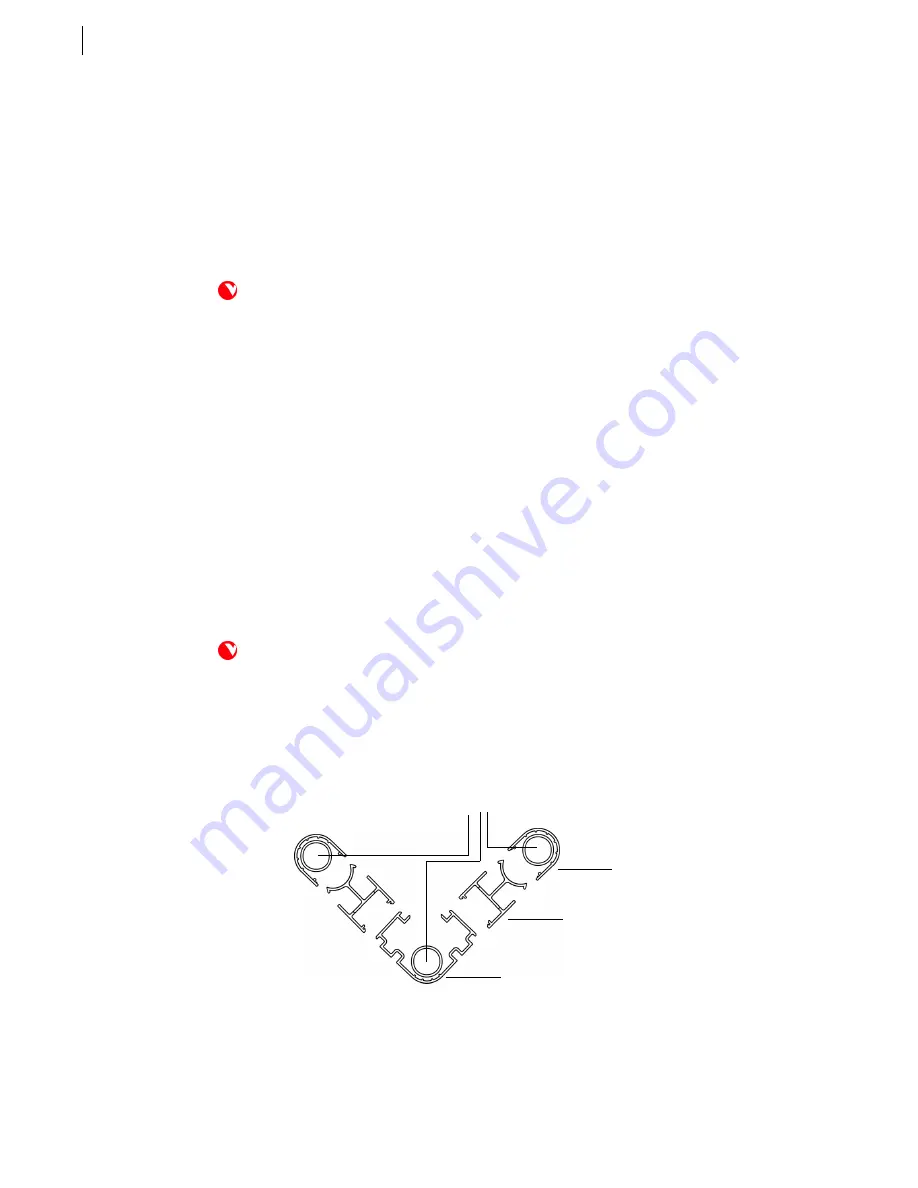
Locate a Double extrusion and place the bottom curved end over the Y-shaped caster (Figure 6-3).
2.
Angle it toward the system, slide it upward and snap it into place.
Figure 6-3 Center Extrusions, Top View
Double
H
C
metal tubes
Summary of Contents for Galaxy
Page 1: ...Face to Face Communications SM Galaxy Installation and Configuration Guide 2 2 ...
Page 4: ...Installation and Configuration Guide iv ...
Page 8: ...Galaxy User Guide Contents viii ...
Page 18: ...Installation and Configuration Guide Chapter 2 Installing Cabinets 2 8 ...
Page 22: ...Installation and Configuration Guide Chapter 3 Installing Monitors 3 4 ...


