


5-75
Operation on the Machine > Manual Staple
3
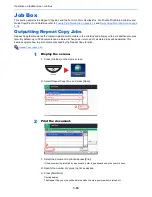
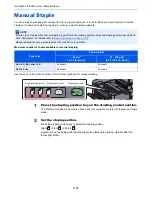
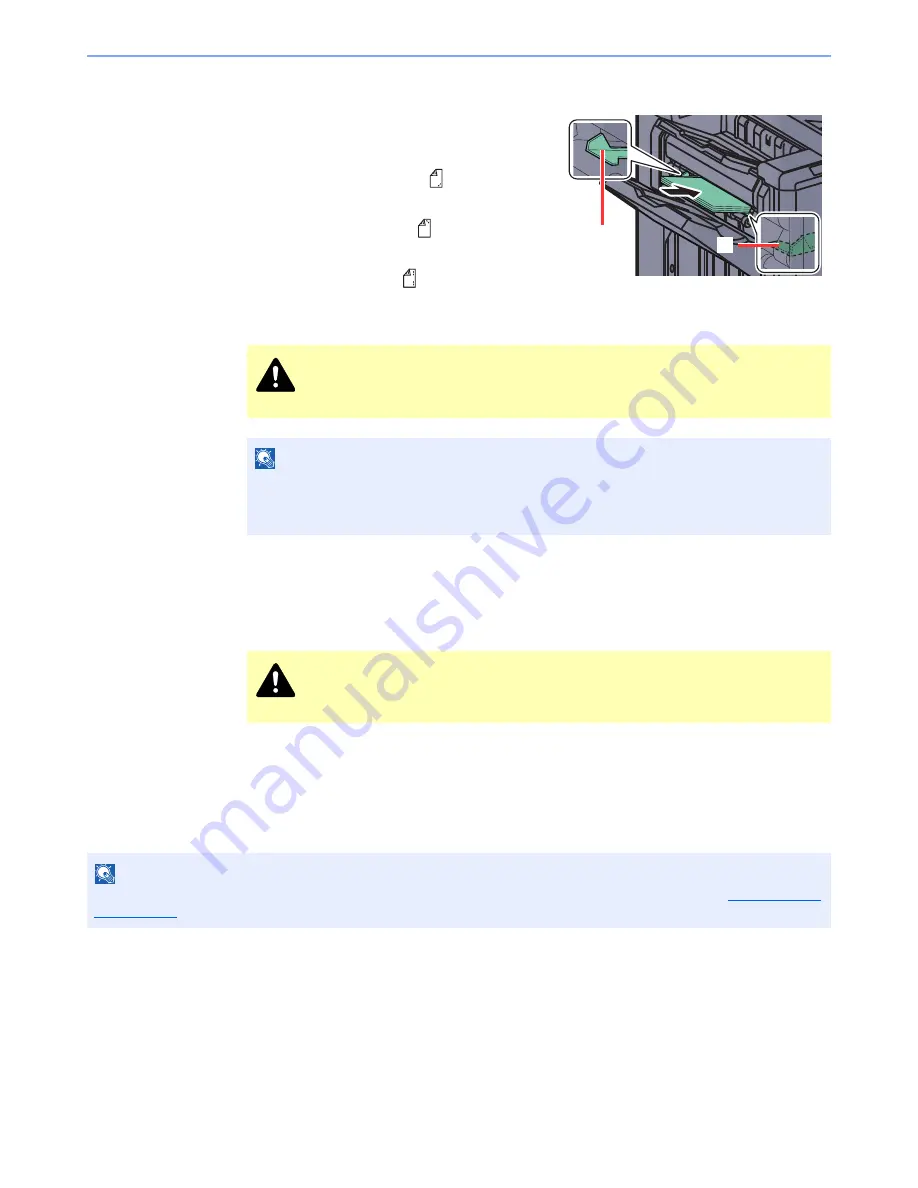
Load the paper.
Straighten the edges of the paper well and place
the paper front side down in the shutter opening
of the output unit.
If the near side of the paper (
) will be stapled,
place the paper against the front guide (A).
If the far side of the paper (
) will be stapled,
place the paper against the back guide (B).
If the edge of the paper (
) will be stapled at
two points, place the paper with the center aligned to the center point between the two side
guides (A and B).
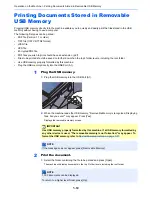
4
Staple the paper.
Let go of the paper, and then press the stapling key.
Stapling starts. Stapling finishes and the output is delivered to tray A.
Finishing the manual staple mode
Press the stapling position key several times until the stapling position lamps turn off. The shutter of the paper exit area
closes. It means that manual stapling is finished.
If no operation is performed for approx. 10 seconds, the manual staple mode will be automatically finished.
CAUTION
Do not insert your hand inside the open shutter.
NOTE
•
Press the stapling position key before you place the paper. Once the paper is placed, the stapling
position key cannot be used.
•
The stapling lamp lights when the paper is properly placed. If it does not light, replace the paper.
CAUTION
Be sure that your hands are away from the paper while stapling is in progress.
NOTE
The time after which manual staple mode is automatically exited can be changed. For details, refer to
Manual Staple
on page 8-24
.
B
A
Summary of Contents for 3005ci
Page 17: ...xvi About the Operation Guide this Guide ...
Page 44: ...xliii Menu Map ...
Page 104: ...2 46 Installing and Setting up the Machine Transferring data from our other products ...
Page 176: ...4 18 Printing from PC Printing Data Saved on the Printer ...
Page 252: ...5 76 Operation on the Machine Manual Staple ...
Page 455: ...10 7 Troubleshooting Regular Maintenance 3 4 5 6 CLICK ...
Page 458: ...10 10 Troubleshooting Regular Maintenance 4 5 6 7 1 2 CLICK CLICK ...
Page 498: ...10 50 Troubleshooting Troubleshooting Large Capacity Feeder 1 500 sheet x 2 1 2 3 4 1 2 B1 B2 ...
Page 499: ...10 51 Troubleshooting Troubleshooting Multi Purpose Tray 1 2 3 4 ...
Page 501: ...10 53 Troubleshooting Troubleshooting Duplex unit 1 2 ...
Page 502: ...10 54 Troubleshooting Troubleshooting Duplex Unit and Cassette 1 1 2 3 CLICK ...
Page 504: ...10 56 Troubleshooting Troubleshooting Fixing unit 1 2 3 A1 ...
Page 506: ...10 58 Troubleshooting Troubleshooting Optional Job Separator Inner Job Separator 1 2 3 A1 ...
Page 507: ...10 59 Troubleshooting Troubleshooting Right Job Separator 1 2 3 Bridge Unit Option A1 1 2 ...
Page 508: ...10 60 Troubleshooting Troubleshooting 1 000 sheet Finisher Option 1 2 3 D1 D2 2 1 D3 ...
Page 511: ...10 63 Troubleshooting Troubleshooting Tray B 1 2 3 Tray C 1 D2 D3 ...
Page 512: ...10 64 Troubleshooting Troubleshooting Conveyor Inner Tray 2 3 Mailbox Option 1 D2 D3 1 2 ...
Page 515: ...10 67 Troubleshooting Troubleshooting 5 Cassette 5 Option Side Feeder 3 000 sheet 1 2 2 1 ...
Page 522: ...10 74 Troubleshooting Troubleshooting Staple cartridge holder B C 1 2 3 4 2 1 CLICK ...
Page 570: ...Index 10 ...
Page 571: ......


