background image

www.ultratecfx.com 

29

Data In / Data Out

These are the communications connectors (5 pin XLR).  Data In is Male, Data Out is Female.

Slaves can be daisy chained in any order on the data line, however the connections must run Out to 

In to Out to In etc.  The data signal is rebroadcast at each remote to improve performance and dis-

tance.

SureFire Digital Slave Module Addressing

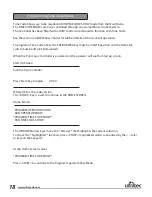
16 channel Slave modules have a push-but-

ton Encoder on the front panel.

The Encoder sets the slave module address 

from 1 to 9. 

The zero ‘0’ address is invalid.

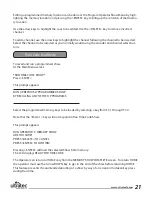
The 16 channel slave Encoder/Channel num-

ber tables are the same as the channel select 

numbers on the controller.

For Example

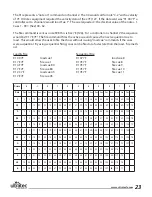
A 16-channel slave with the Encoder set to 

address ‘5’, co-responds directly to the Digital Controller Encoder setting ‘5’.

Channel select buttons 1 to 16 and slave channel outputs 1 to 16 will then correspond.

Important Note

Important Note

The slave must be powered down for a change to the Encoder address to take effect.

If it is not powered OFF it will remain at it’s old address regardless of Encoder setting.

Slave Modules CANNOT share the same address.

For Example

Two slaves with the same address will NOT operate in symmetry, they will return an error.

CAUTION!!!

Summary of Contents for SureFire

Page 1: ...SureFire Pyrologic Digital Controller Operations Manual www ultratecfx com VER 11 07 10...

Page 2: ...r Front Panel Page 10 Surefire Pyrologic Controller Rear Panel Page 11 Channel Select Buttons Encoder Page 27 Surefire Digital 16 Channel Slave Module Page 28 Surefire Digital Airburst Slave Module Pa...

Page 3: ...ox A restocking charge of up to 25 may be levied Only credits are issued to the dealers account Any product not returned within 30 days is considered purchased Warning Ultratec Special Effects Inc con...

Page 4: ...t a suitable first aid kit is available and that personnel are trained in its use 5 There must be no smoking exposed flames or any other sources of ignition in the vicinity of pyro technic material at...

Page 5: ...erform identically this must be considered when locating devices 14 Ultratec Pyrotechnics must only be used in conjunction with Ultratec Firing Systems or Ultratec approved devices No liability of any...

Page 6: ...yrologic Programmable Controller Type Micro Processor Controlled Low Voltage Firing System Weight 17 Lbs Power Rating 110 Volt A C 50 60 Hz 0 75 Amps 240 Volt A C 50 60 Hz 0 35 Amps Technical Specific...

Page 7: ...rol The channel select buttons also have a Green LED This LED indicates the presence of continuity on the corresponding channel of the slave as indicated by the Remote Slave Display The Remote Slave D...

Page 8: ...e Slave Power is OFF Slave Power On is indicated by the Green LED On in the Status Indicator section When Slave Power is ON the firing current is available to the slave channel outputs Fault Indicator...

Page 9: ...Power Off The slave power is required to run the diagnostic routine therefore when the SLAVE POWER key switch is OFF the system will indicate a FAULT Note that when the SLAVE POWER is OFF all 16 faul...

Page 10: ...and for limited functions during Run time A Keypad layout and brief description of their functions follows In the instruction section key presses are indicated with angle brackets Data Link When the d...

Page 11: ...selection or Groups of Channels stages will be fol lowed by a Delay Time DELAY Calls the Delay Time select screen where the time value of the symbol is determined Chase speed VIEW Flashes the bottom...

Page 12: ...cted slave module is On Line If the operator expects to see matches on the selected slave and none appear the slave is not ON Line or the SAFE ARMED key is not in SAFE position In ARMED mode match and...

Page 13: ...16 This system of the first digit representing the slave module address and the second 2 digits repre senting the channel on that slave continues up to the Encoder limit of 9 Each 16 channel slave add...

Page 14: ...e Asterisk that highlights the current selection To chose the highlighted function press START Capitalized words surrounded by the refer to keys on the keypad Programming Operator Shows To program an...

Page 15: ...select a channel for a Group Fire turn the numerical encoder 1 to 9 and press a channel but ton The matching Numerical channel number is displayed on the LCD followed by end 2 To accept the channel as...

Page 16: ...ed at once ALL channels preceding the first symbol The program then pauses for the Delay time Delay time is selected during programming The next Stage of the Chase is Fired after the pause The sequenc...

Page 17: ...reen press VIEW again To accept the displayed Delay time press DELAYMS key The Delay time is now inserted at ALL symbol locations 1__108 609 114 316 109 101 102 501 116 403 911E The above cue will fir...

Page 18: ...RUN OPERATOR X MEMORY SHOW ARE YOU SURE PRESS DELETE TO CANCEL PRESS ENTER TO CONFIRM Editing a programmed memory location can be done at the Program Operator Show Menu by high lighting the memory lo...

Page 19: ...se The Chase sequence will continue ONLY if the FIRE button is held down Release of the FIRE button during a Chase will halt the Cue Re pressing the FIRE button will begin where the Chase halted To sk...

Page 20: ...Link switch must be off not illuminated When the Pyro Logic Controller is powered on the operator will see the Start up screen Start Up Screen SureFire Pyro Contoller Press Start key to begin VX XX Wh...

Page 21: ...ugh TC 4 to be programmed ENTER starts edit program mode In an empty memory location the screen looks like 1 end End of Show Channel Selection for a Group Fire MIDI Cue A Group Fire is defined as a cu...

Page 22: ...t follows Note that channel selections can be duplicated in the same Cue The program will assemble the channel list properly during storage If channel selections are repeated in subsequent Cues the co...

Page 23: ...in Menu select RUN TIME CODE SHOW Press START This prompt appears RUN A PREVIOUSLY PROGRAMMED SHOW BY RECALLING ANY OF THE OP PROGRAMS Select the programmed memory keys to be loaded by selecting a key...

Page 24: ...s Cues can be loaded and fired in any order out of sequence by sending the corresponding MIDI Note On command MIDI Notes must include a velocity of Hex 7F MIDI note On 127 second highest plus the corr...

Page 25: ...0 91 7E 7F fire cue 9 91 7E 7F fire cue 80 91 7E 7F fire cue 10 91 2C 7F load cue 45 91 7E 7F fire cue 11 91 7E 7F fire cue 45 Octave 2 1 0 1 2 3 4 5 6 7 8 Data Dec hex Dec hex Dec hex Dec hex Dec hex...

Page 26: ...The cues will be displayed One cue per line on all 4 lines VERY IMPORTANT The controller will FIRE the CUE displayed on the TOP LINE of the LCD screen The FIRE button will be LIVE if all the safety fe...

Page 27: ...The operator releases the Positive Enable after Cue 2 has been uploaded to the remotes When the FIRE command is received MIDI note on 127 Cue 2 will NOT Fire 10 seconds later the controller receives M...

Page 28: ...can occur with 5 frames between events If SMPTE time code is used as the source and the rate of the SMPTE code is 24 frames per second one frame is equal to 41 milliseconds It will be necessary to upl...

Page 29: ...ave ad dress and does NOT correspond to 0 on the controller display The slave must be powered Off then On for the encoder change to be in effect power On Off key The slave address corresponds to the S...

Page 30: ...ey can be removed in the Off position for safety 48 Channel Slave Modules have encoders mounted on the back panel The encoders should be set to occupy 3 consecutive numbers ie 123 or 234 etc Status Mo...

Page 31: ...address is invalid The 16 channel slave Encoder Channel num ber tables are the same as the channel select numbers on the controller For Example A 16 channel slave with the Encoder set to address 5 co...

Page 32: ...t the operation of the slave modules over the long term 3 In the case of concussion effects place the modules at least 15 feet from the concussion pots The shock from the concussions can damage the el...

Page 33: ...should be lit 14 Slave modules can be turned OFF using the key on the front panel 15 You are now ready to connect pyro devices to the system 16 Once pyro is connected you must restart the modules Soun...

Reviews: