3
and Diagnostics
3.25
Floppy
Disk Drive Utilities
3.25.2 Operations
1. Selecting
7
from the DIAGNOSTIC MENU and pressing
Enter
displays the
following message:
[ FDD UTILITIES ]
1 - FORMAT
2 - COPY
3 - DUMP
4 - HDD-ID READ
9 - EXIT TO DIAGNOSTICS MENU
2. FORMAT
program
(a) Selecting FORMAT displays the following message:
DIAGNOSTICS - FLOPPY DISK FORMAT : VX.XX
Drive number select (1:A, 2:B) ?
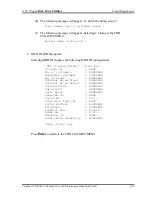
(b) Select a drive number to display the following message:
Type select (0:2DD, 3:2HD) ?
(c) Select a media/drive type number, then the following message appears.
Warning : Disk data will be destroyed.
Insert work disk into drive A:
Press any key when ready.
(d) Remove the Diagnostics Disk from the FDD, insert the work disk and press
any key. The following message will be displayed and the FDD format is
executed:
[ FD TYPE ] : TRACK = XXX
[ FD TYPE ] : HEAD = X
[ FD TYPE ] : SECTOR = XX
Format start
[[track, head = XXX X]]
After the floppy disk is formatted, the following message will appear:
Format complete
Another format (1:Yes/2:No) ?
(e) Typing
1
displays the message from step (c) above. Typing
2
returns the test
to the DIAGNOSTIC MENU.
3-62
Satellite A10/TECRA A1/Satellite Pro A10 Maintenance Manual (960-445)
Summary of Contents for Satellite Pro A10 series
Page 11: ...Satellite A10 TECRA A1 Satellite Pro A10 Maintenance Manual 960 445 xi ...
Page 12: ...Chapter 1 Hardware Overview ...
Page 46: ...Chapter 2 Troubleshooting Procedures ...
Page 112: ...Chapter 3 Tests and Diagnostics ...
Page 199: ...Chapter 4 Replacement Procedures ...
Page 368: ...Appendices ...
Page 369: ...Appendices App ii Satellite A10 TECRA A1 Satellite Pro A10 Maintenance Manual 960 445 ...


