4.18 Fluorescent Lamp
4 Replacement Procedures
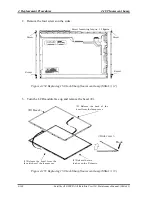
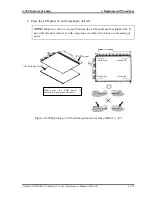
4. Turn the LCD module face down. Remove four screws fixing the board and remove
the FPC (G). Open the bent portion of the TCP of the board and remove the backlight.
Screw
Screw
Screw
Screw
(G) FPC
Screw loosening torque: 0.9kg
•
cm
Open the cap of the connector and
remove the FPC.
Figure 4-156 Replacing 15.0 Inch Sharp fluorescent lamp (SXGA+) (4)
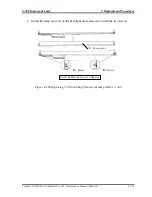
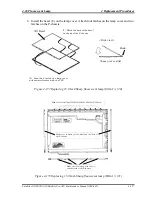
Do not hold the edge.
Do not hold the edge.
Raise the board and make this condition.
Figure 4-157 Replacing 15.0 Inch Sharp fluorescent lamp (SXGA+) (5)
Satellite A10/TECRA A1/Satellite Pro A10 Maintenance Manual (960-445)
4-147
Summary of Contents for Satellite Pro A10 series
Page 11: ...Satellite A10 TECRA A1 Satellite Pro A10 Maintenance Manual 960 445 xi ...
Page 12: ...Chapter 1 Hardware Overview ...
Page 46: ...Chapter 2 Troubleshooting Procedures ...
Page 112: ...Chapter 3 Tests and Diagnostics ...
Page 199: ...Chapter 4 Replacement Procedures ...
Page 368: ...Appendices ...
Page 369: ...Appendices App ii Satellite A10 TECRA A1 Satellite Pro A10 Maintenance Manual 960 445 ...


