4 Replacement Procedures
4.9 Optical Drive
4
4.9 Optical
Drive
This section describes how to remove and install a CD-ROM drive as an example. The
procedure for a DVD-ROM, Combo, Combo+2 or DVD-Multi drive is the same.
NOTE
: Do not apply excessive force to the top of an optical drive.
Removing the Optical Drive
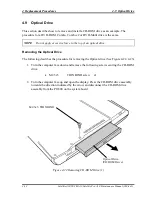
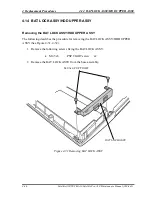
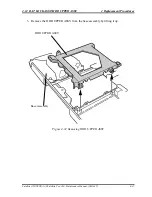
The following describes the procedure for removing the Optical drive (See Figure 4-22, 4-23).
1. Turn the computer face down and remove the following screw securing the CD-ROM
drive.
•
M2.5x5
THIN BIND screw
x1
2. Turn the computer face up and open the display. Press the CD-ROM drive assembly
towards the direction indicated by the arrow and disconnect the CD-ROM drive
assembly from the PJ1800 on the system board.
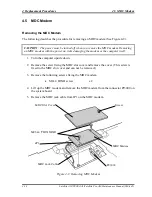
M2.5x5 THIN BIND
Optical Drive
(CD-ROM Drive)
Figure 4-22 Removing CD-ROM Drive (1)
4-32
Satellite A10/TECRA A1/Satellite Pro A10 Maintenance Manual (960-445)
Summary of Contents for Satellite Pro A10 series
Page 11: ...Satellite A10 TECRA A1 Satellite Pro A10 Maintenance Manual 960 445 xi ...
Page 12: ...Chapter 1 Hardware Overview ...
Page 46: ...Chapter 2 Troubleshooting Procedures ...
Page 112: ...Chapter 3 Tests and Diagnostics ...
Page 199: ...Chapter 4 Replacement Procedures ...
Page 368: ...Appendices ...
Page 369: ...Appendices App ii Satellite A10 TECRA A1 Satellite Pro A10 Maintenance Manual 960 445 ...

