74
Connecting your TV
To record DTV programmes (One Touch
Recording)
You can easily record the programme currently being
viewed�
1
Press
●
REC
�
Recording for the currently viewed programme will
start�
The
RED LED
will be lit�
To stop recording
1
Press
v
�
A confirmation window “Do you want to stop
Recording” will appear�
2
Press
v
or
w
to select Yes and press
OK
�
Recording will stop�
Note:
When a timed programme is about to start, an
information screen will appear offering the option of
watching or cancelling the programme. The menus
and other channels will not be available during the
timed programme unless the programme timer is
cancelled.
It will only be possible to create or edit programme
scheduled for the currently tuned DTV input.
To programme the timer
1
From the
Programme Timers
in the TV
Programmes menu, press
OK
�
2
Select the unprogrammed column (blank column) and
press
OK
�
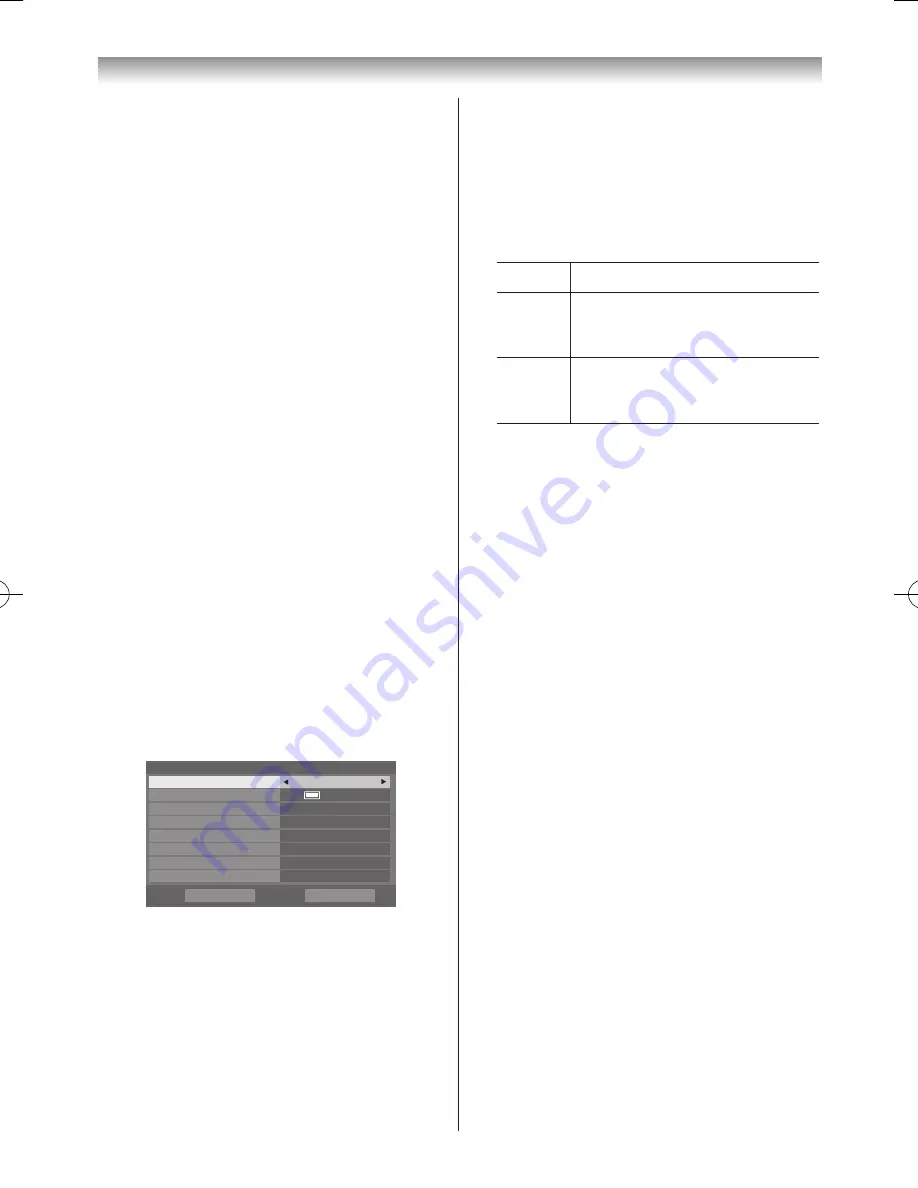
The
Set Timer
menu will appear�
r
p
A
5
2
,
Mon
0
5
:
1
1
r
e
m
i
T
Set
Repeat
Once
End Time
11:51
Start Time
10:55
Date
Mon 25 Apr 2011
Channel
□□□□□
Timer Type
Recording
Protect
Off
Personal Grouping
None
Set Timer
Delete Timer
3
Press
s
or
r
to select
Timer Type
and press
v
or
w
to select
Recording
�
You cannot use the
Reminder
and
Recording
functions at the same time�
4
Press
s
or
r
to go through the list adding the details
of the programme by using the number buttons and
v
or
w
to make selections�
Channel:
Select the channel for programmed recording�
Date:
Select the date for programmed recording�
Start Time:
Select the time to start recording�
End Time:
Select the time to end recording�
Repeat:
Select “
Once
”, “
Daily
” or
Weekly
”�
Once
The selected content is recorded once�
Daily
The same time slot on the same
channel is recorded every day on and
after the selected day�
Weekly
The same time slot on the same
channel on the same day of the week is
recorded on and after the selected day�
Protect:
Select this function when you want to protect a
recorded programme� When
On
is selected, the
programme will be protected�
You can protect and unprotect recorded programmes
afterwards�
Personal Grouping:
Select a Personal Mode for the programme to be
recorded to make it easier to find later for viewing.
Select your preferred Personal Mode� If you select
None
, the programme will be recorded to
All
in
Library
�
5
Press
s
or
r
to select
Set Timer
and press
OK
�
The
ORANGE LED
will be lit�
To check, edit or delete scheduling information
You can check, edit or delete scheduling information.
1
From the
Programme Timer
menu, press
OK
�
Programme Timer
screen will appear�
Recording List:
• Depending on the transmitter information, the
programme broadcast time, or other information
may not be correctly displayed in the recording list�
• The programme does not appear in the recording list
immediately at the start of recording, but appears a
few minutes after recording starts�
• Up to 500 programmes can be displayed in the
recording list�
• If the channel settings are changed, the digital
channel number, or other information may not
appear correctly in the recording list�
• As the displayed programme time is calculated from
the actual recording information, it may not match
the recording time on the USB HDD�
110920c1_55WL800AZ_En.indb 74
11.9.21 11:37:38


