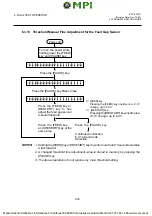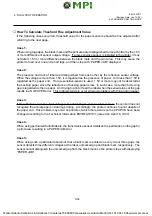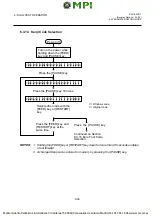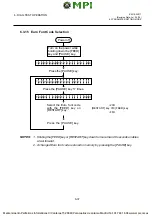
6-47
EM18-33017
6. DIAG. TEST OPERATION
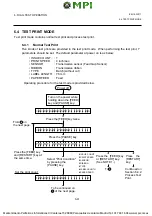
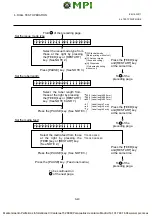
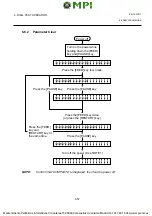
Power off
Turn on the power while
holding down the [FEED]
key and [PAUSE] key.
< 1
D I A G N O S T I C
V 1 . O A
>
Press the [FEED] key twice.
Press the [RESTART]
key.
Press the [FEED] key
and [RESTART] key
at the same time.
< 3
T E S T
P R I N T
>
P R
N T
C O N D I T I O N
I
A U
O
P R I N T ( R E F L E C T . )
T
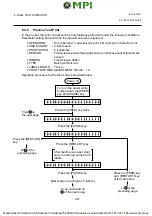
Press the [PAUSE] key.
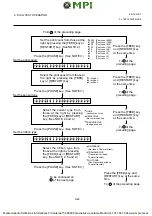
Press the [PAUSE] key.
Press the [RESTART] key.
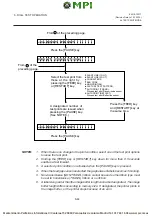
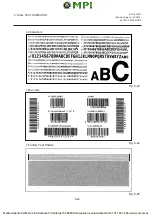
[Bar codes are printed on 5 labels.]
After feeding one label, slant
lines (3 dots) are printed on 5
labels.
From
C
on
the next page.
To
A
of the
preceding page.
To
C
of the
preceding page.
To be continued on
B
of the next page.
6.4.2
Process Test Print
In the precess test print, the test print is automatically performed under the following conditions.
Parameter setting and print tone fine adjustment value is ignored.
•
OPERATION
: One label feed, 3-dot slant line print, bar code print, character print
•
ISSUE COUNT
: 5 labels each
•
PRINT SPEED
: 4 inches/sec.
•
SENSOR
: Transmissive sensor (feed gap sensor) or reflective sensor (black mark
sensor)
•
RIBBON
: Transmissive ribbon
•
TYPE
: Batch (without cut)
•
LABEL LENGTH : 76 mm
•
PRINT TONE FINE ADJUSTMENT VALUE : + 0
Operating procedure for the test mode is provided below.
6.4 TEST PRINT MODE

