84
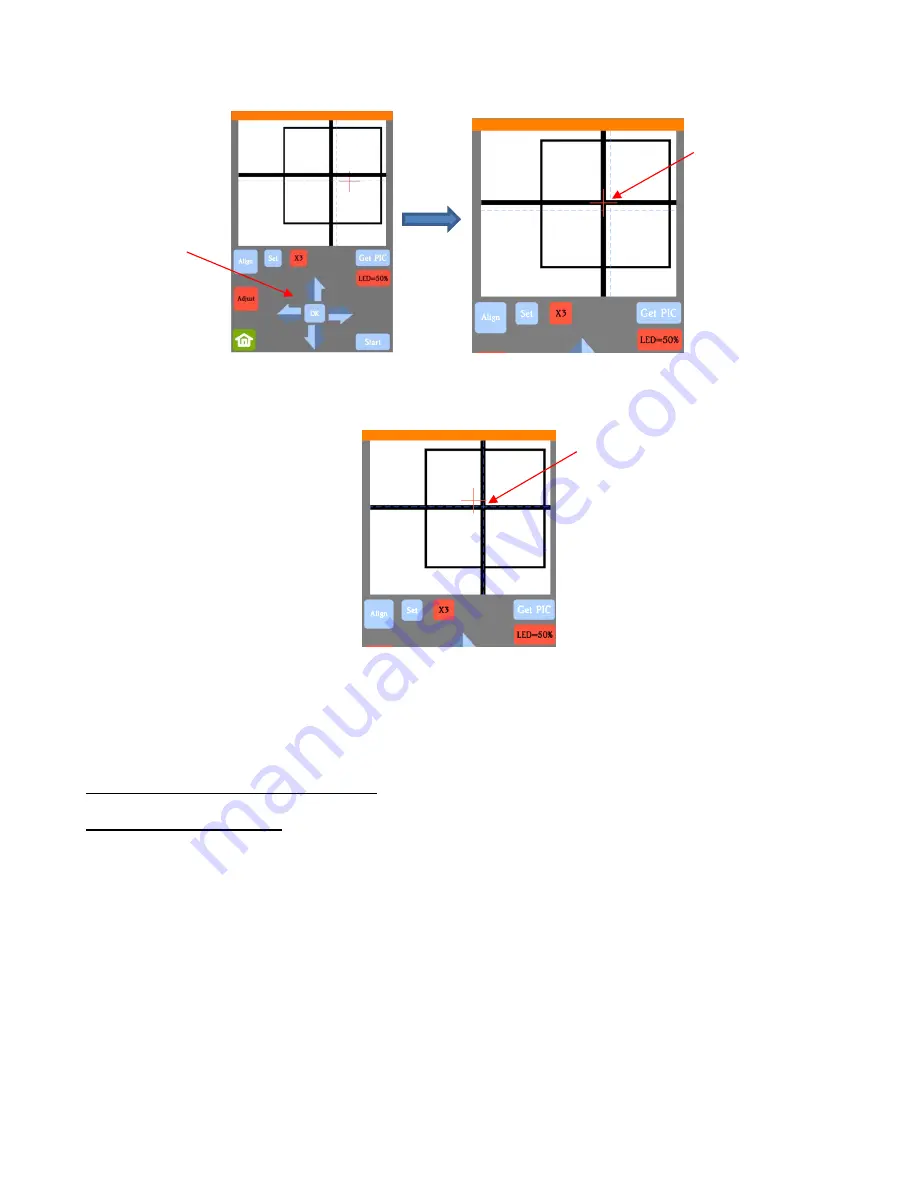
(11) Press
OK
and a new photo will be taken. The
blue dashed
+
should now be more closely aligned with the
center of the test shape:
(12) If necessary, repeat
Steps 10 and 11
until the
blue dashed
+
is near-perfectly centered in the test shape.
(13) Press
X3
to return to normal magnification. Click on the
Home
icon to return to the
Main Screen
. Your
Skycut is now calibrated for print and cut (PNC) applications.
3.04 Performing a PNC in SignMaster
3.04.1 Summary of Steps
•
Here are the typical steps when performing a PNC application:
Prepare the image(s) that will be printed which can include the following:
o
An imported raster image such as a JPG or PNG or BMP file
o
A vector image (either imported or designed in SignMaster) that will be printed but not cut
o
Text that will printed but not cut
Prepare the cut lines which can include:
o
The resulting cut lines from tracing imported raster files. Refer to
Section 5.01
for details on using
the
Trace
function in SignMaster.
o
A contour cut around the outside of the traced image: Refer to
Section 5.01.
o
Any other vector shapes, either imported or designed in SignMaster: Refer to
Section 5.02.
Print the project, after selecting reg mark properties, location of project on the page, and printer options.
The
red +
is now
centered in the test
shape
Press the arrow
buttons to move
the
red +
Note new location
of
blue


