121
5.02 Adding a Contour Cut to a Vector Image
•
As mentioned in
Section 3.05.2
, vector images also require a contour before being used in print and cut
applications. This section will present the method to be used and several of the settings that will typically be
adjusted. While this section accesses the
Create Cut-Contour
window from within the
Contour Cut Wizard
window, note that the same process can be applied by adding the contour from the main screen as was
done in
Section 5.01
(i.e. select shape and go to
Contour Cutting>Create Cut Contour
).
•
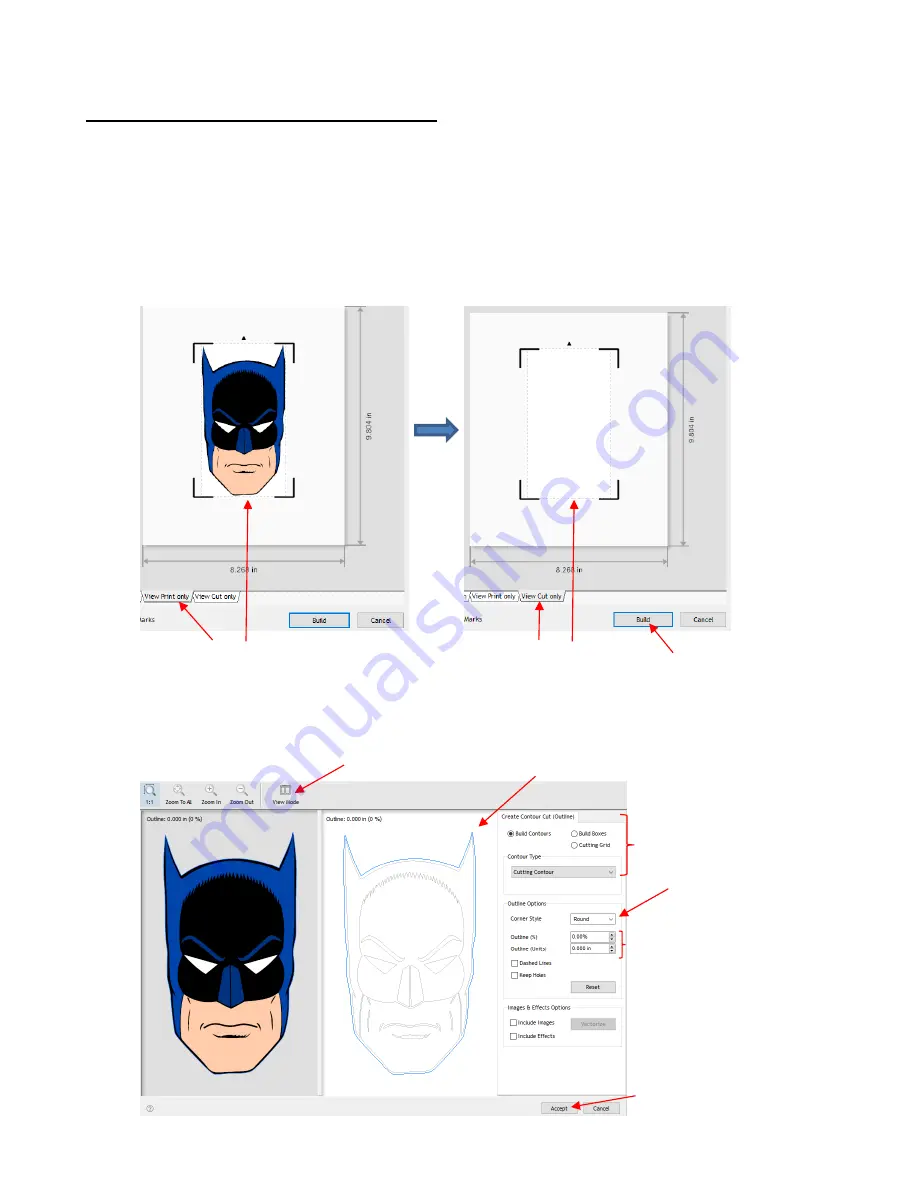
For example, the following Batman SVG file is imported into Signmaster and then the
Contour Cut Wizard
window is opened. Note that comparing the
View
Print only
preview with the
View
Cut only
preview
indicates that the vector file is ready to print but there’s no cut line for the design:
SignMaster recognizes there is no contour to cut and offers the option to add one using the
Build
button
below the preview. Clicking on
Build
opens the
Create Cut
–Contour
window:
What will print
What will cut
Option to add contour cut
Select a
Corner Style
Click on
Accept
when done
Use these options
Keep at 0 for cut line
to follow print line or…
Increase to add a
contour cut or…
Decrease to add an
inset cut
Click on
View Mode
to add the
Outline
preview


