Configuring the Wi-Fi Network
113
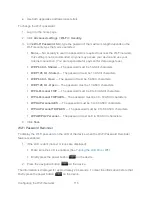
2. Click
Advanced settings
(
).
3. Click
Wi-Fi > Network
or
Router > LAN
.
4. Select the
Link SSID and Hostname
check box.
The
SSID
field gets the value of
Hostname
and becomes unavailable (grayed out).
5. Click
Save
.
The device resets, after which you must reconnect to Wi-Fi. (See
How Do I Connect to
Wi-Fi?
Wi-Fi Security
Learn about the various Wi-Fi security options available to you.
By default, Wi-Fi security is enabled for your device and the Wi-Fi network.
Note:
All the devices used with the Sierra Wireless 4G LTE Tri-Fi Hotspot must support the
selected security type.
Note:
WPS is available only if you select either a WPA2 Personal option (including
WPA/WPA2 Personal
) or (not recommended) no security. (See
Connecting Through
WPS
.)
To change the security used by Wi-Fi:
1. Log in to the home page.
2. Click
Advanced settings > Wi-Fi > Security
.
3. Select one of the following options. Note that not all options may be displayed,
depending on the
Basic Rate
setting.
None
— No security is used (no password is required to access the Wi-Fi network);
this setting is not recommended. Anyone may access your device and use your
Internet connection. (You are responsible for payment for data usage fees.)
WEP 64 Bit - Shared
— This option provides security, but it’s relatively weak. This
option works with older and newer Wi-Fi devices, and is recommended only if any of
your devices don’t support WPA or WPA2.
Shared WEP uses the same key for encryption and authentication; some consider
shared WEP to be less secure than open WEP.
WEP 128 Bit - Shared
— This option provides security, but it’s relatively weak (but
stronger than
WEP 64 Bit - Shared
). This option works with older and newer Wi-Fi


