


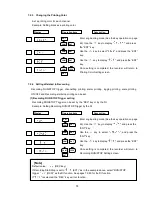


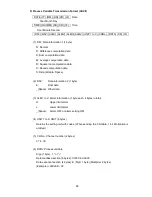


78
Printing sample
:
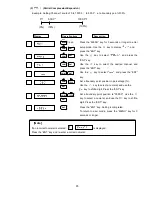
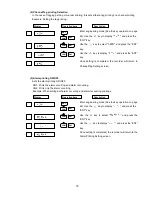
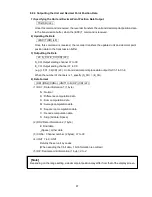
7.2.7 Setting the Communication Function
Sets Protocol, Local Address, Communication Speed, Data Length, Parity Bit, and Stop Bit.
Example: Original Protocol, Local Address: 02, Communication Speed: 1200 bps, Data Length: 7
bits, Parity Bit: Even, Stop Bit: 2 bits.
Enter engineering mode (See the key operation on page
69). Use the
key to display “
”, and press the
“ENT” key.
Use the
key to display “
”, and press the
“ENT” key. (Select either Original or Modbus RTD.)
Use the
key to display "
", and press the
“ENT” key. (Select from
to
)
Use the
key to display "
", and press the “ENT”
key. (Select from 1200, 2400, 4800, 9600, 19200, 38400.)
Use the
key to display "
", and press the
“ENT” key. (Select 7 bits or 8 bits)
Use the
key to display "
", and press the
“ENT” key. (Select from EVEN, ODD and NONE)
Use the
key to display "
", and press the
“ENT” key. (Select 1 bit or 2 bits)
Once setting is completed, the recorder will return to
Communication Function Setting screen.
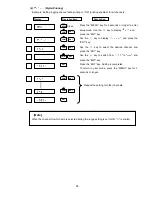
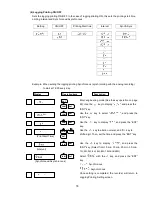
7.2.8 Initializing the Setup Data and Calibration Data
If “
” is selected, all setup mode data will revert to the default value.
If “
” is selected, calibration data will revert to the default value. Since this function initializes
all setup data and calibration data, take care when executing this function.
Example: Initializing the Setup Data.
Enter engineering mode (See the key operation on
page 69). Use the
key to display "
", and
press the “ENT” key.
Use the
key to select "
", and press the “ENT”
key.
Initialization is completed.
ENT
ENT
Display
Operation keys
Description
ENT
ENT
ENT
Display
Operation keys
Description
ENT
ENT
ENT
ENT
ENT
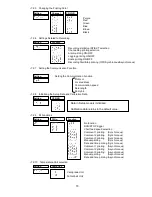
Recording Stop printing
(e.g.) 2006.5.10 20:00
Recording Start printing
(e.g.) 2006.5.10 19:00
May.10.06 19:00Start
May.10.06 20:00End
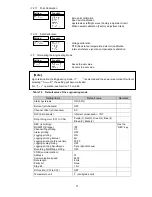
(Local address)
(Communication speed)
(Data length)
(Parity)
(Stop bit)
ENT
(Parity bit)


