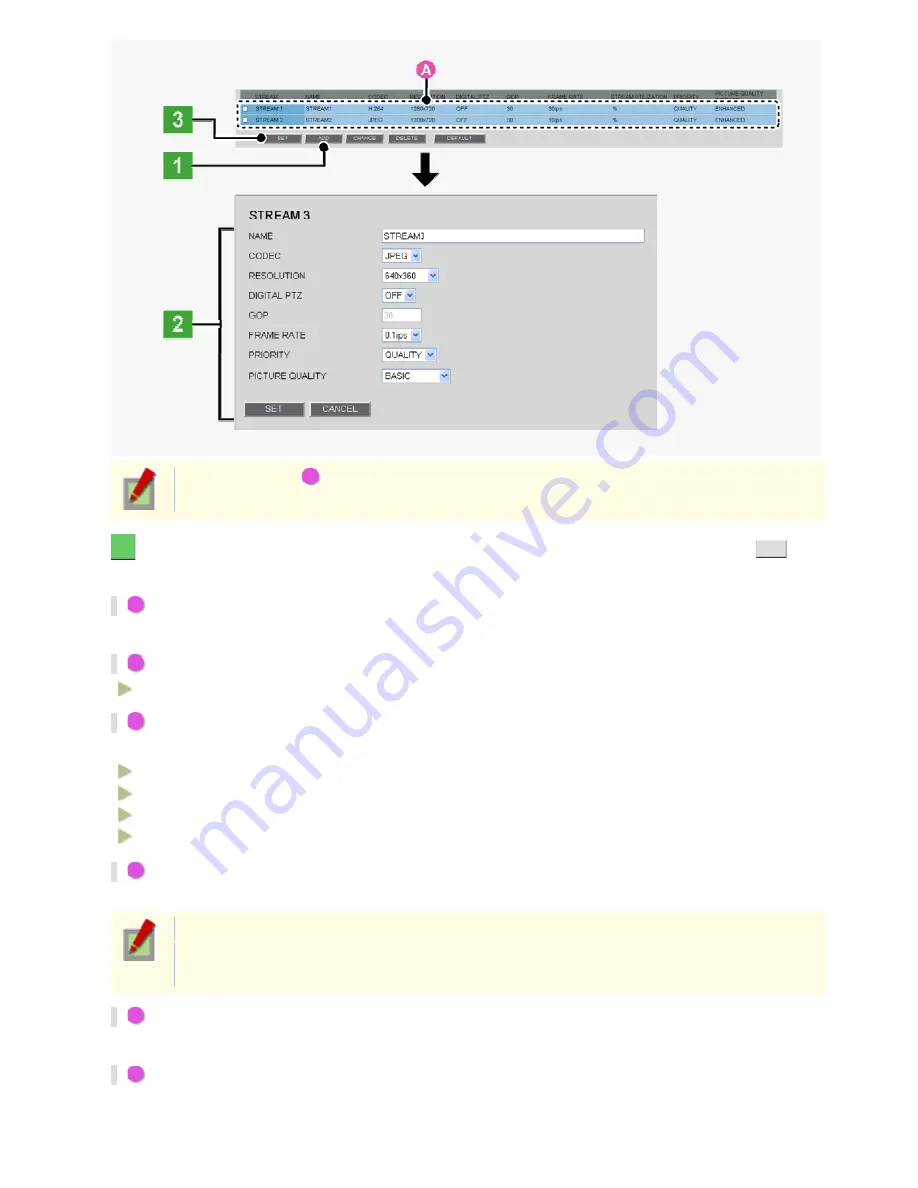
In the stream list (
A
), the currently registered streams are shown.
Initially, this list shows video settings for STREAM1 and STREAM2.
2
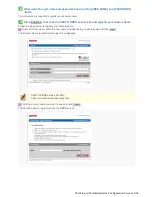
Configure the video/image conditions for the stream you want to register and click
SET
.
The settings are saved. The stream list now includes the stream you just registered.
1
In [NAME], type the stream name you want.
You can type up to 64 alphanumeric characters.
2
In [CODEC], select the image/video compression format.
JPEG, H.264
3
In [RESOLUTION], select the display resolution.
The available options vary depending on your selections in [ASPECT RATIO] and [CODEC].
JPEG (16:9):
1920×1080, 1280×720, 1024×576, 640×360
JPEG (4:3):
2288×1712, 1600×1200, 1280×960, 1024×768, 800×600, 640×480, 320×240
H.264 (16:9):
1920×1080, 1280×720, 640×360, 320×180
H.264 (4:3):
1600×1200, 1280×960, 1024×768, 640×480, 320×240
4
In [DIGITAL PTZ], enable or disable the digital PTZ function.
To display areas of subject you clipped, or use the digital PTZ function on the live screen, select “ON”.
You cannot select “ON” if you selected “H.264” in [CODEC].
Selecting “ON” in [DIGITAL PTZ] fixes the [RESOLUTION] value to a VGA-equivalent size (“640×
360” in 16:9 aspect ratio or “640×480” in 4:3 aspect ratio).
5
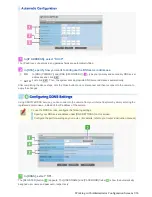
If you selected “H.264” in [CODEC], in [GOP], enter a GOP value.
This enables you to specify the GOP setting for the H.264 video stream.
6
In [FRAME RATE], select the frame rate of the stream.
The available options vary depending on your selection in [CODEC] and your camera model.
Working with Administrator Configuration Screens 17/66


