background image


  89 

all printers already installed. 

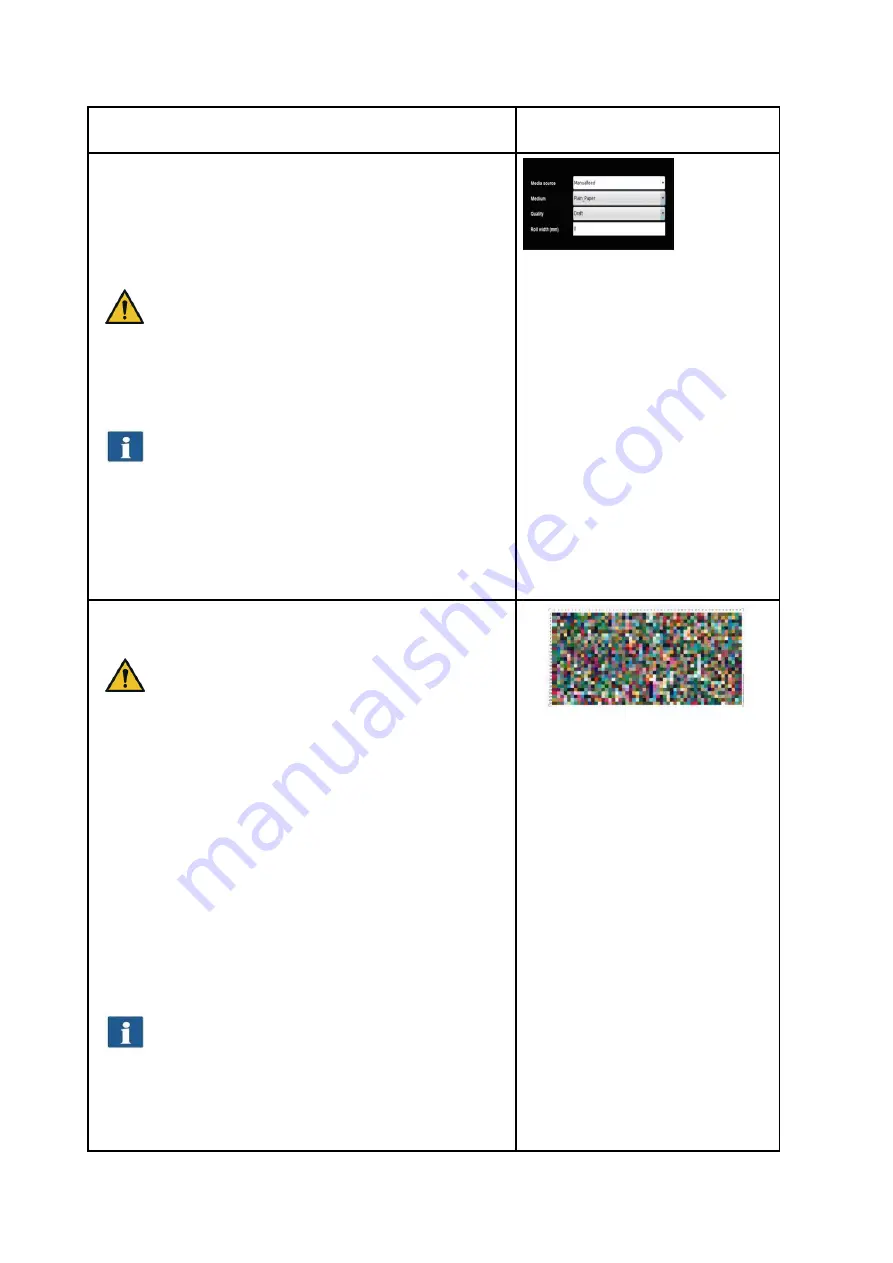
In  the  following  dialog  select  the  medium  for  which  you 
want to create a profile. As some color printers have several 
rolls, you further have to indicate on which roll the medium 
can be found.  


Make sure that the appropriate medium is actually 
available on the selected roll. 

Afterwards,  enter  roll  width  as  well  as  desired  quality  level 
for the target to be printed. Then press "

Print chart

“. 


If your printer has several rolls which are provided 
with  different  media  and  if  you  want  to  create  a 
profile  for  further  media,  you  can  click  "Back" 
afterwards and print the target already on the next 
medium.  When  creating  a  profile  later,  you  can 
then skip this step. 


Figure 6.13: Selection of paper grade 

In the next step, the printed target needs to be scanned.  


Allow the target to dry for about one hour, as the 
colors may still change during this period. 

After  the  drying  time,  place  the  target  in  the  scanner  and 
click  "

Next

".  The  target  is  scanned  and  the  ICC  profile  is 

calculated  automatically.  This  process  may  take  a  few 
minutes.  

If you want to optimize the reproduction of the gray scale 
of the printer additionally, you can perform a so-called gray 
balance optimization. For this purpose, another target which 
has  been  optimized  for  the  gray  scale  reproduction  is 
printed  and  scanned.  Simply  follow  the  instructions  on  the 
screen. 


Normally,  gray  balance  optimization  is  not 
required. On request you can skip this step. 

Afterwards  you  can  complete  the  process  by  pressing 
"

Finish

". 


Figure 6.14: Inkjet profiling - target 

Summary of Contents for Scan 450i 24 inch KIT 40

Page 1: ...R O T H W E B E R G m b H APP CENTER ecoPrint Scan 450i O PE RA TIN G M AN UAL RE VI SION 1 5 3...

Page 2: ...e of non observance ROTH WEBER cannot accept any liability Other product and company names mentioned herein may be trademarks or trade names of the respective owner Copyright ROTH WEBER GmbH referred...

Page 3: ...anual and help you to familiarize quickly with the ROWE Scan 450i scanner Comments In the present manual the following types of comments are given Note You obtain information and useful tips which are...

Page 4: ...rocess 22 2 5 Installation of Device Drivers 22 2 6 Installation of Additional Plug ins 23 2 7 Shutting Down Computer Connecting Scanner Switching ON Computer and Scanner 24 2 8 Continuing Installatio...

Page 5: ...jet Printer 52 5 10 2 4 Set Function 52 5 10 3 Settings Independent of Function 52 5 10 3 1 Color Mode 53 5 10 3 2 Quality 54 5 10 3 3 Scan Format 58 5 10 3 4 Scaling Margins 59 5 10 3 5 Info 61 5 11...

Page 6: ...OST TRACKER CENTER APP 102 7 1 Main View ROWE COST TRACKER APP 103 7 2 Menu Order report 104 7 3 ROWE COST CENTER APP 106 7 3 1 Allocation of Limits and Discounts 106 7 3 2 Allocation of Limits and Di...

Page 7: ...roup 125 8 Maintenance of Scanner 126 8 1 Cleaning of Scanner 127 8 2 Replacing Glass Plate 127 9 Trouble Shooting 129 9 1 Malfunction Indicator Lamp on Control Panel 130 9 2 Installation Problems 130...

Page 8: ...B 3 6 Take back of Devices at the End of Service Life WEEE 137 C Service and Contact 139 D About this System 140...

Page 9: ...he main functions of the ROWE Scan 450i series of the scope of supply and the options of the ROWE Scan 450i series of the software applications of the ROWE Scan 450i series This chapter shall provide...

Page 10: ...44 5 1 130 mm Original width 47 4 1 204 mm Original thickness up to 2 mm 0 08 for flexible materials The ROWE Scan 450i basic models KIT 40 can be upgraded to KIT 60 by installing a software license...

Page 11: ...anagement etc ROWE SCAN APP TWAIN EDIT SCAN Includes ROWE ScanManager TWAIN plus Scan to Net Scan to USB Scan to Email etc ROWE COPY APP TWAIN EDIT SCAN COPY Includes ROWE ScanManager TWAIN LT plus Sc...

Page 12: ...RIPT PDF APP Direct printing of PostScript level 2 and 3 PDF PDF A Multipage PDF PDF A files on a ROWE ecoPrint and or Inkjet Table 1 2 ROWE APP CENTER By default the ROWE Scan 450i is delivered inclu...

Page 13: ...maximum weight not exceeding 10 kg The flat screen is not included in the scope of supply ROWE Scan 450i MFP stand 24 36 44 Intended to integrate a ROWE Scan 450i into an inkjet printer up to date lis...

Page 14: ...ibration chart for ROWE Scan 450i 36 ROWE Scan 450i Calibration Chart 44 Calibration chart for ROWE Scan 450i 44 For information on the available accessories for the individual scanner types please re...

Page 15: ...ion for formats 4 Feeding slot for document feed 5 Zero point 6 Locking scanner top on both sides Figure 1 1 ROWE Scan 450i Figure 1 2 shows the ROWE Scan 450i control panel It includes the following...

Page 16: ...anel use a conventional permanent marker Please use household cleaning agents to remove or clean it Figure 1 3 shows the back of the ROWE Scan 450i with the left side box There you see the following c...

Page 17: ...writing by a corresponding comment on the consignment note Otherwise payment of damages by the carrier is excluded In order to avoid damages to the device please do not place any tools components or t...

Page 18: ...he ROWE Scan 450i software on your PC In exceptional cases a USB 2 0 3 0 host controller chip set may not be compatible with the high performance transfer mode of the ROWE Scan 450i We recommend to us...

Page 19: ...18 When several devices are connected to one socket using an extension cord and or a multiple socket the total current draw shall not exceed 10 A The socket has to be located near the scanner...

Page 20: ...tarting installation the scanner must neither be connected to power supply nor PC Should you use mouse and keyboard on the scanner top place the cables in a way that they do not obstruct the paper out...

Page 21: ...also see Chapter 1 4 on Page 16 2 2 Starting Software Installation In order to install the software you need the supplied CD Rom First switch the computer On which is not yet connected to the scanner...

Page 22: ...dialog box 2 3 Selecting Folder When selecting the folder Figure 2 4 a folder where to install the ROWE Scan 450i software is already suggested The shown figures have the following meaning 1 Destinat...

Page 23: ...boxes pop up indicating that the appropriate drivers for the device are being installed During installation Windows Windows XP may point out that the drivers did not pass the so called Windows logo t...

Page 24: ...tallation of plug ins In the opening dialog box Figure 2 9 you are prompted to accept the license agreement Select I agree Figure 2 9 License agreement for plug ins The required plug ins are now insta...

Page 25: ...t until the computer has been shut down and switched OFF Figure 2 11 Prompt to shut computer down After having switched the computer OFF proceed as follows 1 Connect the computer to the scanner using...

Page 26: ...g boxes in Figures 18 to 21 are displayed Please select No not this time and click the Next button in Figure 2 13 Figure 2 13 Disable Windows update Afterwards select Install the software automaticall...

Page 27: ...uctions Figure 2 17 Start Setup Wizard The Setup Wizard now establishes the connection between scanner and computer automatically This process may take some time depending on the PC performance If you...

Page 28: ...xisting license 1 If you obtained a license file by e mail you have to save the attached key file on your PC first to be able to select it under 1 3 If you want to fit your ROWE Scan 450i with additio...

Page 29: ...or dust during the calibration process a message pops up In this case check and clean the glass plate Afterwards you can repeat the process Please handle the calibration chart with care After calibrat...

Page 30: ...29 3 Switching Scanner ON OFF Operate the ROWE scanner at a supply voltage of 100 to 240 volts and a frequency of 50 60 Hz only...

Page 31: ...or to use Plug the connector of the power unit into the socket to switch the device ON Figure 3 1 Position connector power unit On the control panel of the scanner see also Figure 1 2 on Page 15 you s...

Page 32: ...31 4 Simple Scan Moreover the ROWE Scan 450i scanners are fitted with automatic width detection see scan format Chapter 5 on Page 58...

Page 33: ...l the scanner takes it in Select the requested color mode in ROWE SCAN APP see Chapter 5 10 3 1 on Page 53 Select the requested scan format in ROWE SCAN APP see Chapter 5 10 3 3 on Page 58 if applicab...

Page 34: ...33 5 ROWE APP CENTER The ROWE APP CENTER is the central software needed to operate the ROWE Scan 450i series The present chapter describes how to use the scanner efficiently by means of this software...

Page 35: ...g Recopy closed loop color calibration one printer driver each for inkjet printer and ROWE printer etc ROWE PRINT APP Sending printjobs Webbased clients Cloud USB Preview ROWE AUTO CROP recognizes and...

Page 36: ...for touch screen operation i e without mouse and keyboard The figures given in the following chapters refer to regular versions which are not optimized for touchscreens However appearance and operatio...

Page 37: ...ng on the purchased license options not all functions are available see Chapter 5 4 Page 37 2 Toolbar of main viewer see Chapter 5 8 Page 41 3 Main viewer to display scans detailed view preview for de...

Page 38: ...your work as easy as possible the control elements of ROWE APP CENTER are divided into so called functions so that only the required functions are available By selecting one of the buttons in the top...

Page 39: ...r upgrades resp additional ROWE APPS see Chapter 2 10 Page 27 5 5 Main Viewer Figure 5 6 Main viewer The main viewer serves to display the document scanned last and or a loaded image file Numerous zoo...

Page 40: ...ion in the complete image when using the zoom functions of the main viewer 3 The General Viewer is linked with the main viewer in a way that the section shown in the main viewer is always highlighted...

Page 41: ...ngs Normal prescan The scan is effected as in case of actuation of the start key However there is no output You are thereby given the opportunity to edit the scanned image before output After having e...

Page 42: ...hifted in the respective direction if a section has been zoomed in before 4 Zoom Zooming a detail shown in the Viewer in or out 5 Expanding detail By means of this button you define the behavior of th...

Page 43: ...ooming any detail in This is how you can position edges precisely in particular for large sized drawings This function can only be with the ROWE EDIT PROFESSIONAL APP 10 Reset width detection This fun...

Page 44: ...different from that shown in the Viewer 0 90 180 270 The image is rotated clockwise by a set value The rotation is visible immediately in the Viewer Output is effected as displayed In case of output...

Page 45: ...click This function is available with ROWE EDIT PROFESSIONAL APP only 8 Edit image This function provides numerous image editing options After actuating the button the image and or selected detail is...

Page 46: ...scans and select other image settings Expert mode For detailed information see 5 10 3 2 Scan format Here you can select whether the document width is to be detected automatically in subsequent scans o...

Page 47: ...data carrier 5 Location Select folder 6 Open folder in Windows Explorer The selected folder is opened directly in Windows Explorer for you to be able to call the file s quickly Local Press this button...

Page 48: ...cognized a USB data carrier being connected By means of button 1 you can also select a subdirectory Figure 5 13 Storage location USB data carrier 5 10 1 2 File Format Figure 5 14 Settings File format...

Page 49: ...r further wildcards in the file name DATE The date is added to the file name TIMESTAMP The time is added to the file name In order to create a Multipage TIFF PDF file first select the file name and th...

Page 50: ...information see Chapter 5 10 2 1 Page 50 For being able to use a printer you have to set it once Printer setup is described in Chapter 6 5 1 Page 86 Medium Roll Here you can define on which medium and...

Page 51: ...see Figure 5 19 Inkjet printer see 5 10 2 3 Figure 5 17 Printer selection 5 10 2 2 Output Settings for ROWE Printer Figure 5 18 Folder settings If you print on a ROWE printer featuring a folding mach...

Page 52: ...priority are prioritized High The print job is started as soon as possible Suspended For the time being the drawing is not printed but the job has to be started manually on the printer 2 Tolerance De...

Page 53: ...e following options if you selected an inkjet printer 1 Quality Draft normal or high 2 Cut On Off Set whether the paper is to be cut off after output of a document Figure 5 20 Output settings for inkj...

Page 54: ...original exclusively includes line structures and or homogenous areas e g CAD drawings Select Photo if the original includes complex structures and color gradients e g photos posters etc Select Mixed...

Page 55: ...optical resolution the original is scanned perpendicular to the feed direction so that interpolation is effected in feed direction only 2 Brightness By setting the brightness the reproduction becomes...

Page 56: ...ings with lines information which is very bright can get lost In case of doubt simply check the result in the Viewer 5 Sharpening By means of this slide control you can increase the sharpness of the i...

Page 57: ...ose colors are shifted to gray which are quite far away from a gray scale setting range 0 255 0 neutral 4 Color depth In color mode RGB the color information is usually coded with 8 bits per color cha...

Page 58: ...e brightness of permanent markers cannot be distinguished from the actual background white of paper 6 ICC profiles Select an ICC color space in which the file is to be saved In general sRGB is appropr...

Page 59: ...andscape Select whether the default format is portrait or landscape Fixed format On Off If the fixed format is activated On the length in feeding direction is considered in addition to the width when...

Page 60: ...t By means of this option you can shift the reference point for the middle of the document to the left negative value or right positive value Figure 5 30 User defined format 5 10 3 4 Scaling Margins I...

Page 61: ...is cut off if the original is longer than the fixed format to be scaled to on the basis of the detected width Orientation Selection of portrait or landscape when scaling to default format Scale Mode A...

Page 62: ...e number of settings and or combinations of settings are used over and over again In order that you do not have to set and adjust each option individually again you can save settings once made as so c...

Page 63: ...ul if you want to issue copies on several output devices The Multiprint function is described in a separate chapter see Chapter 5 11 1 Figure 5 35 Favorites If you press the Edit favorites button see...

Page 64: ...the scan with standard settings as PDF file In order to understand the Multiprint concept it is first required to logically distinguish the parameters saved in the favorite by Scanning parameters e g...

Page 65: ...o which output devices they refer 1 for Scan to File the target folder is indicated In the shown example the favorite New favorite is a Multiprint favorite with three output options Scan to File on dr...

Page 66: ...you want to output on the indicated device otherwise remove the check mark by clicking 2 Number of copies For output on a printer you can enter the number of copies in this text box before starting i...

Page 67: ...e job Name of printer Size of file to be printed Status e g Processing Waiting etc Action keys for deleting editing and stopping jobs see below The following actions are available to control individua...

Page 68: ...provide the following options 1 Active jobs Displays jobs which have not yet been processed 2 Ready jobs Displays jobs which have already been finished provided for future updates 3 Delete all jobs By...

Page 69: ...ettings which shall apply to the file highlighted in list 1 see Chapter 5 13 3 3 Job settings The settings made here apply to all files of a print job see Chapter 5 13 4 4 Action Buttons Print Button...

Page 70: ...tails on preview see Figure 5 45 4 Delete file s By means of this button you can remove one or several file s from the list 5 Undo redo key By means of this button various settings can be undone such...

Page 71: ...ith several pages only By means of the arrow keys you can browse the pages of the document in the preview As an alternative you can also enter a page number in the text field and press the Enter key t...

Page 72: ...ur information the name of the file to which the settings apply is shown again The shown name corresponds to the name of the file highlighted in the file list For lack of space the name of the file hi...

Page 73: ...ted here Moreover you can define in which quadrant any text field shall be located If a folding program is activated the drawing is rotated automatically so that the text field is always at the top Wi...

Page 74: ...he dimensions of the documents may be exceeded in for the document being printed on the next smaller roll nonetheless 2 Copies Here you define the number of copies of the complete set 2a Sorting If yo...

Page 75: ...re you can select whether and or which banner to be printed in which position 5 Miscellaneous 5a Fallback See Figure 5 48 5b Priority Define behavior of job in printer job list Normal The job is added...

Page 76: ...ires the respecting roll format Otherwise the printer prints to a larger format available next 3 Folding machine Response to missing folding machine Default Use standard response of respective printer...

Page 77: ...fo texts Here you can enter additional information on a print job This information helps to identify the job in the job list The info texts are provided for future extensions and do not yet have any f...

Page 78: ...ng off 0 no auto logoff Show all favorites temporarily If you need to change or check the settings of a special favorite e g a listener activate this option in order to be able to select the favorite...

Page 79: ...lobal settings The following settings can be made Language Select the desired language of the texts in ROWE SCAN COPY APP Speed Select automatic and reduced feed speed to protect sensitive originals T...

Page 80: ...ollowing requirements are met Either JPEG or TIFF are selected as file format The resolution is not 2400TURBO Mirroring rotating inverting and automatic alignment must be deactivated All margins are s...

Page 81: ...APP is available while the regular version is not intended for touch screen operation i e without mouse and keyboard Appearance and varies only slightly The decisive difference is that the buttons of...

Page 82: ...ed a virtual numeric keypad is shown automatically Figure 5 53 Numeric keypad If you touch a text field with the finger where a text needs to be entered e g a file name a virtual keyboard is shown aut...

Page 83: ...gManager provides all administrative functions for the scanners of the ROWE Scan 450i series Apart from configuring all basic settings printers can be set license upgrades can be loaded or the scanner...

Page 84: ...ilar to that of ROWE SCAN COPY APP Similar to them the provided configuration options in the ConfigManager are divided into different functions by topics Status Different status information on the sca...

Page 85: ...WE EDIT PROFESSIONAL APP see XYZ Listener Confguration and editing of listeners directories for print jobs only available with copy system ROWE ecoPrint see ROWE ecoPrint manual for details Scanboxes...

Page 86: ...he scanner Under Version you can see detailed information on the software version as well as firmware of the scanner Usually only the entry Software Release here 1 3 0 is important Figure 6 3 ConfigMa...

Page 87: ...5 4 If you are not logged in as administrator you are requested to do so as soon as you press one of the buttons see 6 11 6 5 1 Adding Printer If you want to add a printer press the button Add printer...

Page 88: ...eld The APP then identifies the printer on the basis of this name see printer selection Chapter 5 10 2 1 The printer name is also saved under the favorites Should a printer be saved in a favorite whic...

Page 89: ...d on e g normal paper high gloss photo paper 3 Age and condition of ink The factors printer model and medium have a great influence In the following steps of creation of a color profile therefore make...

Page 90: ...n then skip this step Figure 6 13 Selection of paper grade In the next step the printed target needs to be scanned Allow the target to dry for about one hour as the colors may still change during this...

Page 91: ...rwards press Next Figure 6 15 Printer selection Figure 6 16 Roll configuration Now you access the configuration area of the printer There you can Change IP address and or host name of the printer See...

Page 92: ...in this connection The effect of changed settings may vary depending on the printer model Different parameters are available depending on the printer model Some options can possibly not be edited 6 6...

Page 93: ...sition of the stamp on the sheet Can be in relation to header or centered top bottom resp left right Offset hor vert An optional offset in relation to the selected alignment Rotation The rotation of t...

Page 94: ...licking Save Figure 6 2 Inkscape Subsequent the message occurs that the installation procedure is finished successfully Press on Main Menu to get back To use the new stamp please restart the system re...

Page 95: ...gs menu The wizard depicted in Figure 6 4 is displayed Just follow the instructions and questions on the screen to add delete or change scan boxes Figure 6 5 Creating a local scanbox The parameters sh...

Page 96: ...access data to access the shared directory in the network Attention Write protection required Domain If the computer on which the shared directory can be found is a member of a domain enter this domai...

Page 97: ...ased a license upgrade subsequently and obtained a new license file If you want to purchase a license upgrade click Order license ConfigManager then automatically opens the ROWE website using your Int...

Page 98: ...gging in as an administrator see 6 11 6 10 Parameters Under Parameter you can make some basic settings for scanner and software You can call the function Update only after logging in as an administrat...

Page 99: ...e values the corresponding margin is cut off for positive values it is added Tolerance for mapping autoformats Here you can define by how many per mills the width of a scan format recognized by the wi...

Page 100: ...ed with special access rights only For this purpose an administrator account has been created Click on the function Login for authentication The factory set access data is Username administrator Passw...

Page 101: ...ng of the parameter in the ROWE SCAN COPY PRINT APP gets lost and after loading of the favorite it needs to be set again if a value deviating from the favorite shall be used Parameter not included in...

Page 102: ...101 output device Parameter range you want to make the changes...

Page 103: ...d a limitation of device use if required The ROWE COST TRACKER APP records all relevant data of a scanning printing and or folding operation are and provides the results in a table in ROWE ConfigManag...

Page 104: ...ng components 1 Via this tab in the ConfigManager Cost Control can be opened 2 Menu Order report see 7 2 3 Menu User administration see 7 4 4 Men Cost center administration see 7 5 5 Menu Configuratio...

Page 105: ...automatically when opening the Cost Control menu Figure 7 2 Fields in order report Possible filter criteria Description User login If active the order report will provide information on the selected u...

Page 106: ...older on your computer Your own user folder is preset first In the text field File name 4 a name can be allocated to the CSV file to be created By default orderreport csv is used File extension csv wi...

Page 107: ...b category is effected as follows 1 Limits allocated directly to a person have top priority 2 Afterwards limits allocated to a user group follow 3 Limits allocated to a cost center or cost center grou...

Page 108: ...d user groups Among others the present chapter describes the configuration of limits and discounts in detail Setting of limits for users user groups cost centers and cost center groups is affected ide...

Page 109: ...you can create a user account opens In this menu various information about the user is entered The fields marked with an asterisk have to be completed E mail address Login Password The remaining field...

Page 110: ...ng User group administration a list with all user groups available in the system pops up Figure 7 10 User group administration Figure 7 11 User group list By double click the user group selected befor...

Page 111: ...ated Figure 7 14 Limits List of currently allocated job categories On this level you can change existing job category limits or create new ones By clicking Add and or double click on an existing entry...

Page 112: ...repeated for all existing job categories A job category which is not allocated may result in a refusal of the ROWE SCAN COPY PRINT APP to execute the job see Figure 7 17 Figure 7 17 Error message Limi...

Page 113: ...unique The fields Status and Available date serve to allow bookings on this cost center in the ROWE SCAN COPY PRINT APP or not It is not possible to charge to inactive cost centers and cost centers w...

Page 114: ...e name for the cost center group The field Status defines whether job category limits can be used for this cost center group in ROWE SCAN COPY PRINT APP Figure 7 22 Define modify cost center group Aft...

Page 115: ...t one cost center group needs to be established 7 6 Menu Config Setup In this menu the behavior of the ROWE SCAN COPY PRINT APP with Cost Control Professional being activated is defined Moreover it is...

Page 116: ...d Changes in this menu have to be confirmed by the Save button for being effective in ROWE SCAN COPY PRINT APP A note regarding the saving status is given in red and or green font Figure 7 24 Menu Con...

Page 117: ...urrent Windows login name is used for recording 7 Prescan to protocol Define whether prescans shall be recorded too 8 Local server time Serves to display the date time column in the order report If au...

Page 118: ...d and interpreted as required Three versions of job category can be entered Piece m and cm In general a square measure is recommended for scanning and printing while the quantity is interesting for fo...

Page 119: ...information of the previous three months and the information on the current month will be given in the order report The selection of years works in the same way so that the information on the current...

Page 120: ...ete have to be actuated For this purpose a popup menu is displayed where you have to enter the administrator password 7 6 4 Export Import By means of the export import functions backups of existing da...

Page 121: ...thly backup file an SQL file with the corresponding name is created in the selected folder They can then be used separately for restoration Example For backup the file name Sicherung_Auftragsreport sq...

Page 122: ...e Login is only possible if the user is enabled Figure 7 35 Error message User not active If the combination of user name and password was not correct this message is displayed If a repeated login is...

Page 123: ...Figure 7 39 Please fill ALL mandatory fields If the login name is already used in the system you have to change this entry Figure 7 40 Field User login is not unique If the e mail address is already u...

Page 124: ...ssible warnings are described in the following Figure 7 46 Input of cost center If the user selected a cost center he she is not allowed to use this warning is displayed Another cost center has to be...

Page 125: ...ne user groups for different tasks such as group Scanning and group Printing Allocate the corresponding job categories and define the requested limits discounts per user group in the area of user grou...

Page 126: ...obs affected in ROWE SCAN COPY PRINT APP are then entered in the respective cost center group The advantage of this limitation is that only a few settings are required for the job category limit if so...

Page 127: ...126 8 Maintenance of Scanner The present chapter describes how to clean the scanner of the ROWE Scan 450i series and how to replace wear parts...

Page 128: ...d clean and fuzz free cloth to rub the glass plate dry Make sure that the liquid does not penetrate under the glass plate and allow the area to dry completely It is absolutely necessary to switch the...

Page 129: ...ve it First place the new glass plate in the retaining clips of the lower support and push it down again Swivel the glass plate and let it slide slowly upwards into the second support Make sure of the...

Page 130: ...129 9 Trouble Shooting This chapter describes the actions to be taken if a problem occurs when using the scanner...

Page 131: ...does not open after inserting the CD ROM Enable Windows Autorun or start installation program directly from the CD Installation fails giving an error message Make sure that the minimum requirements ar...

Page 132: ...or the target folder and that sufficient storage space is available Image is not printed Check the job list Job print may be stopped and whether the printer can be accessed in the network Quality and...

Page 133: ...en small dust dirt particles may result in a deterioration of the scan result Afterwards calibrate the scanner If the problem persists check the glass plate for scratches If any replace the glass plat...

Page 134: ...t In order to be able to use all functions of the ROWE APPS a Java Runtime Environment version 1 6 0 update 39 or higher has to be installed If it is not yet installed on your computer it will be inst...

Page 135: ...nex includes safety notes to be read prior to commissioning of the scanner of ROWE Scan 450i series You obtain information on possible risks of personal injury and property damage regarding the device...

Page 136: ...ion according to the intended use being aware of safety and hazards and observing this Operating Manual In particular failures impairing safety have to be eliminated immediately The ROWE systems of th...

Page 137: ...that the current draw of the devices connected to the extension cable multiple socket does not exceed the cable capacity Make sure that not more than 10 A are applied to the wall socket The plug conne...

Page 138: ...rts or wearing parts approved by ROWE Use of wearing parts which are not approved by ROWE may damage the devices ROWE does not accept any liability if wearing parts are used which are not approved by...

Page 139: ...Company www rowe de or your local sales partner in order to obtain information about the current mode of take back The WEEE symbol dustbin crossed out and underlined on your device points out that it...

Page 140: ...he ROWE products or need any technical support in case of problems with your ROWE device do not hesitate to contact our Service Department Phone 49 0 2743 9217 21 Fax 49 0 2743 2018 E mail service row...

Page 141: ...140 D About this System Copyright 2003 2014 ROTH WEBER GmbH All rights reserved...

Page 142: ...rs of the Common Unix Printing System CUPS http www cups org License Copyright The authors of the XmlRpc library http sourceforge net projects xmlrpcpp License Copyright The authors of the argyII colo...

Page 143: ...ng driver automatically 25 Figure 2 15 Continuing driver installation 25 Figure 2 16 Driver installation finished 26 Figure 2 17 Start Setup Wizard 26 Figure 2 18 Connection establishment 26 Figure 2...

Page 144: ...sor 58 Figure 5 30 User defined format 59 Figure 5 31 Scaling margin 59 Figure 5 32 Scaling 60 Figure 5 33 Area Info 61 Figure 5 34 Functions Favorites 62 Figure 5 35 Favorites 62 Figure 5 36 Edit fav...

Page 145: ...ion 93 Figure 6 21 Stamp selection 93 Figure 6 22 License options during and after trial phase 96 Figure 6 23 ConfigManager Parameters 97 Figure 6 24 ConfigManager Login 99 Figure 6 25 ConfigManager L...

Page 146: ...gure 7 32 Export backup of tables 119 Figure 7 33 Import Restore tables 120 Figure 7 34 Cost Control login 121 Figure 7 35 Error message User not active 121 Figure 7 36 Error message Invalid login 121...

Reviews: