RICOH Ri 1000
User Manual
105
Fig. 3
Step 5
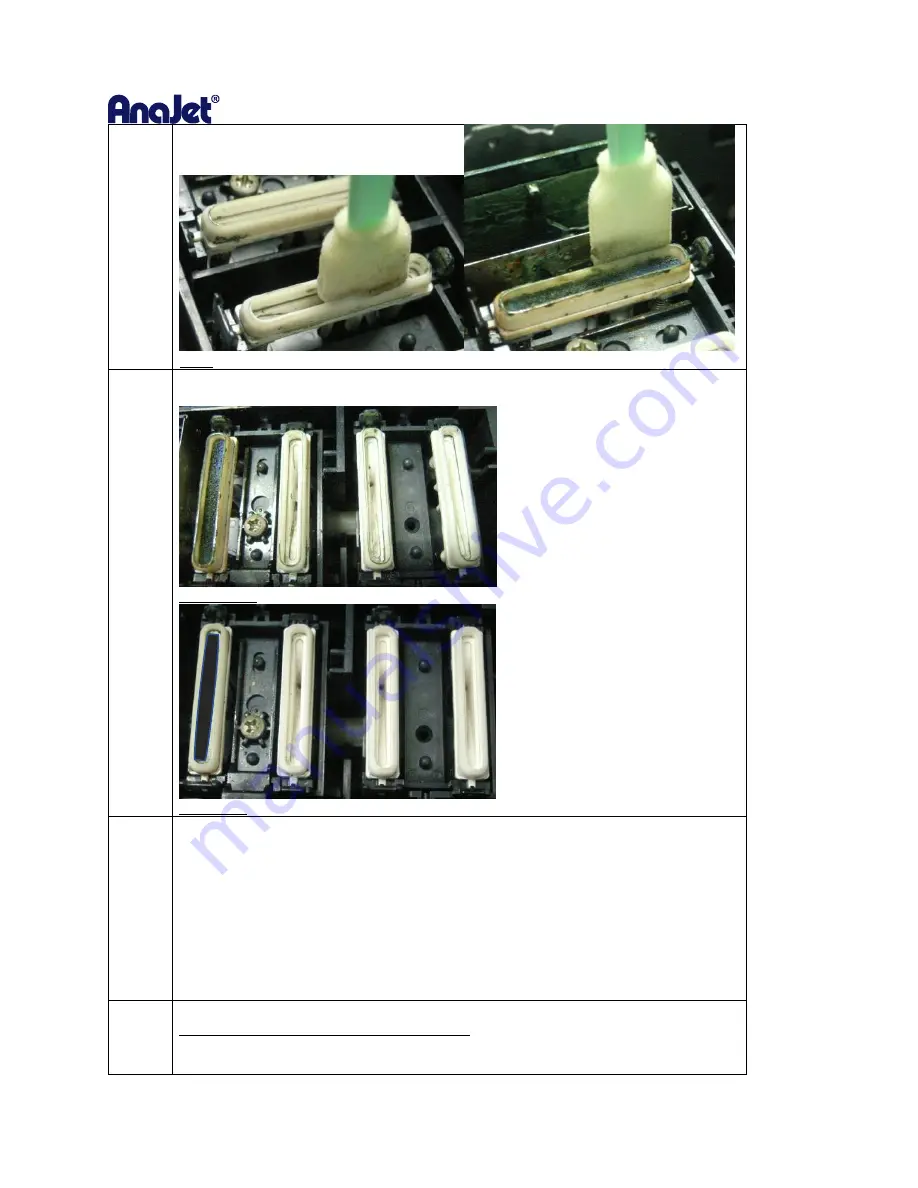
Fig. 4 shows an example before cleaning, and Fig. 5 shows an example after cleaning.
Dirt to the level of the example after cleaning.
Fig. 4 Before
Fig. 5
After
Step 6
<Cleaning the Suction Cap>
The method of cleaning the Suction Cap is the same as Step 3 the cleaning method of the
Moisturizing Caps.
However, there is a vacuum cap inset in the cap, clean it carefully so as not to shift or detach
this part.
Be sure to return the parts when the parts in the cap are displaced or removed. Press down
until the spring bottoms out.
If not returned properly, it may cause nozzle out.
See Fig. 4 and Fig. 5 for the figures before and after cleaning.
For parts inside the Suction Cap, it is sufficient that the solid ink or the stuck ink is removed.
Step 7
<Cleaning the Wiper and Wiper Cleaner>
1. Cleaning the frame top of the Wiper Cleaner
Clean of the frame top surface indicated by the yellow line in FIG. 6.
An example of how to apply the Cleaning Applicator is shown in Fig. 7.
Summary of Contents for Ri 1000
Page 5: ...5 ...
Page 11: ...RICOH Ri 1000 User Manual 11 Printer Specifications ...
Page 12: ...RICOH Ri 1000 User Manual 12 1 2 Part Identification ...
Page 27: ...RICOH Ri 1000 User Manual 27 Select PROGRAM and click NEXT ...
Page 29: ...RICOH Ri 1000 User Manual 29 Select the ALLOW THE CONNECTION radial button and click NEXT ...
Page 64: ...RICOH Ri 1000 User Manual 64 Selecting ICC Preview ...
Page 90: ...RICOH Ri 1000 User Manual 90 After agitating cartridges insert the cartridges ...
Page 95: ...RICOH Ri 1000 User Manual 95 ...
Page 108: ...RICOH Ri 1000 User Manual 108 Fig 11 Fig 12 Fig 13 ...
Page 132: ...RICOH Ri 1000 User Manual 132 8 Click the install option on the screen to continue ...
Page 134: ...RICOH Ri 1000 User Manual 134 ...
Page 141: ...RICOH Ri 1000 User Manual 141 ...


