


Scan Settings
77
3
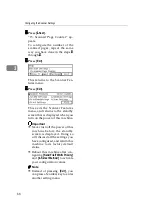
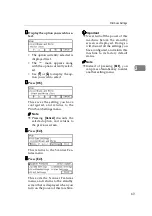
B
Use the
{{{{
1
1
1
1
}}}}
or
{{{{
0
0
0
0
}}}}
key to
highlight the item you wish to
enter, and then use the Num-
ber keys to enter the value.
Note
❒
To correct the number you
have entered, use the
{{{{
1
1
1
1
}}}}
or
{{{{
0
0
0
0
}}}}
key to highlight it, and
then press the
{{{{
Clear/Stop
}}}}
key to clear the number.
❒
You can also use the
{{{{
#
}}}}
key
as well as the
{{{{
1
1
1
1
}}}}
and
{{{{
0
0
0
0
}}}}
keys to move selection.
C
Press
[
OK
]
.
This saves the setting you have
entered, and returns to the De-
fault Scan Settings menu.
Note
❒
Pressing
[
Cancel
]
discards the
values you have entered, and
returns to the Default Scan
Settings menu.
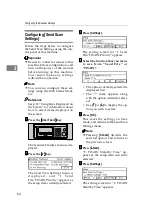
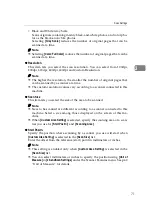
MMMM
Press
[
↓↓↓↓
Next
]
.
“4. Image Density” appears as the
setup item currently selected.
NNNN
Press
[
Settings
]
.
The setting screen for “4. Image
Density” appears.
OOOO
Use the
{{{{
1
1
1
1
}}}}
or
{{{{
0
0
0
0
}}}}
key to high-
light the setting you wish.
PPPP
Press
[
OK
]
.
This saves the setting you have se-
lected, and returns to the Default
Scan Settings menu.
Note
❒
Pressing
[
Cancel
]
discards the
selected setting, and returns to
the Default Scan Settings menu.
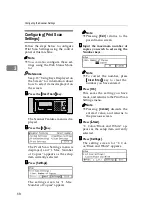
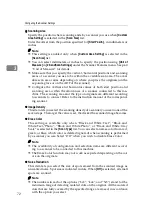
QQQQ
By pressing
[
↓↓↓↓
Next
]
to display “5.
Erase Color” through “11. Origi-
nal Settings” as the setup items,
select options for each of them in
the same way you have done in
the steps
through
RRRR
After all the settings are done in
the way you wish, press
[
Exit
]
.
This registers the Scan Settings you
have configured in the “Default”
memory area, and returns in the
Scan Settings menu.
SSSS
While the Scan Settings menu is
displayed, press the
{{{{
2
}}}}
,
{{{{
3
}}}}
or
{{{{
4
}}}}
key to display the correspond-
ing User Scan Settings menu.
For example, press the
{{{{
2
}}}}
key to
display the User 1 Scan Settings
menu.
TTTT
through
each of “User 1”, “User 2”, and
“User 3” memory areas.
UUUU
When you are finished, press
[
Exit
]
.
This returns to the Scanner Fea-
tures menu.
Summary of Contents for Network Scanning Unit A
Page 8: ...vi ...
Page 28: ...What You Can Do With This Machine 20 1 ...
Page 36: ...Setting Up the Machine 28 2 ...
Page 118: ...Configuring the Scanner Settings 110 3 ...
Page 138: ...Sending Scan File by E mail 130 5 ...
Page 148: ...Sending Scan File by Scan to Folder 140 6 ...
Page 154: ...Sending Scan File by Scan to FTP 146 7 ...
Page 164: ...Printing Scanned Image Files 156 8 ...
Page 168: ...Sending Scan Files Using Delivery Server 160 9 ...
Page 172: ...Using the Network TWAIN Scanner Function 164 10 ...
Page 204: ...196 EN USA G829 8602 ...
Page 206: ...Network Scanning Unit Type A Operating Instructions EN USA G829 8602 ...